VSCO is a powerful iPhone photo editor and the best free camera app for iPhone. But with so many features, it can be confusing to use. That’s why we created this in-depth VSCO tutorial. Read on to discover how to use VSCO to shoot and edit beautiful iPhone photos.
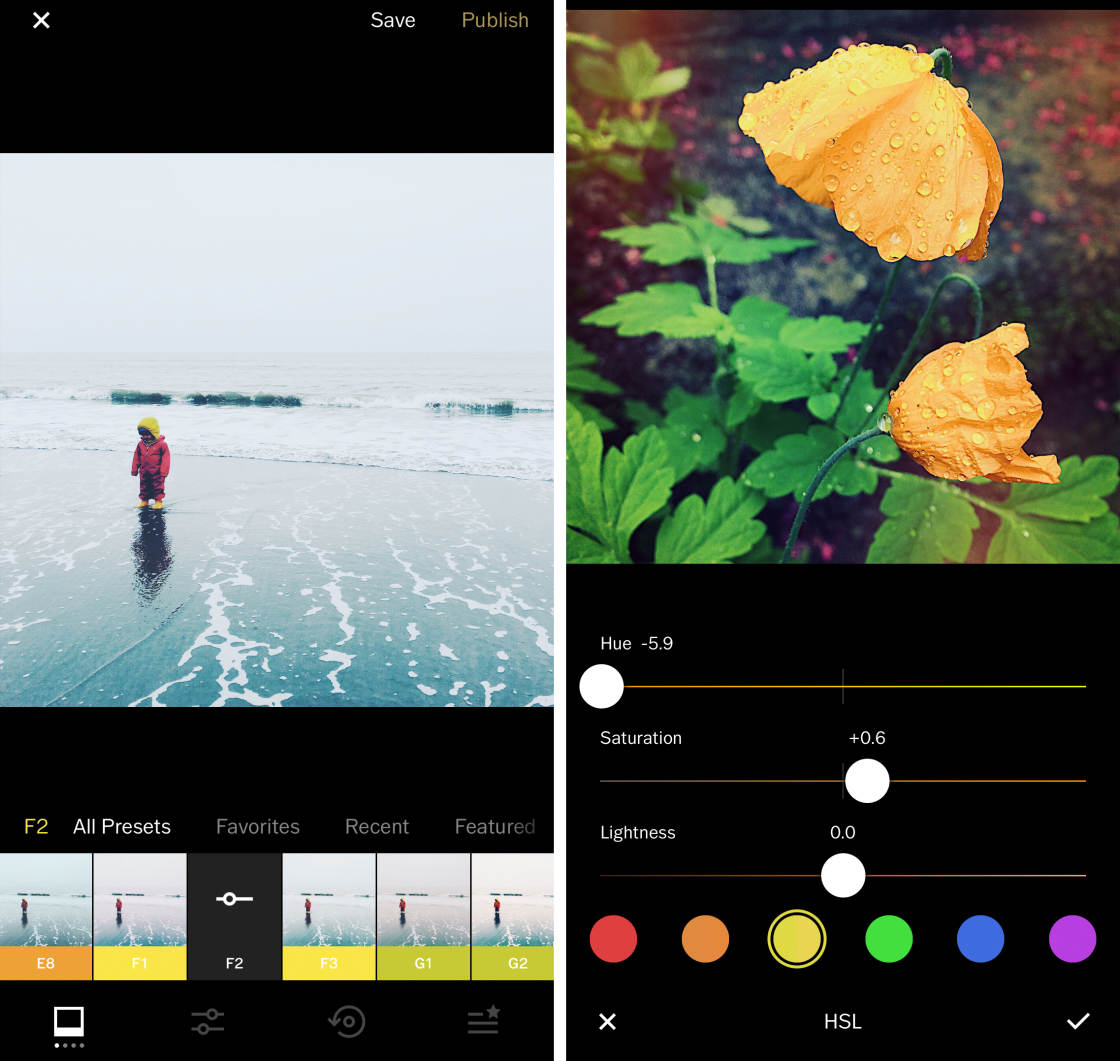
Table Of Contents: VSCO Tutorial
Click any title link below to go straight to that section of the article:
1. How To Use VSCO App: Overview
1.1 Navigate The VSCO App
1.2 Import Photos Into VSCO For Editing
1.3 Open The VSCO Photo Editor
2. VSCO Filters
2.1 Apply A VSCO Filter To Your Photo
2.2 Download More VSCO Filters
3. VSCO Photo Editing Tools
3.1 Exposure
3.2 Contrast
3.3 Adjust (Crop, Rotate, Straighten & Skew)
3.4 Sharpen
3.5 Clarity
3.6 Saturation
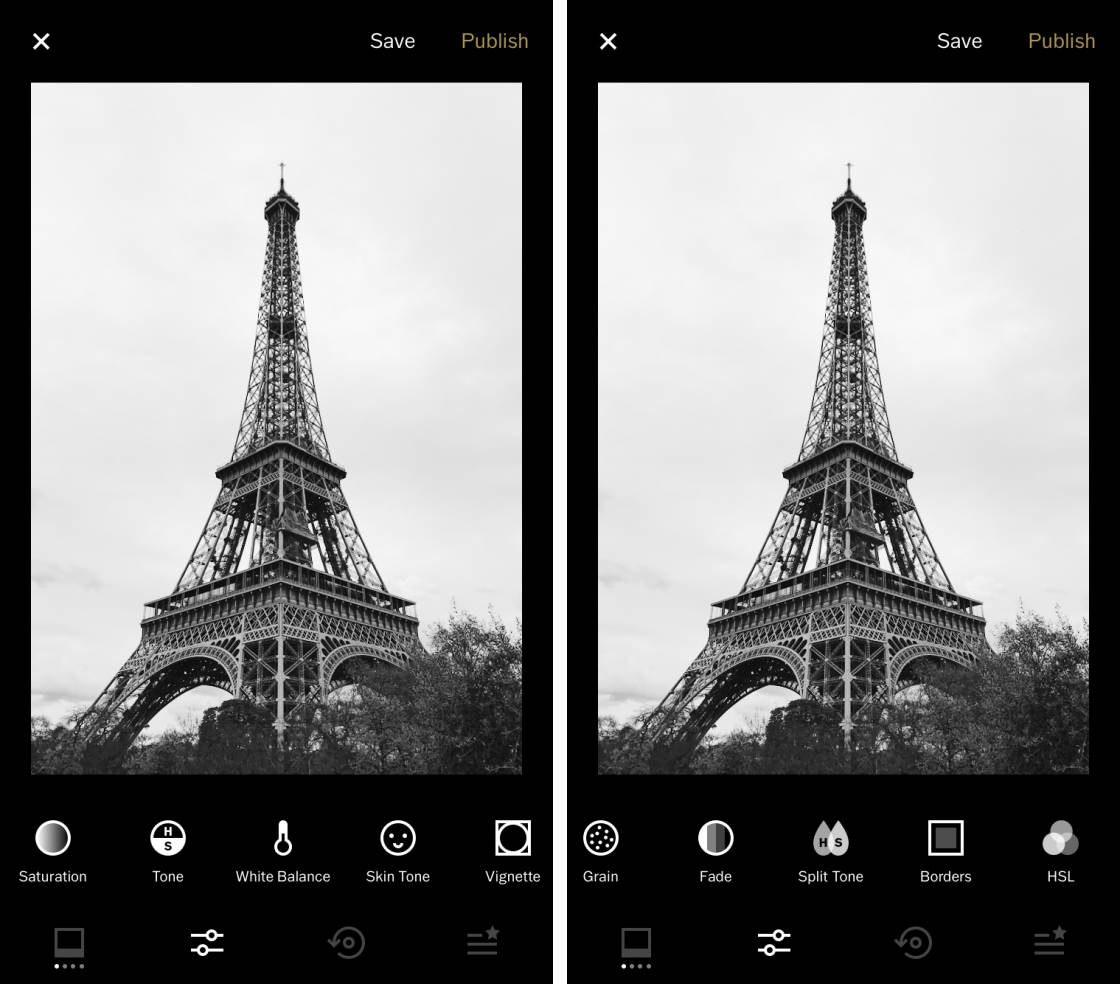
3.7 Tone
3.8 White Balance
3.9 Skin Tone
3.10 Vignette
3.11 Grain
3.12 Fade
3.13 Split Tone
3.14 Borders
3.15 HSL (Hue, Saturation & Lightness)
3.16 Change Or Delete Individual Edits
5. How To Use VSCO Camera
5.1 Focus & Exposure
5.2 Manual Camera Controls
5.3 RAW Format
5.4 Grid & Tiltmeter
5.5 Flash
5.6 Exposure Compensation
5.7 White Balance
5.8 Manual Focus
5.9 Shutter Speed
5.10 ISO
5.11 Preview Your Photos
5.12 VSCO Camera Vs. iPhone Camera App
1. How To Use VSCO App: Overview
What is VSCO?
It’s a fantastic app that lets you shoot, edit and share your iPhone photos.
But if you’re new to the app, it can be difficult to find your way around. And some of the icons don’t have labels – which can make it even more confusing.
So, in this section, you’ll learn how to navigate around VSCO and import your photos for editing.
1.1 Navigate The VSCO App
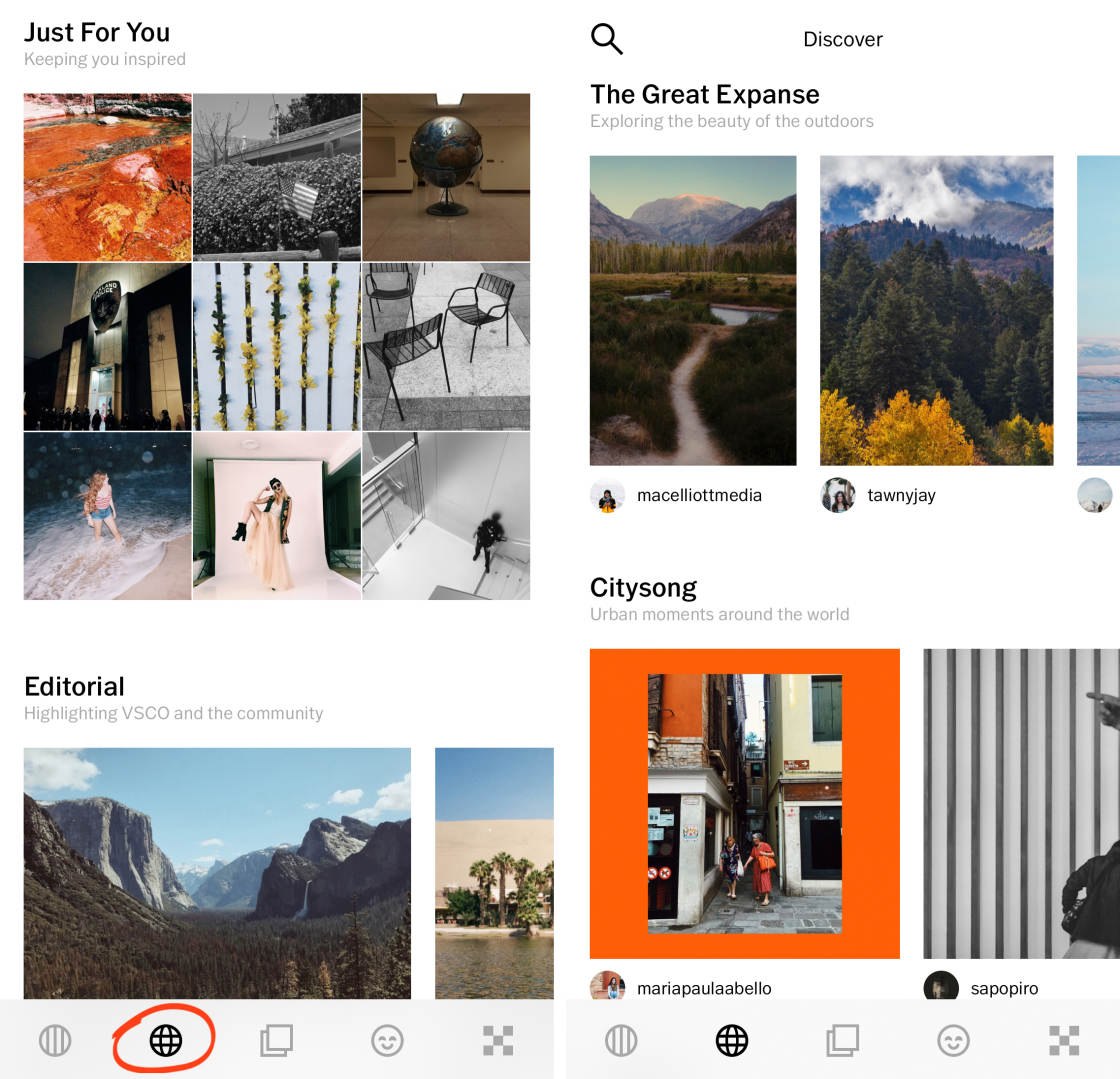
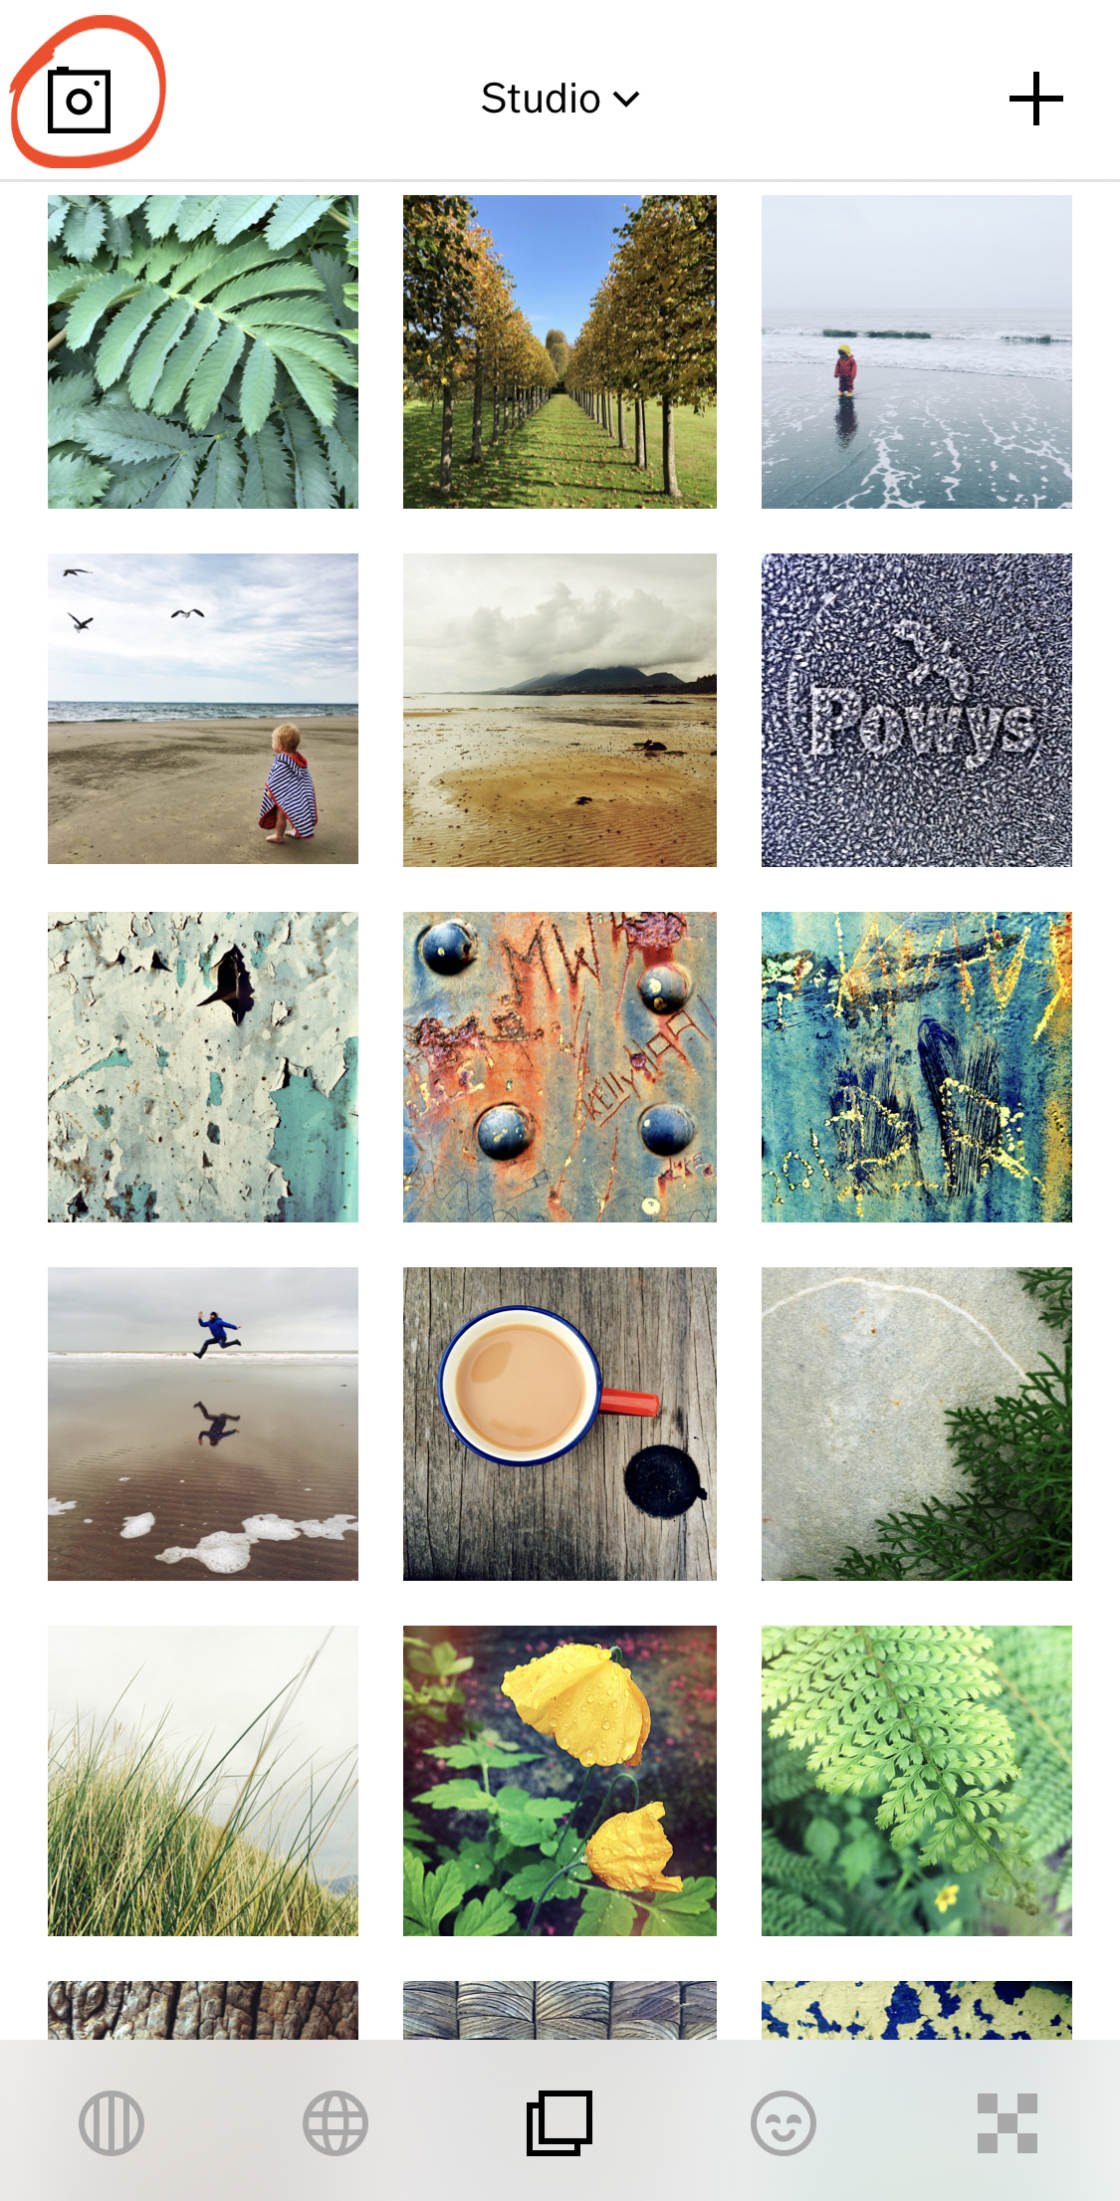
When you open the VSCO app, you’ll see five icons at the bottom of the screen. From left to right, these are VSCO Feed, Discover, Studio, Profile, and VSCO X.
The VSCO Feed (circle icon with three lines) displays photos from people you follow on VSCO.
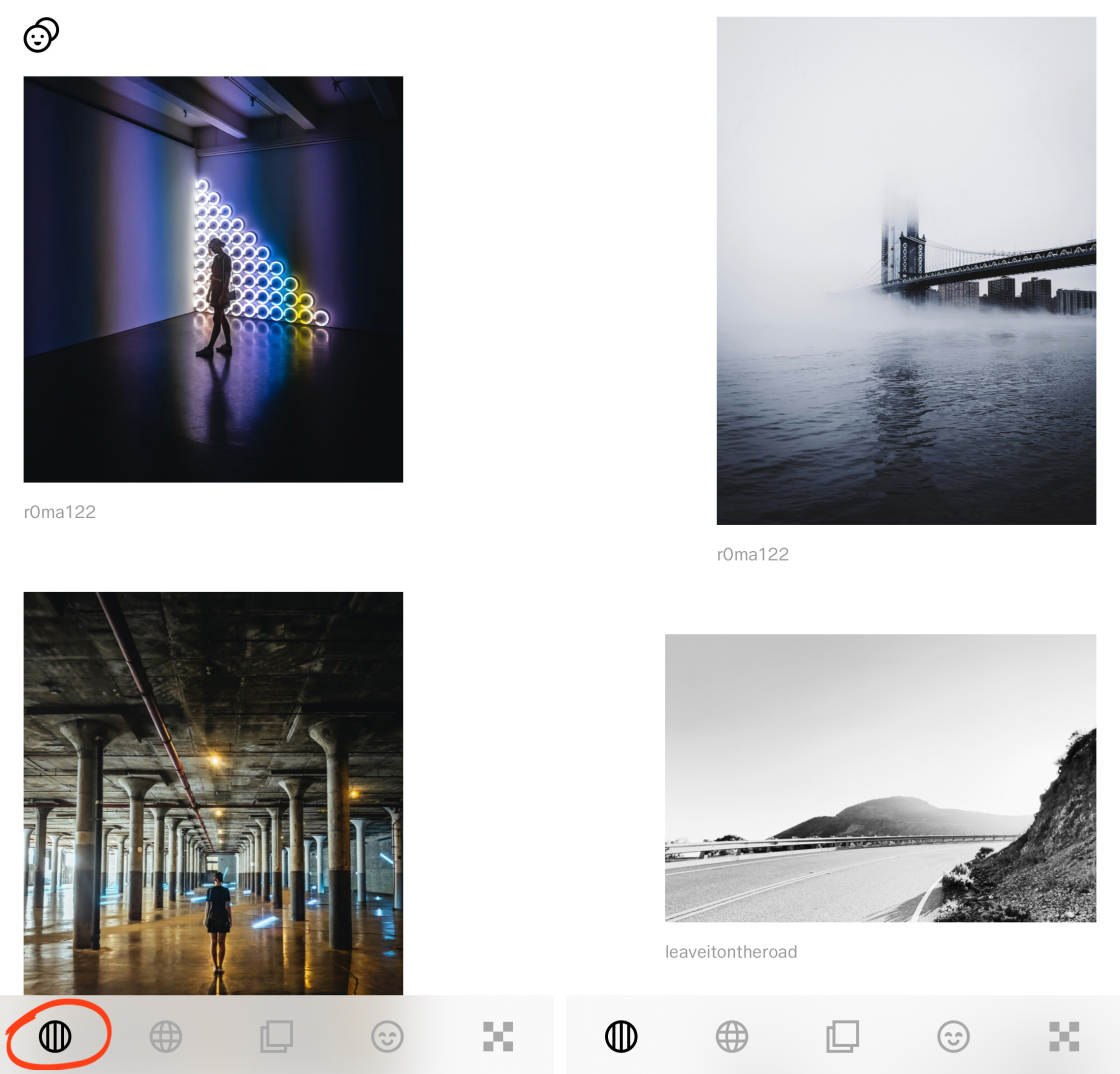
The Discover icon (circle icon with four intersecting lines) lets you discover new photographers in the VSCO community.
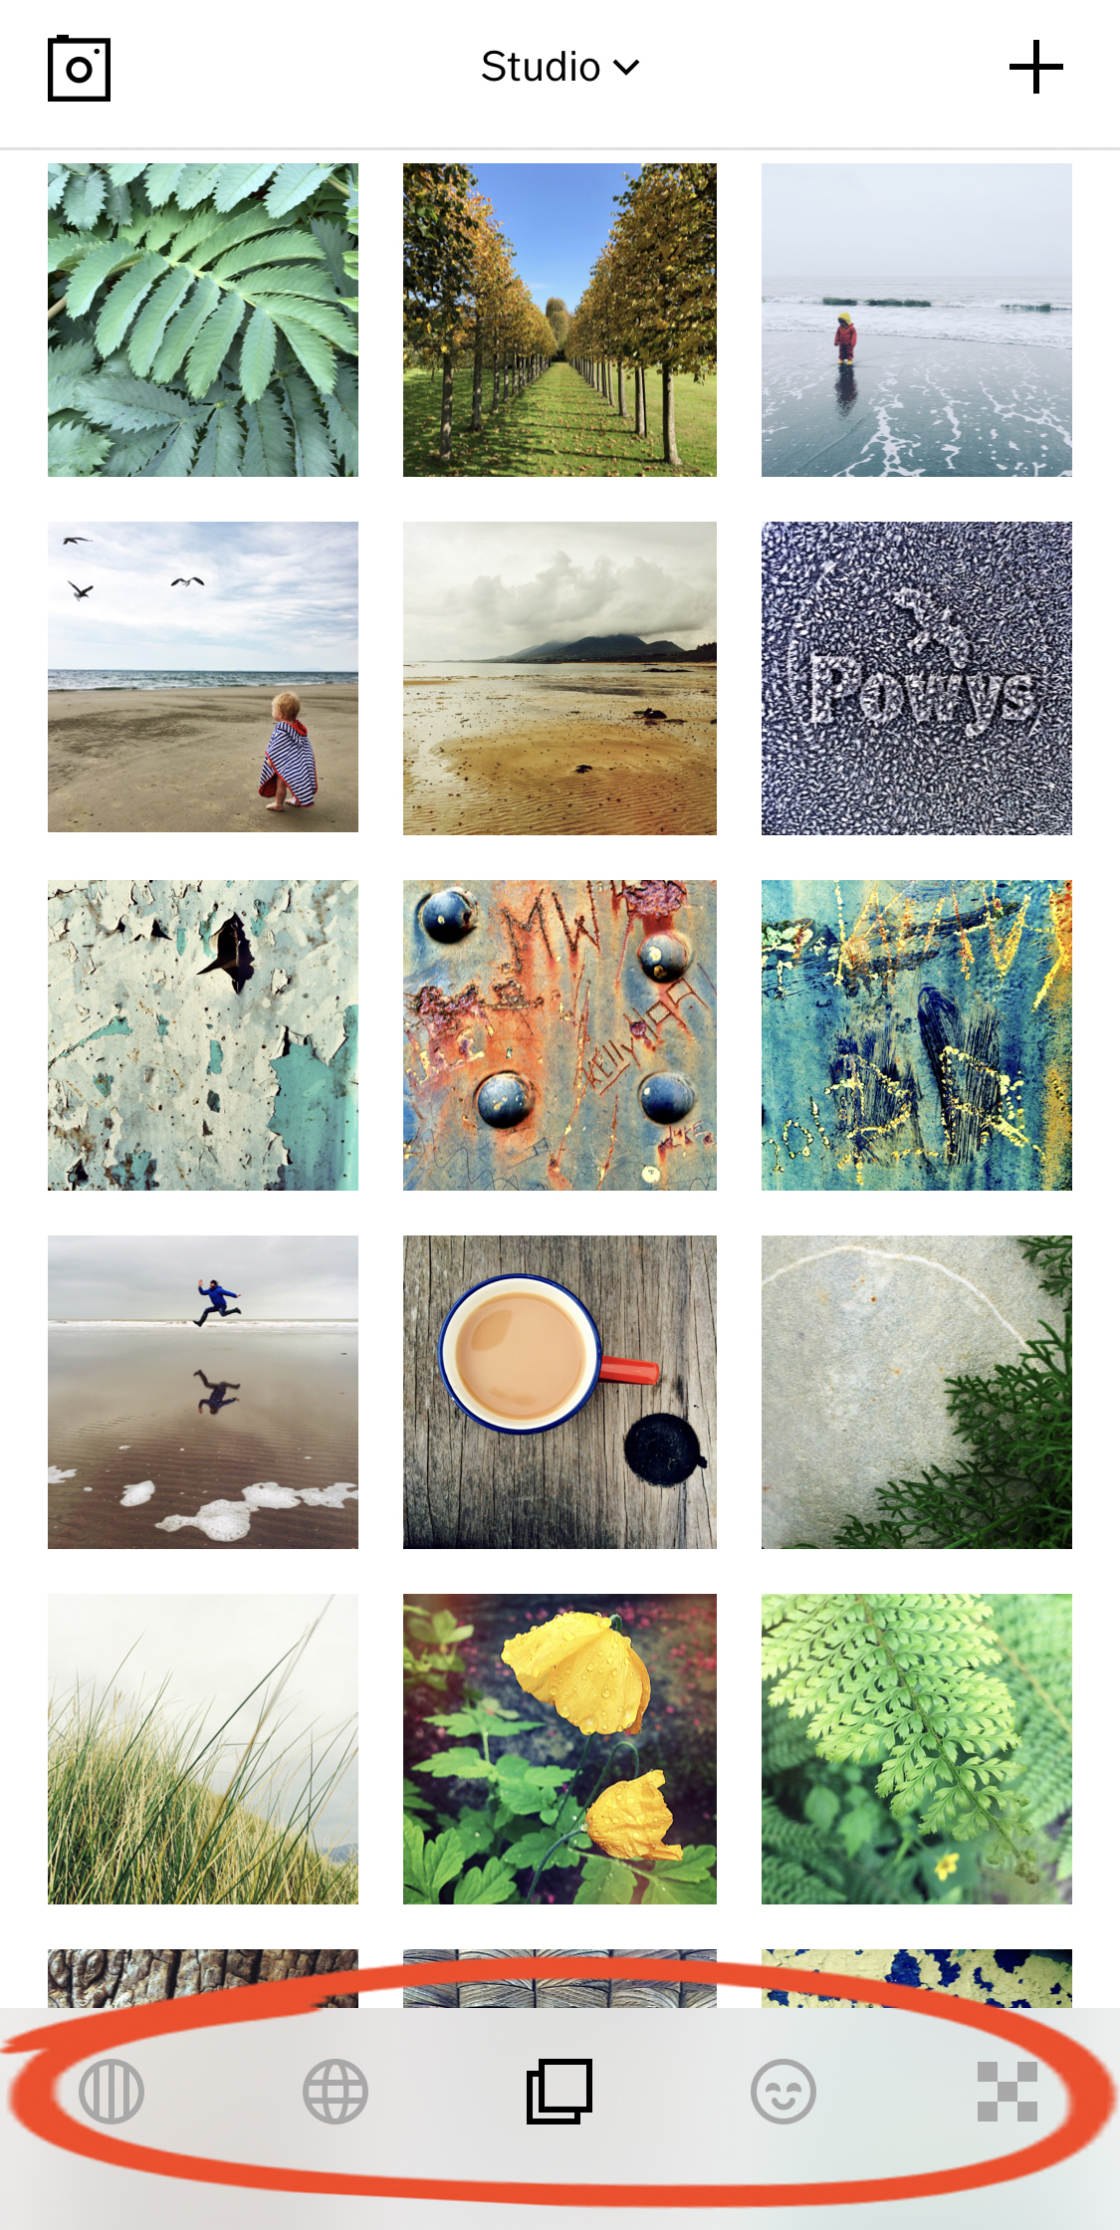
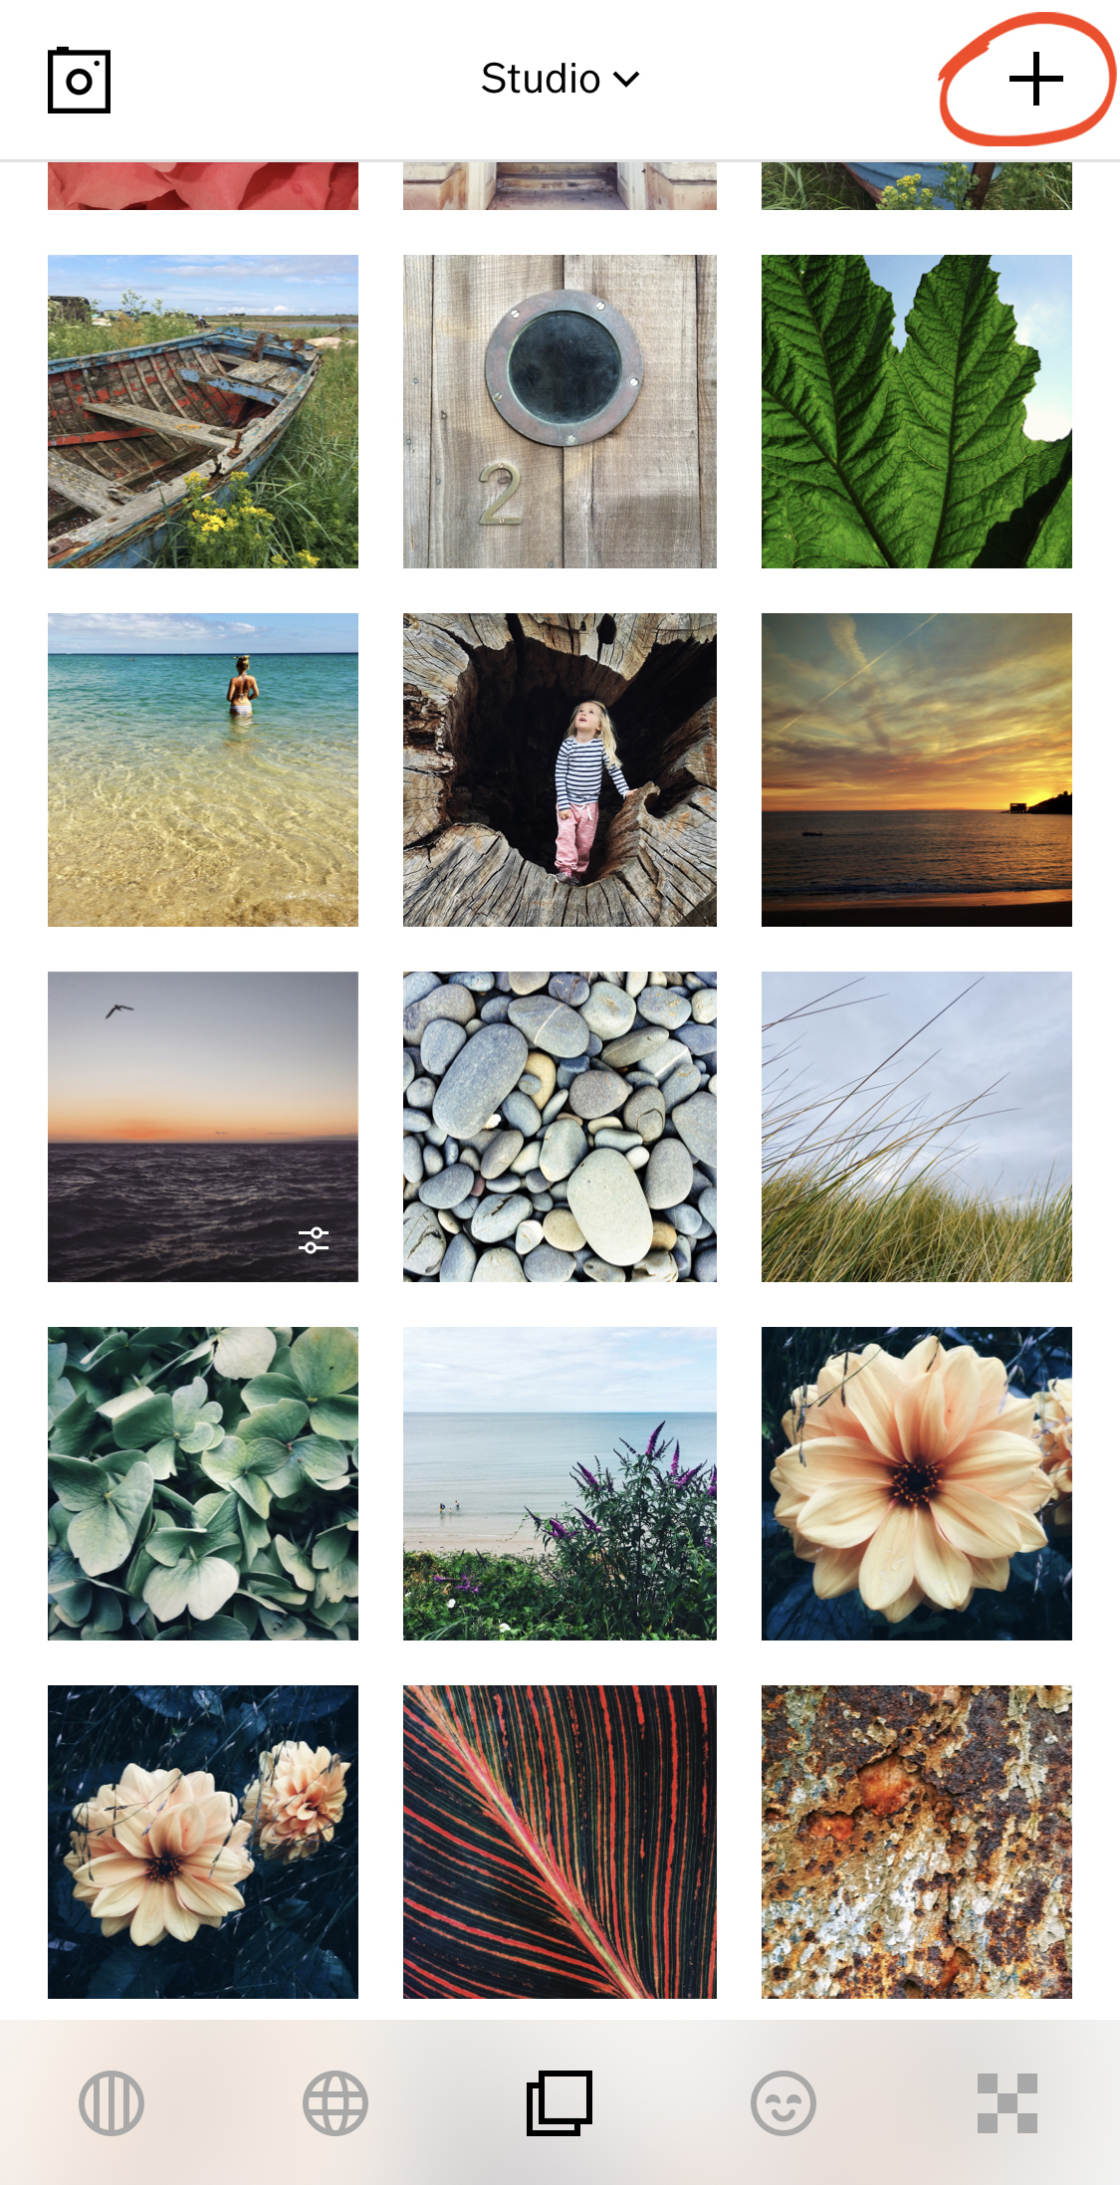
The Studio (two stacked squares icon) is where you import your photos ready for editing.
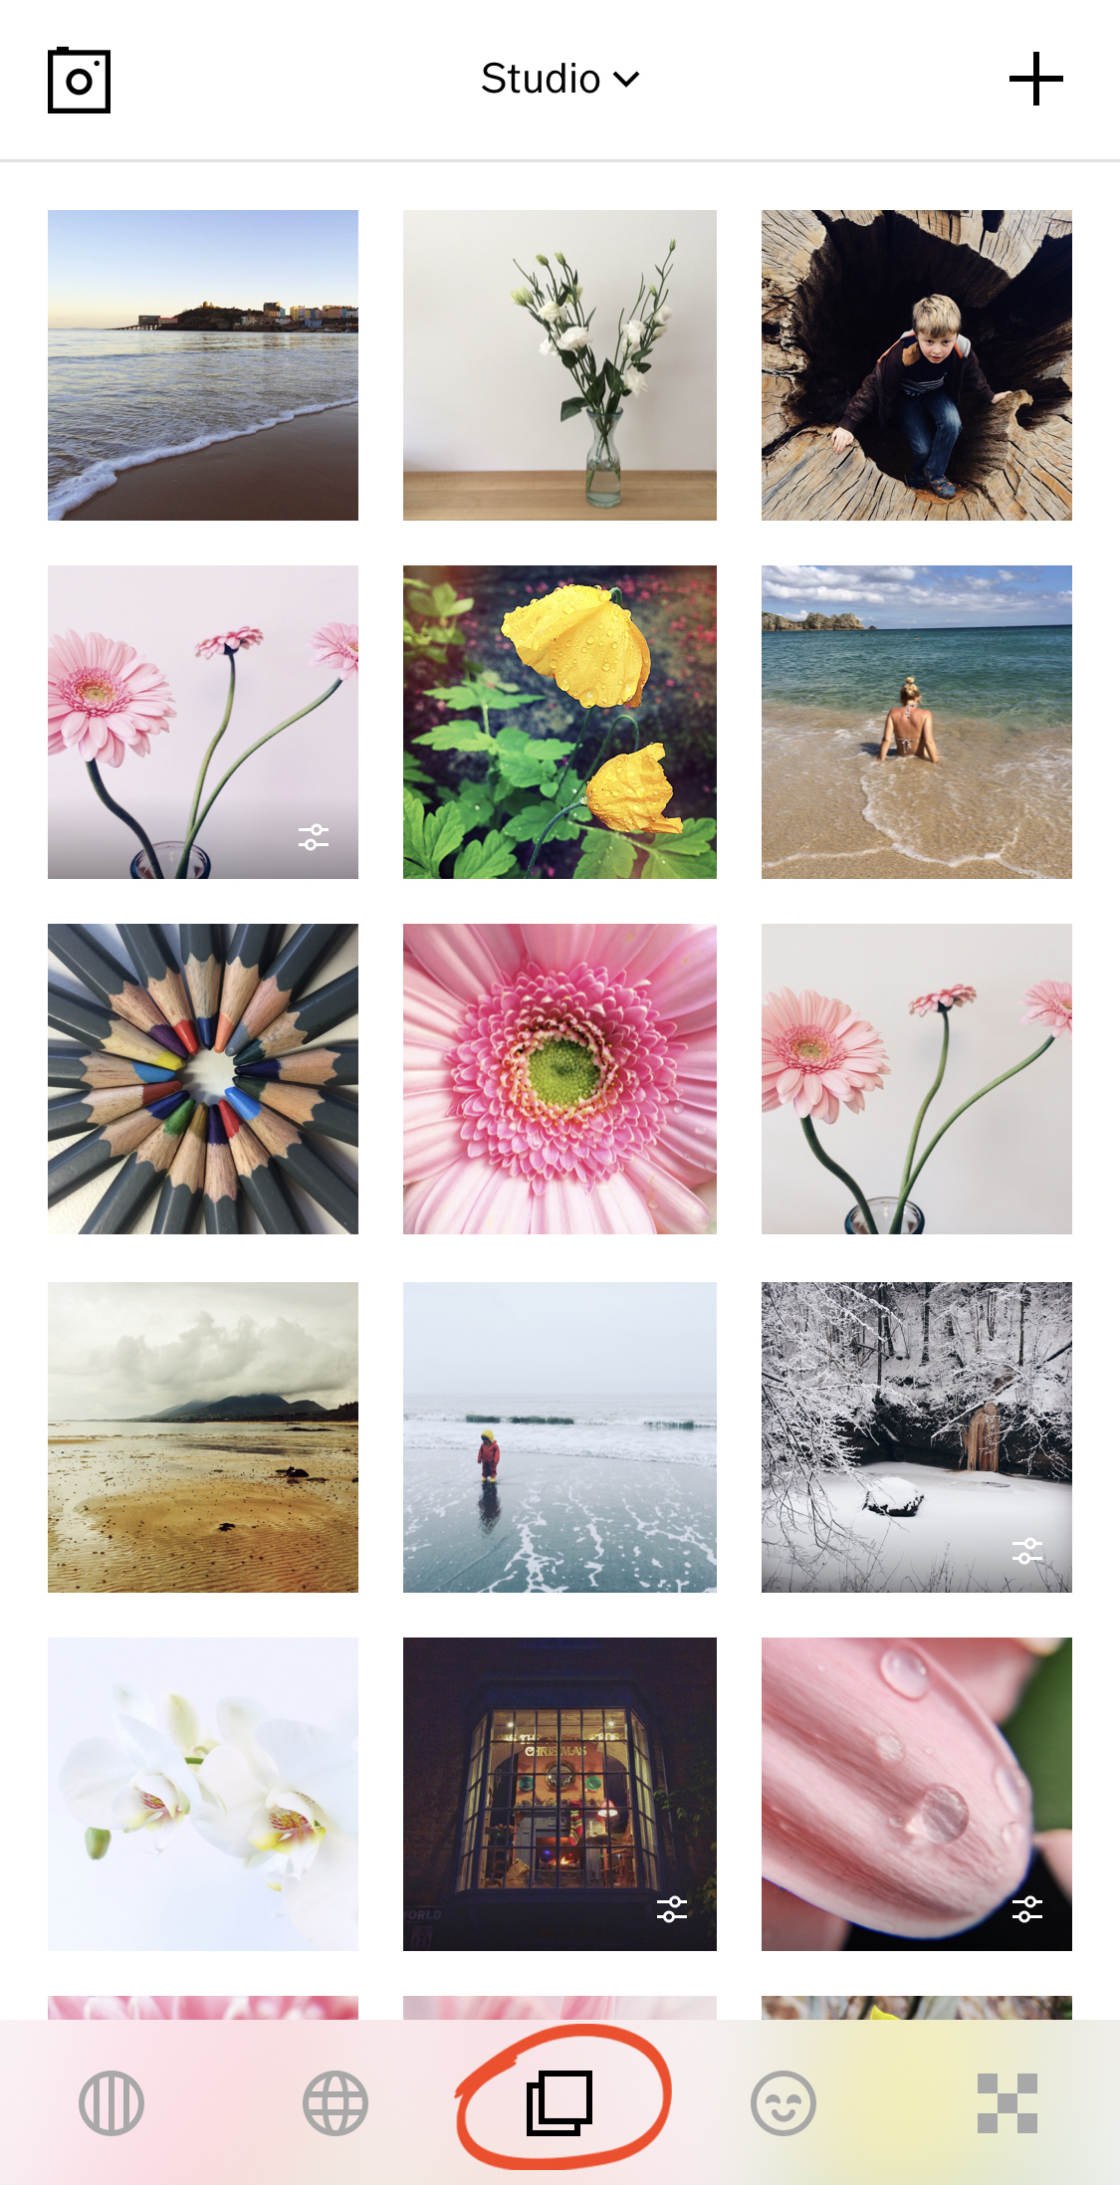
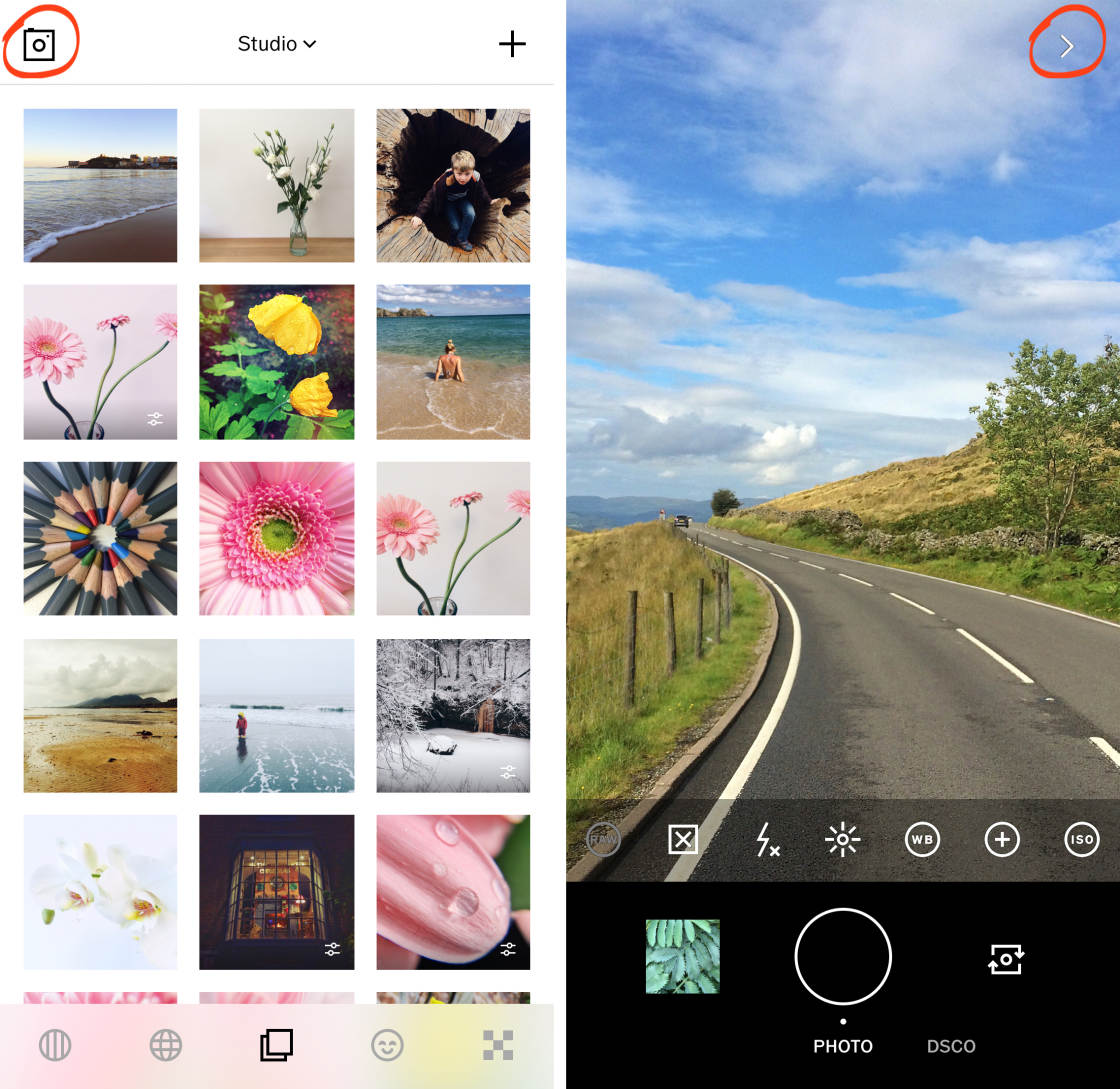
To open the VSCO camera, tap the Camera icon at the top left of the studio screen. When you’ve finished taking photos, tap the arrow at the top right to exit the camera.
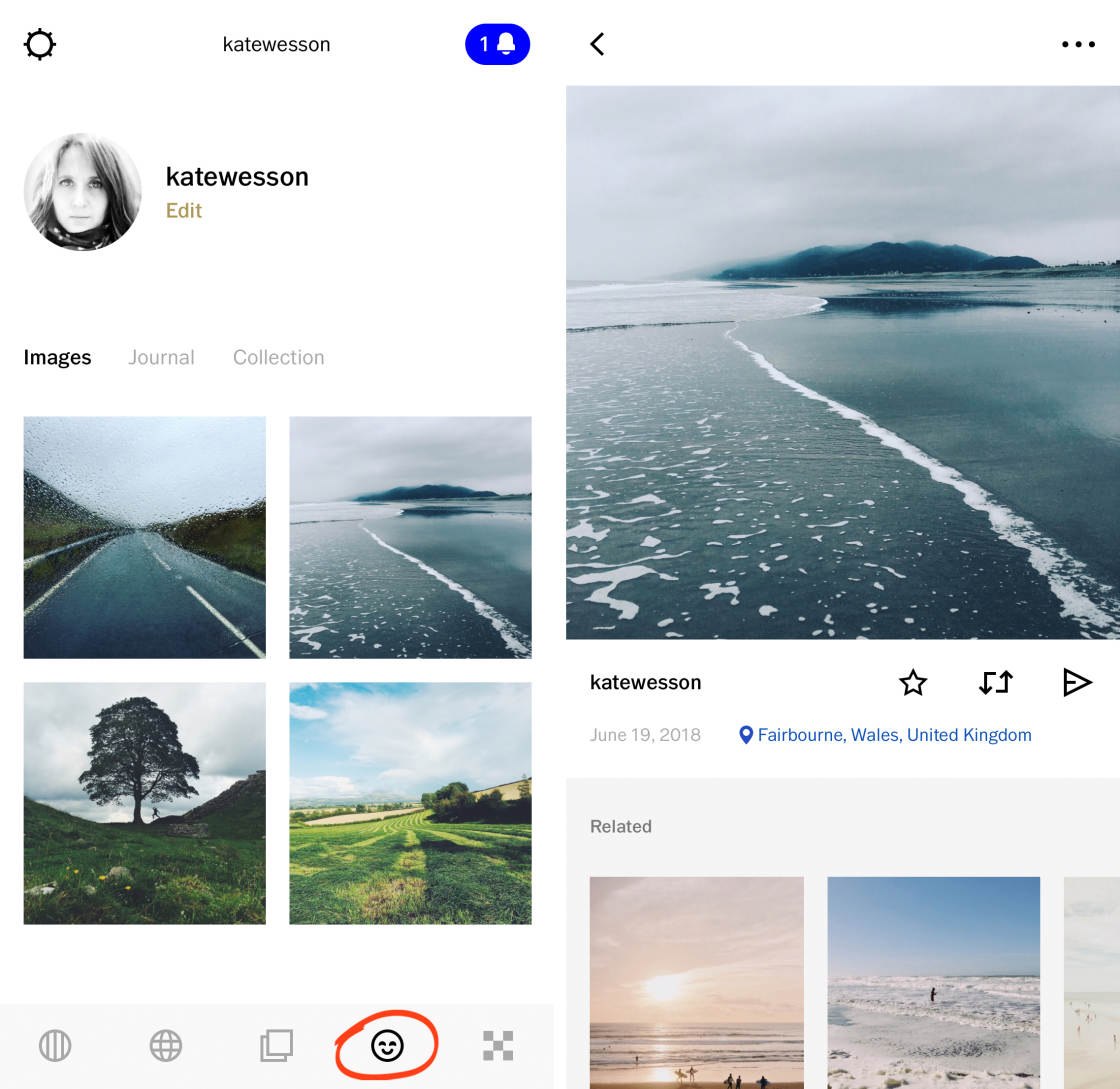
The Profile icon (smiley face icon) displays photos that you’ve shared with the VSCO community.
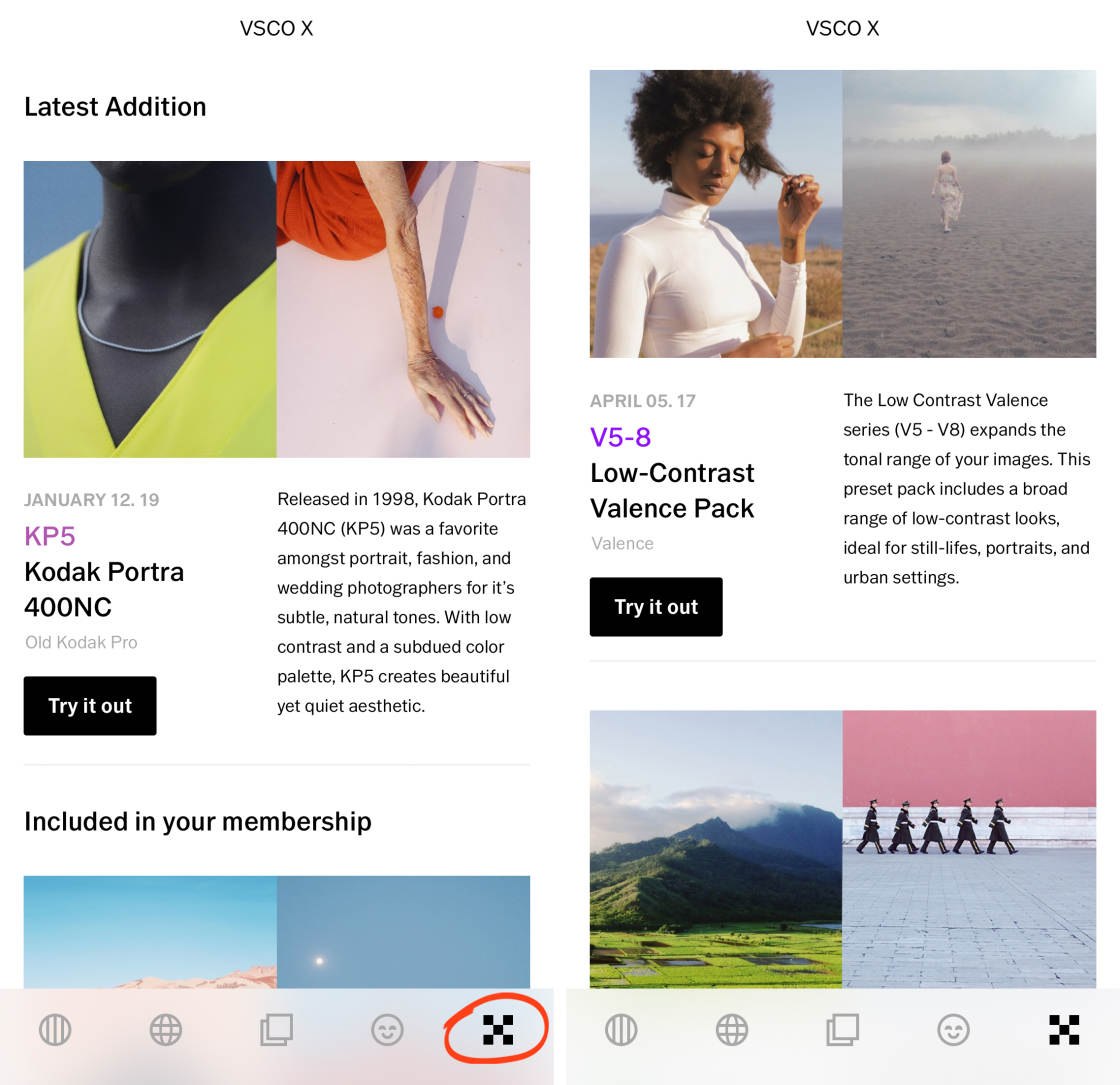
The VSCO X icon at the bottom right allows you to subscribe to VSCO X membership. For $19.99 a year, you’ll get access to the entire range of VSCO filters, as well as additional editing tools.
1.2 Import Photos Into VSCO For Editing
To edit a photo in VSCO, you first have to import the image from your iPhone’s photo library. Tap the [+] icon at the top right of the VSCO studio.
The Camera Roll screen will appear. This displays the images from your iPhone’s photo library.
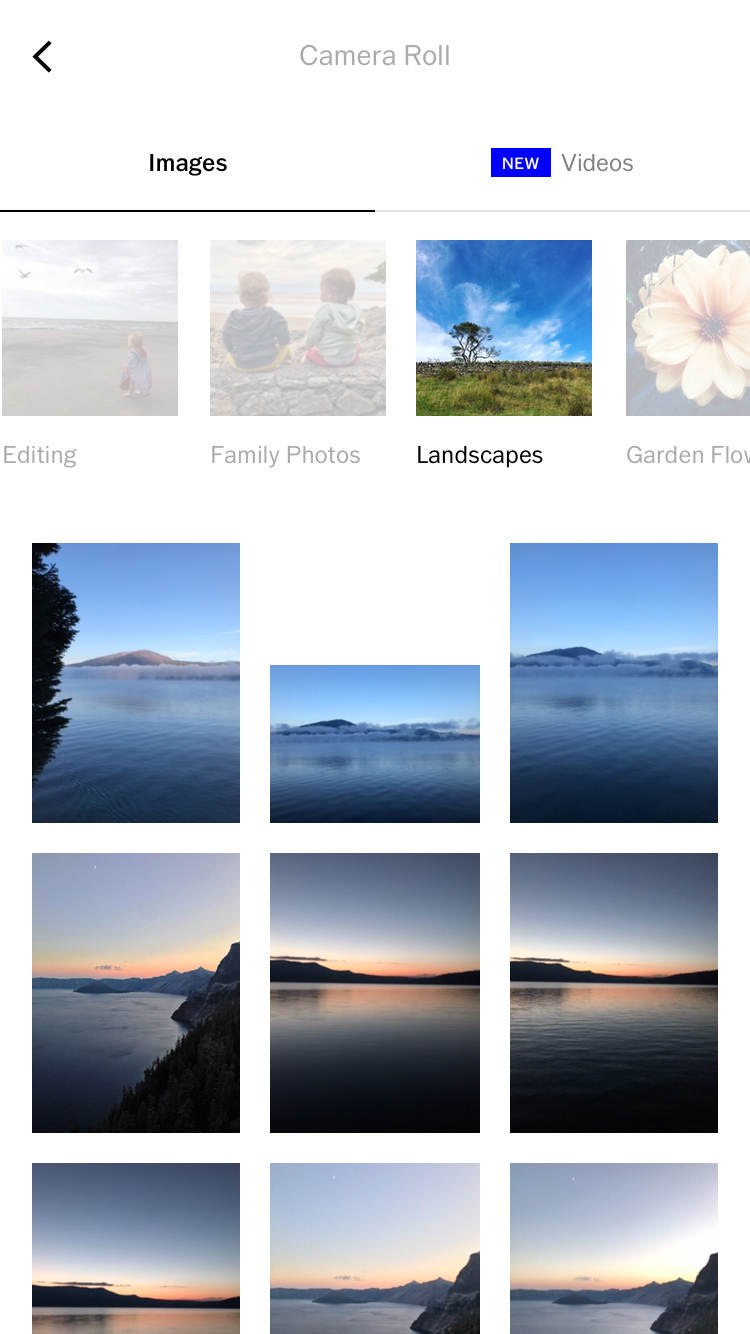
Scroll down to view more images. Or select a different album from the row of albums at the top of the screen.
Tap on the photo or photos you want to import for editing. Then tap Import at the bottom of the screen.
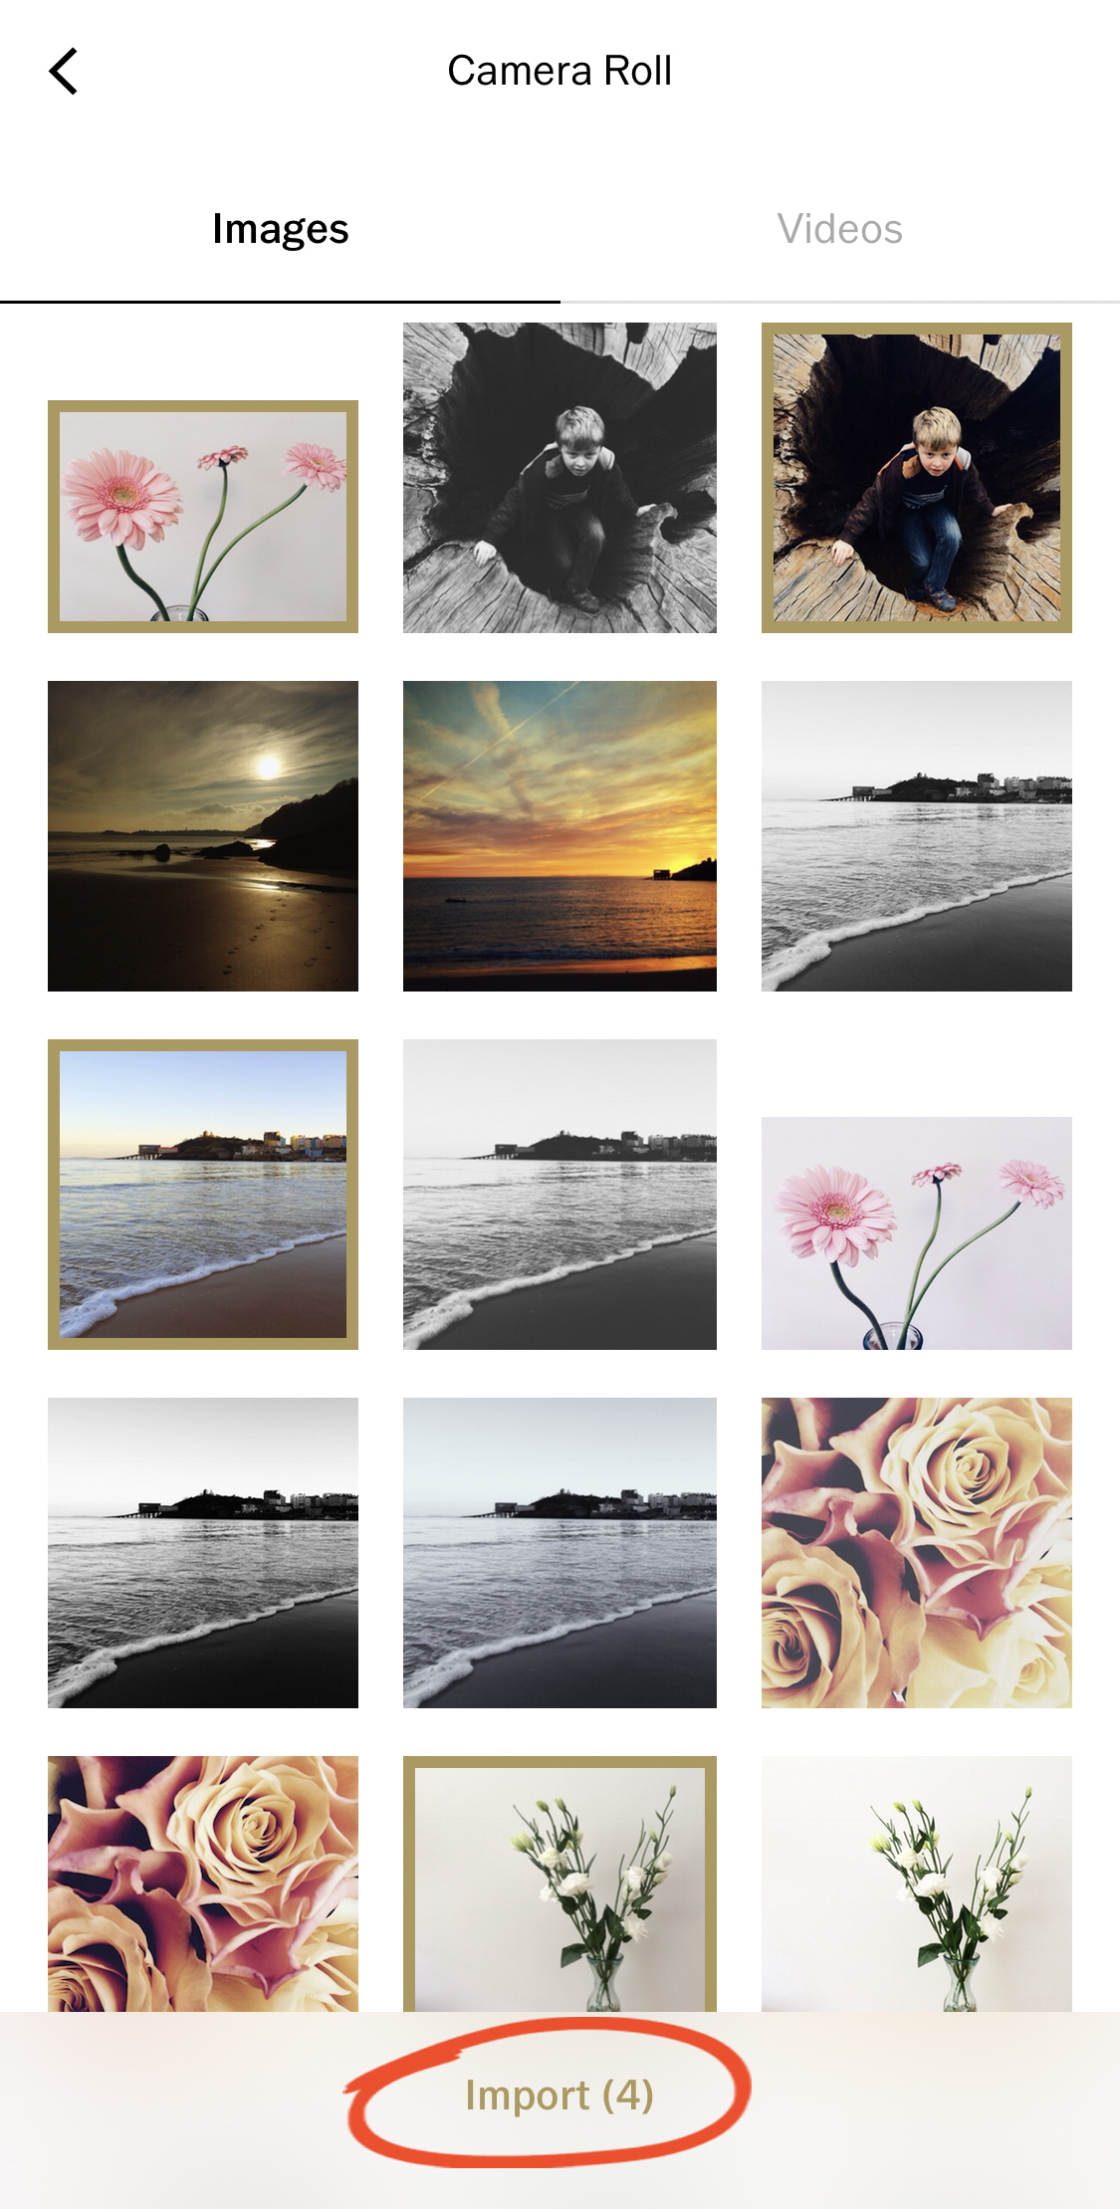
The imported images will appear in your VSCO studio.
1.3 Open The VSCO Photo Editor
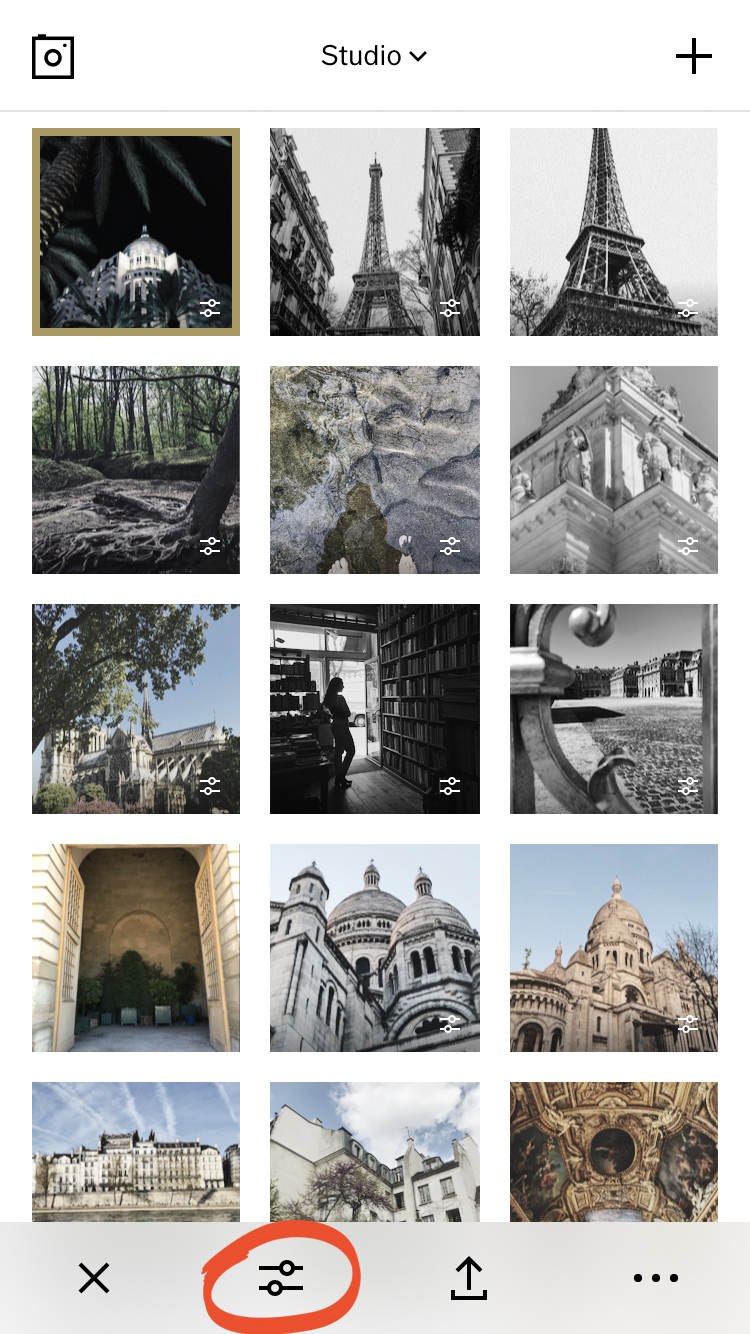
In the VSCO studio, select the photo you want to edit. A gold outline appears around the selected image.
Tap the Edit icon (two sliders) at the bottom of the screen to open the VSCO editor.
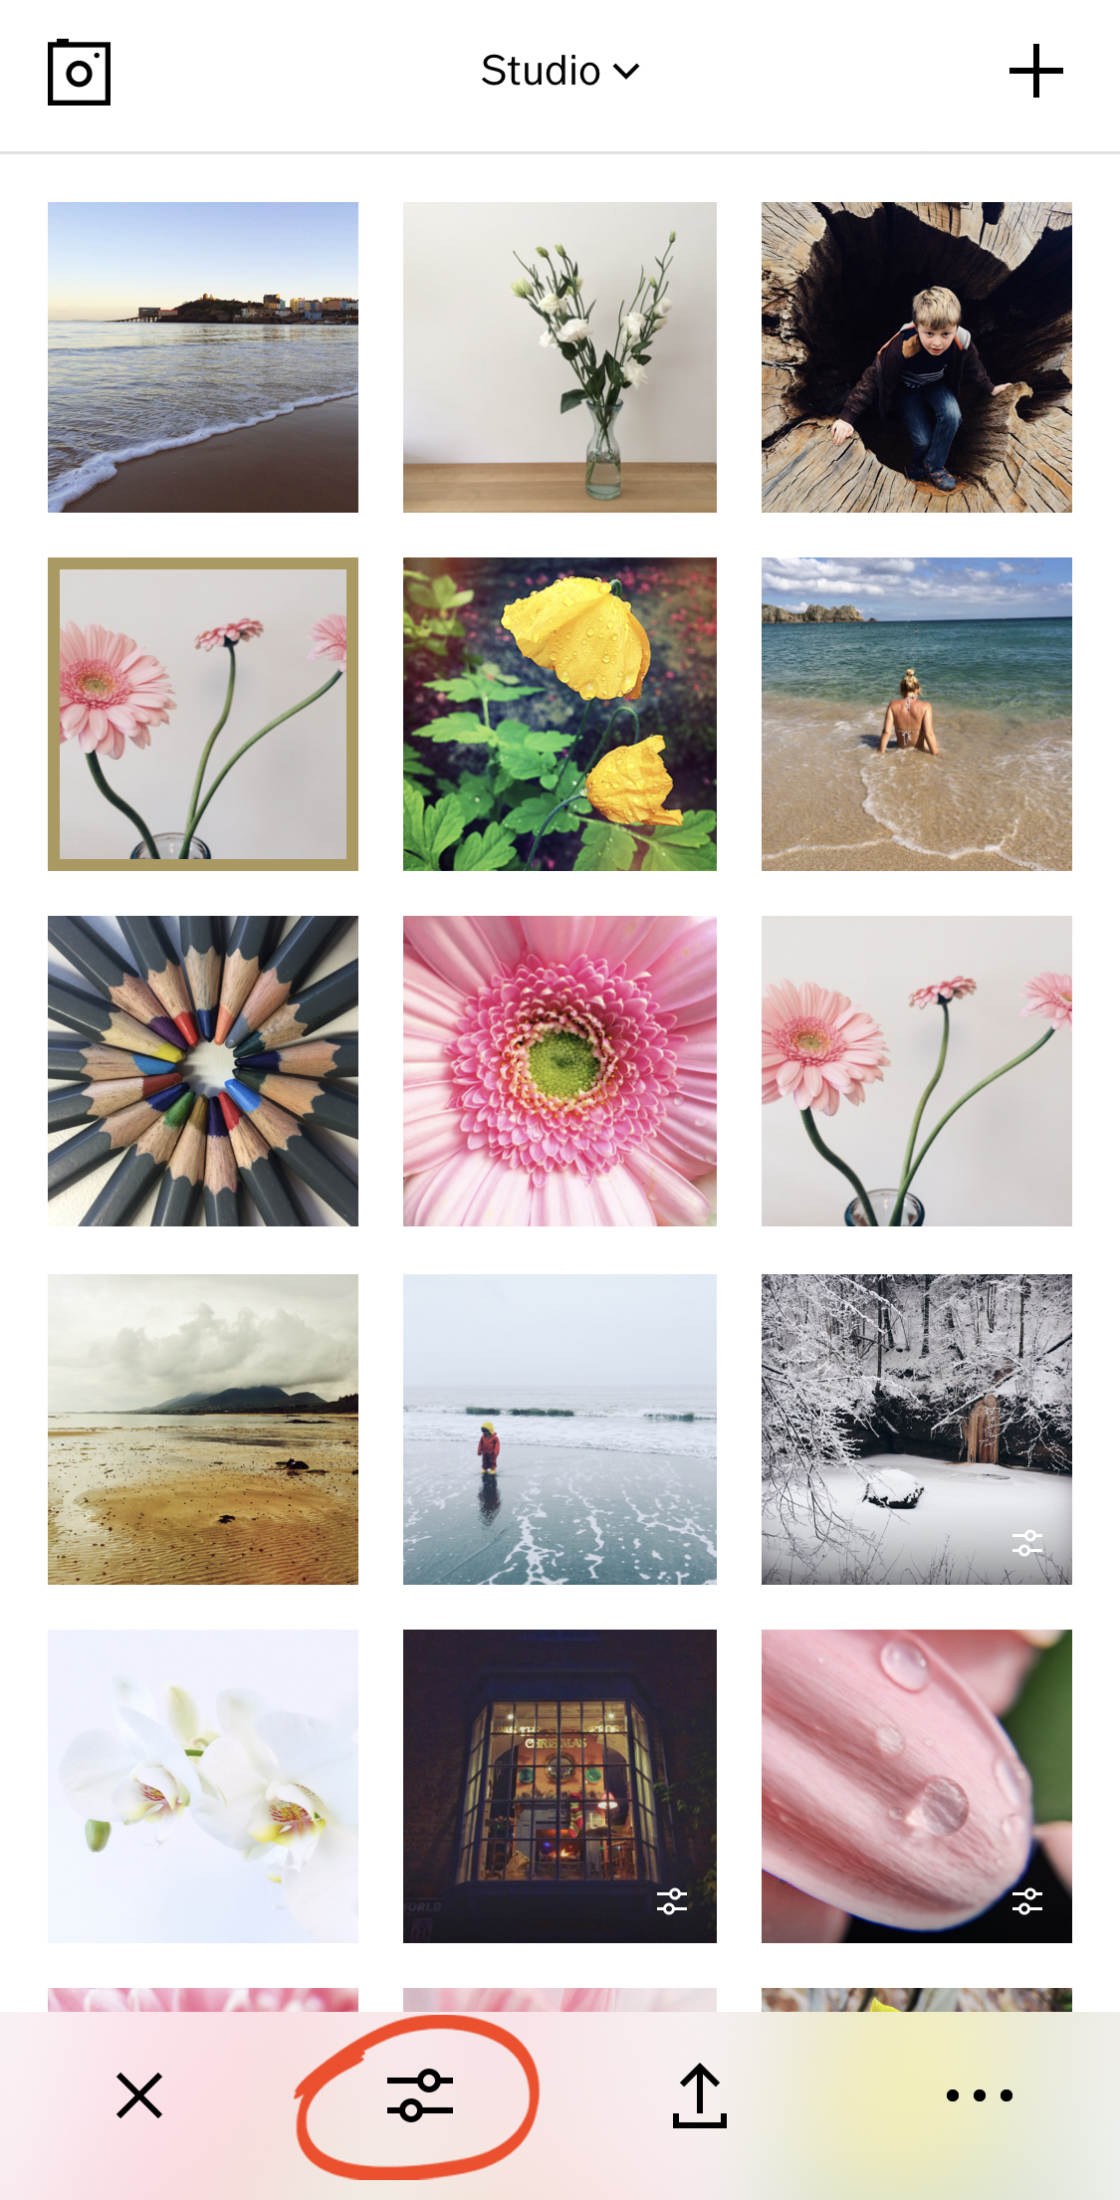
Note that if you’ve selected multiple photos, you won’t be able to access the editing tools. If you’ve selected more than one photo, tap the X at the bottom left to deselect all images. Then select the photo you want to edit.
There are two ways to edit a photo in the VSCO app. You can use one-tap VSCO filters to quickly change the look and mood of your image. Or you can make manual edits using a range of VSCO editing tools.
Of course, you can edit using both filters and manual adjustments to create the exact look you want.
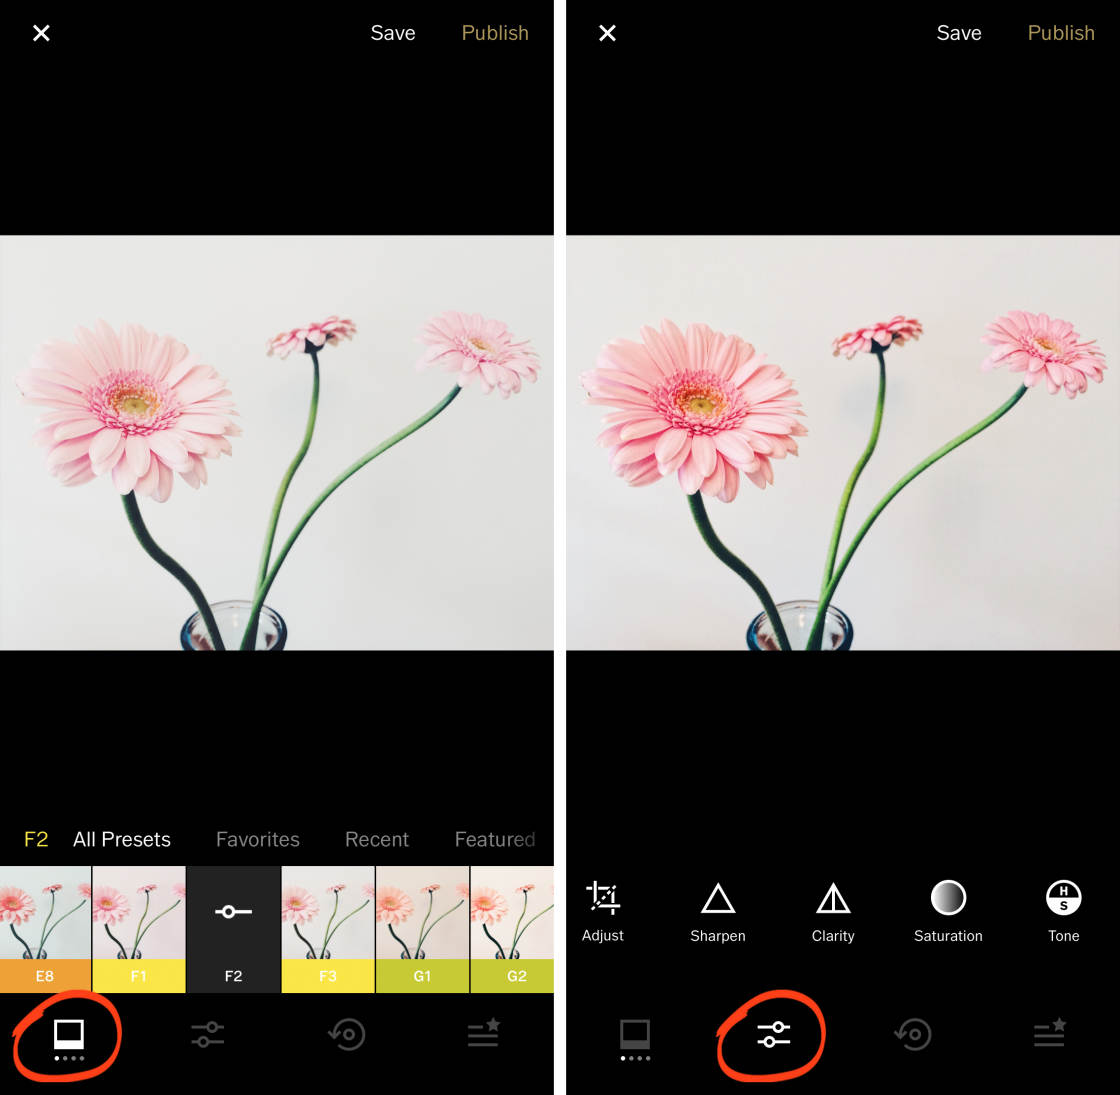
To open the VSCO filters, tap the Filters icon (white square) at the bottom left. To access the VSCO editing tools, tap the Edit icon (two sliders).
Next, you’ll learn how to create beautiful edits using the VSCO editing tools and filters.
2. VSCO Filters
VSCO filters (also known as ‘presets’) offer a quick one-tap editing solution. Each filter creates a different look by applying preset color and exposure adjustments.
VSCO is one of the best photo filter apps for iPhone. Its presets are subtle and have a wonderful film-like quality.
Read on to learn how to create beautiful VSCO edits using filters.
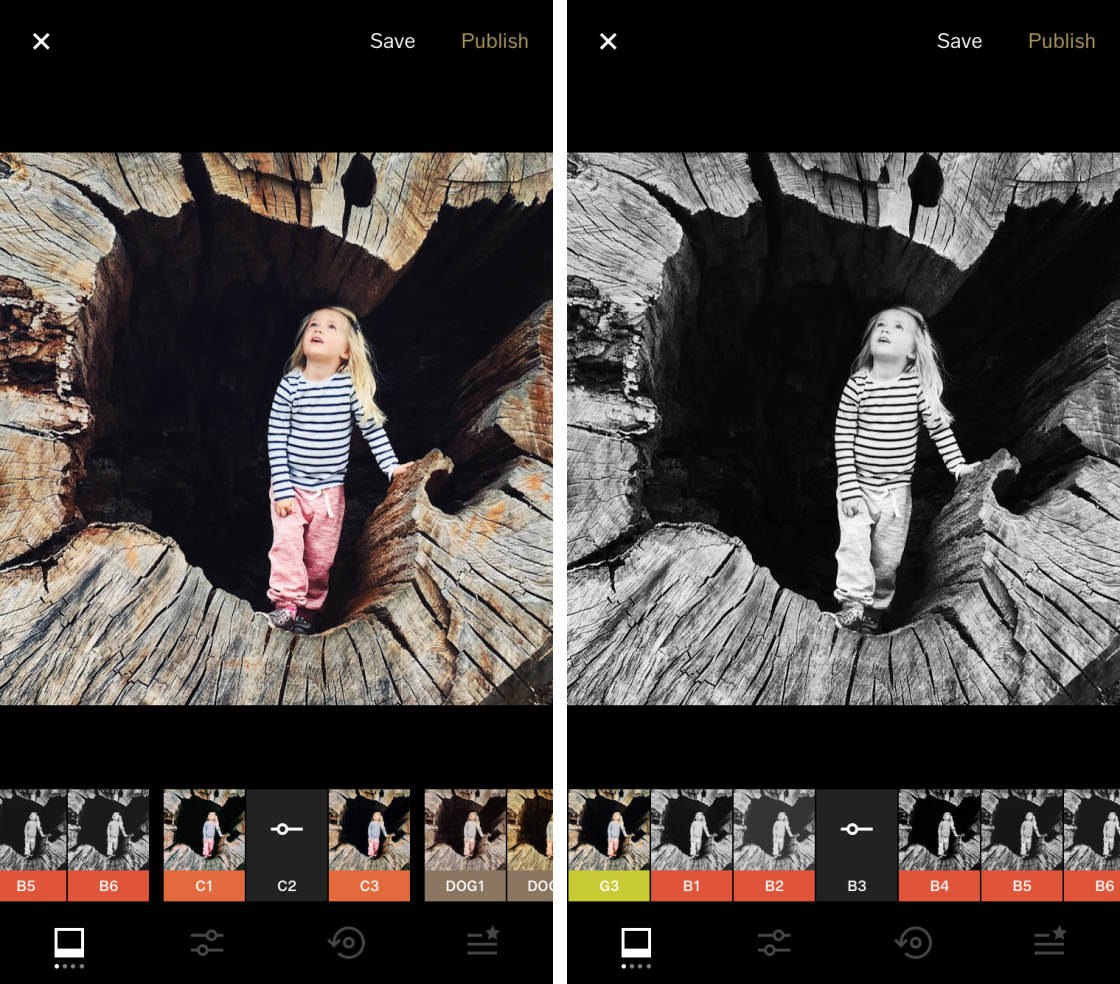
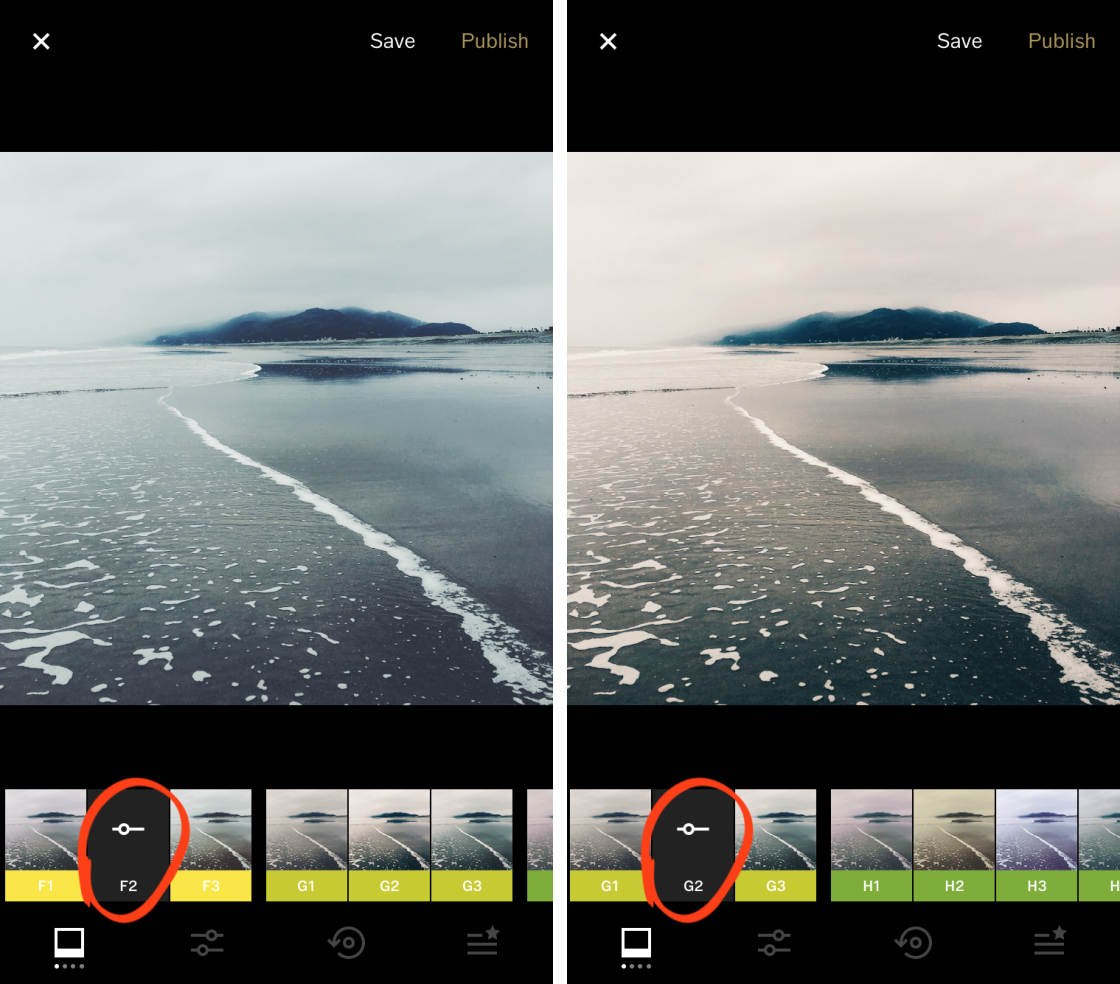
2.1 Apply A VSCO Filter To Your Photo
To apply a filter, first select the photo in your VSCO studio. Then tap the Edit icon (two sliders) at the bottom of the screen. On the next screen, ensure the Filters icon (white square) is selected.
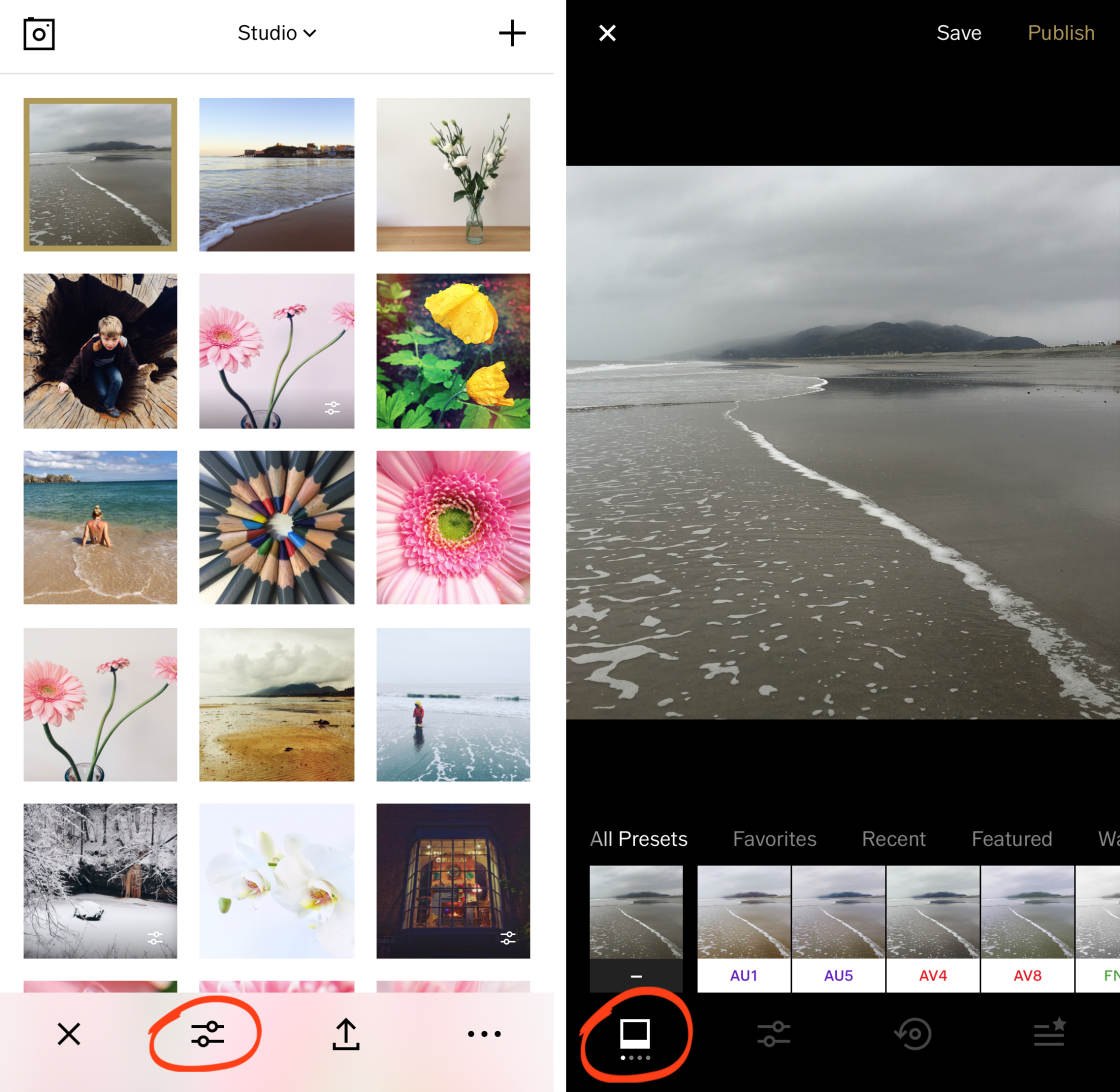
The VSCO filters appear beneath your photo. Swipe across to see more filters.
Tap on a filter to apply it to your photo. If you don’t like the effect, tap a different filter.
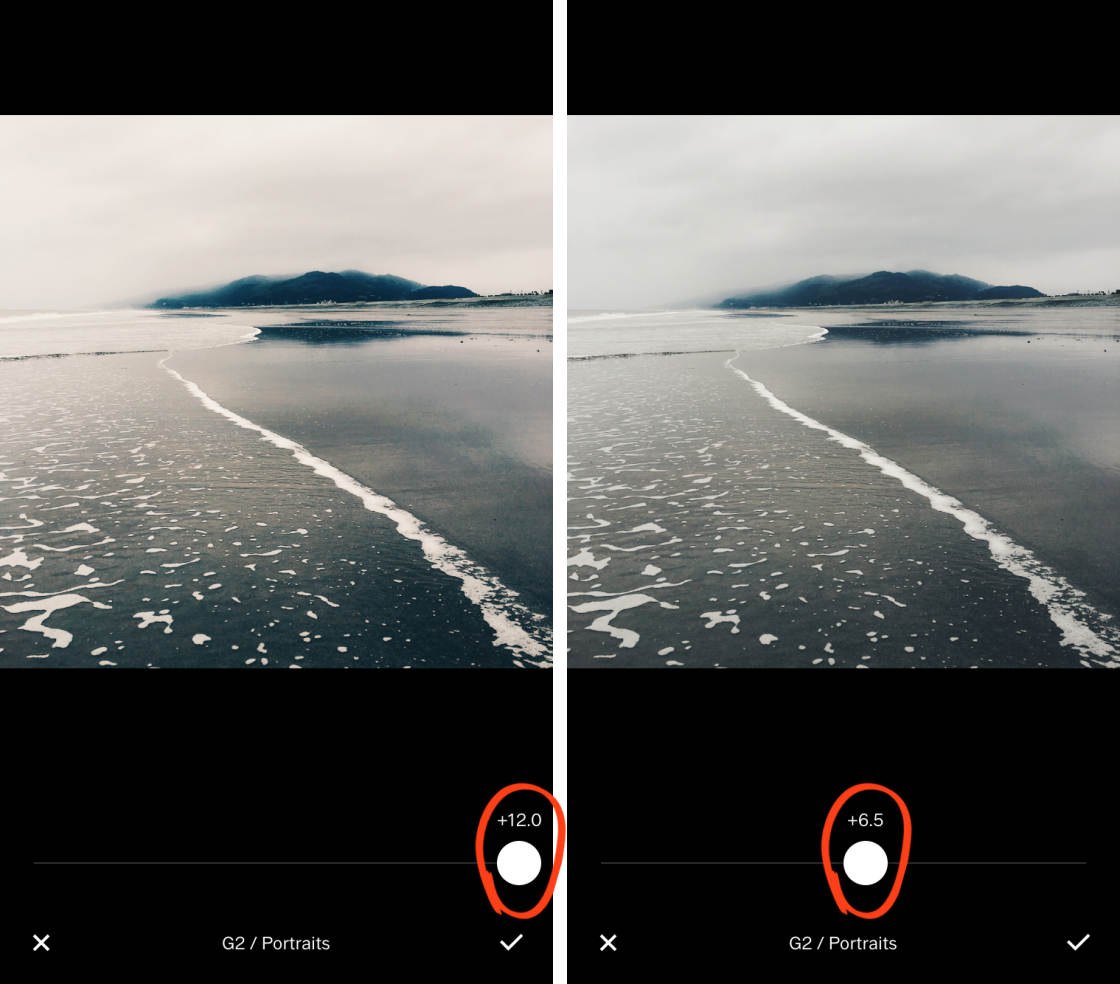
After applying a filter, you can reduce its intensity to tone down the effect.
Tap on the active filter, then use the slider to adjust the filter strength. Tap the checkmark when you’re done.
When editing photos in VSCO, you can easily compare the before and after images. Tap and hold the image to see the original unedited version. Release your finger to return to the edited photo.
2.2 Download More VSCO Filters
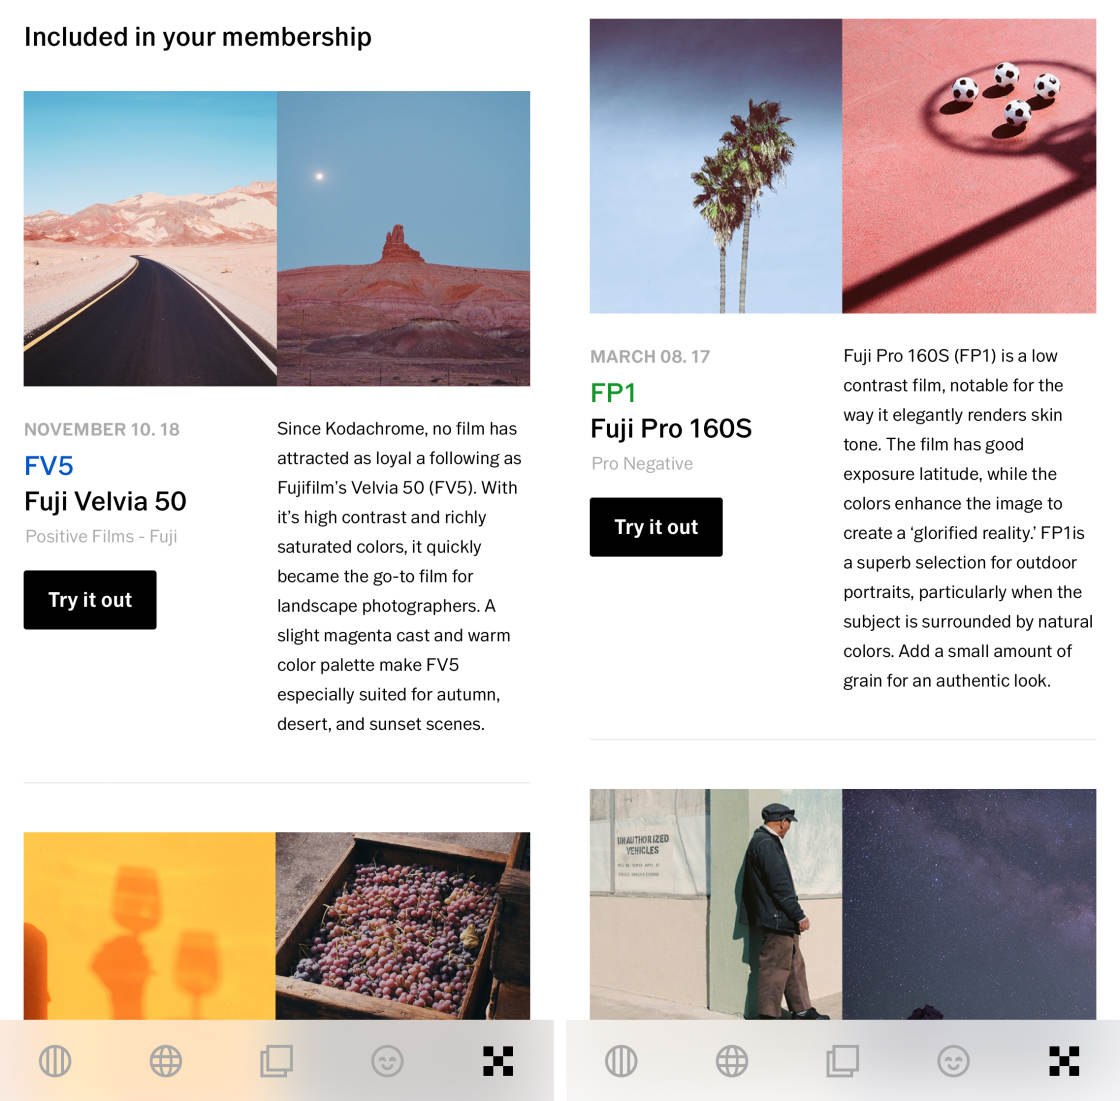
The free VSCO app comes with a basic set of 10 filters to get you started. But there many more filters available.
To access to the entire collection of over 130 VSCO filters, you’ll need to subscribe to VSCO X.
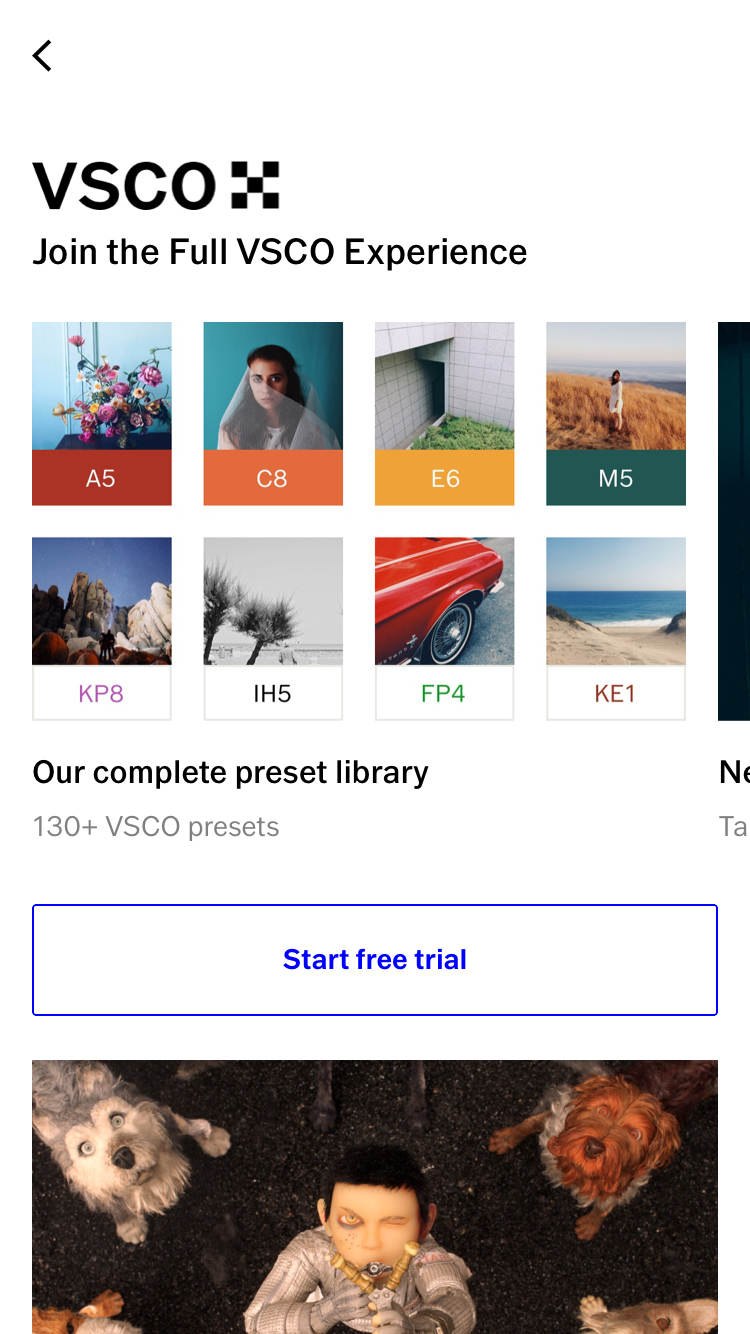
It costs $19.99 a year, but it’s well worth it for the huge choice of filters that you’ll be able to use.
Edited with VSCO filter HB2
As a VSCO X member, you’ll also get access to some additional photo editing tools.
So, how do you subscribe to VSCO X?
Simply tap the VSCO X icon at the bottom right of the studio screen. Then tap Start Free Trial.
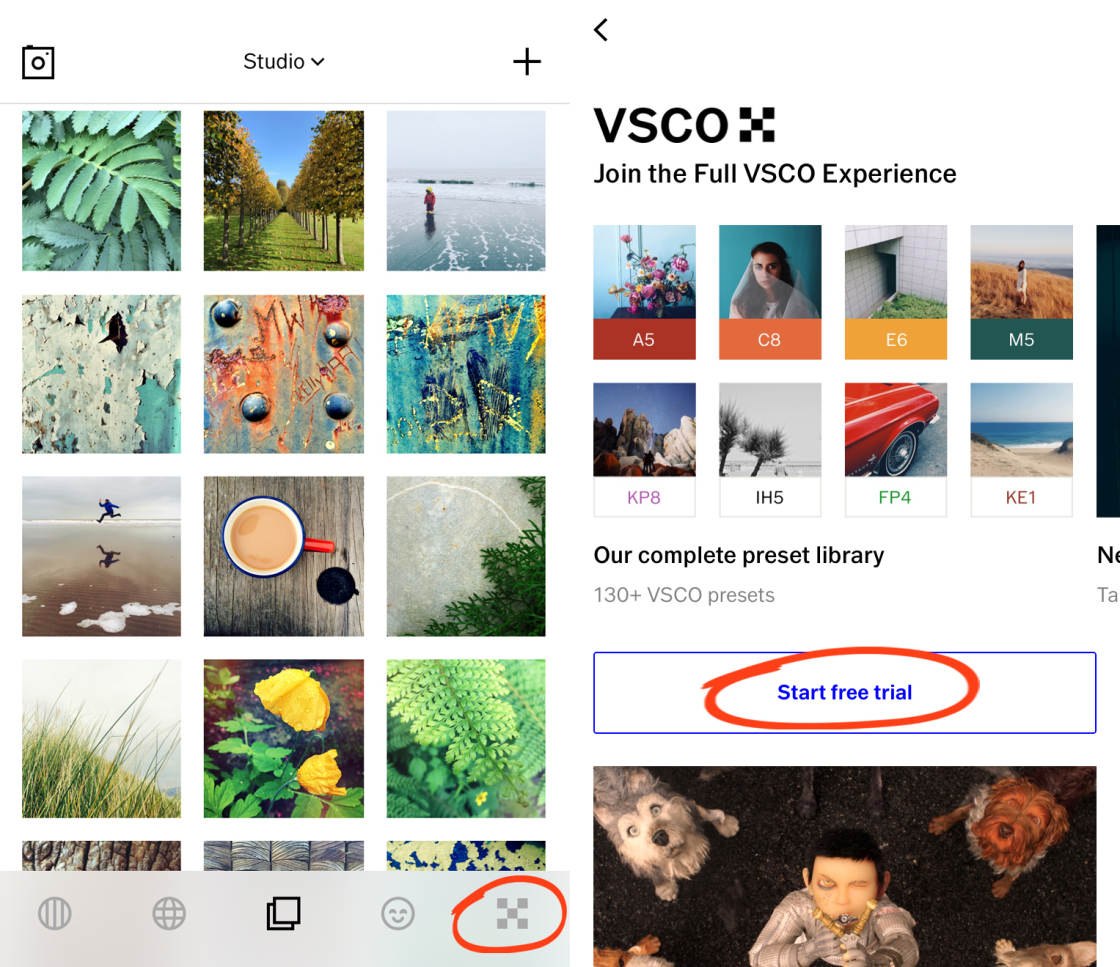
The 7-day free trial allows you to try out VSCO X (and all of the filters) before you commit to paying the annual subscription.

Edited with VSCO filter G1
Once you’ve signed up to VSCO X, you’ll have access to the full range of VSCO filters.
Now you can experiment with different filters to create just the look that you want.
The 7 Best iPhone Photography Apps
There are thousands of excellent photo apps on the App Store, and the things you can do with apps are absolutely incredible. With that said, the number of photo apps out there is overwhelming, and it's really hard to know which apps are worth getting.
That’s why we created this free report revealing the 7 best iPhone photography apps that you should start using straight away. Click here to download this free report.

3. VSCO Photo Editing Tools
VSCO has a wide range of photo editing tools for fine-tuning color, brightness, and sharpness. It also has adjustment tools for cropping, straightening, and correcting perspective problems.
To access the photo editing tools, select the photo you want to work on in your VSCO studio.
Then tap the Edit icon (two sliders) at the bottom of the screen. If you’ve already opened your photo to apply a VSCO filter, you can skip this step.
Tap the Edit icon (two sliders) at the bottom of the next screen. The VSCO photo editing tools appear beneath your image.
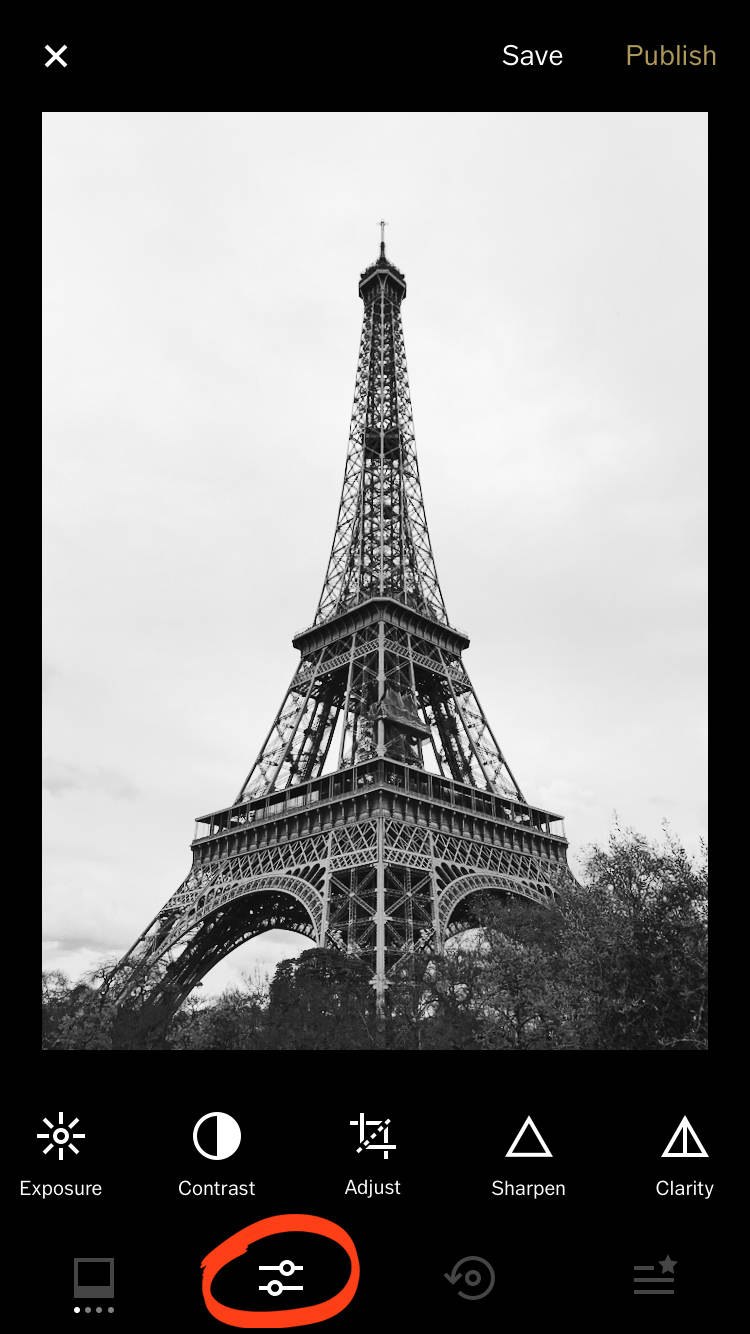
Swipe across the row of editing tools to see the full range of tools available.
Tap on a tool to access the options for that adjustment. Most tools have a single slider for making adjustments. But some tools have other options too.
Below you’ll discover how to create stunning VSCO edits using these photo editing tools.
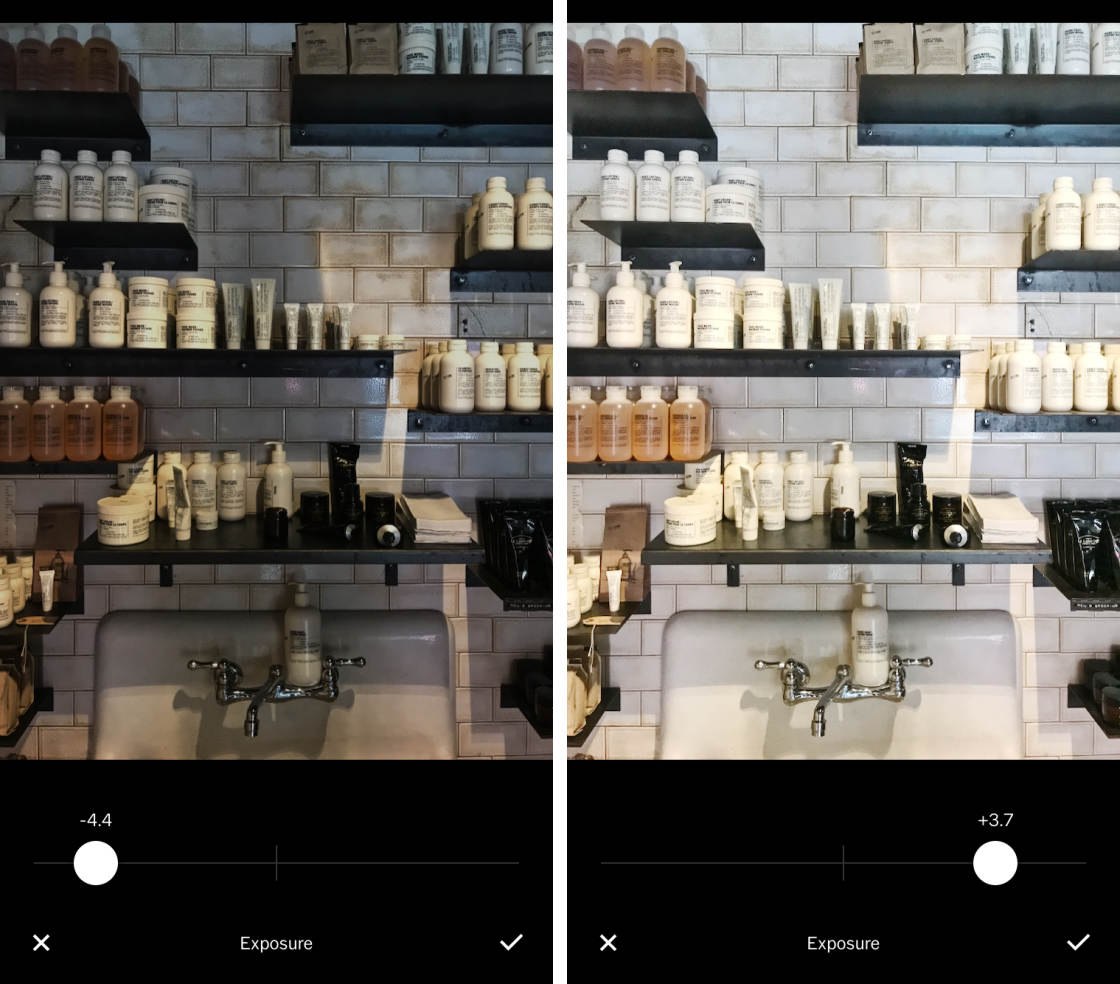
3.1 Exposure
The Exposure tool lets you change the image brightness. Drag the slider left to make your photo darker, or right to make it brighter.
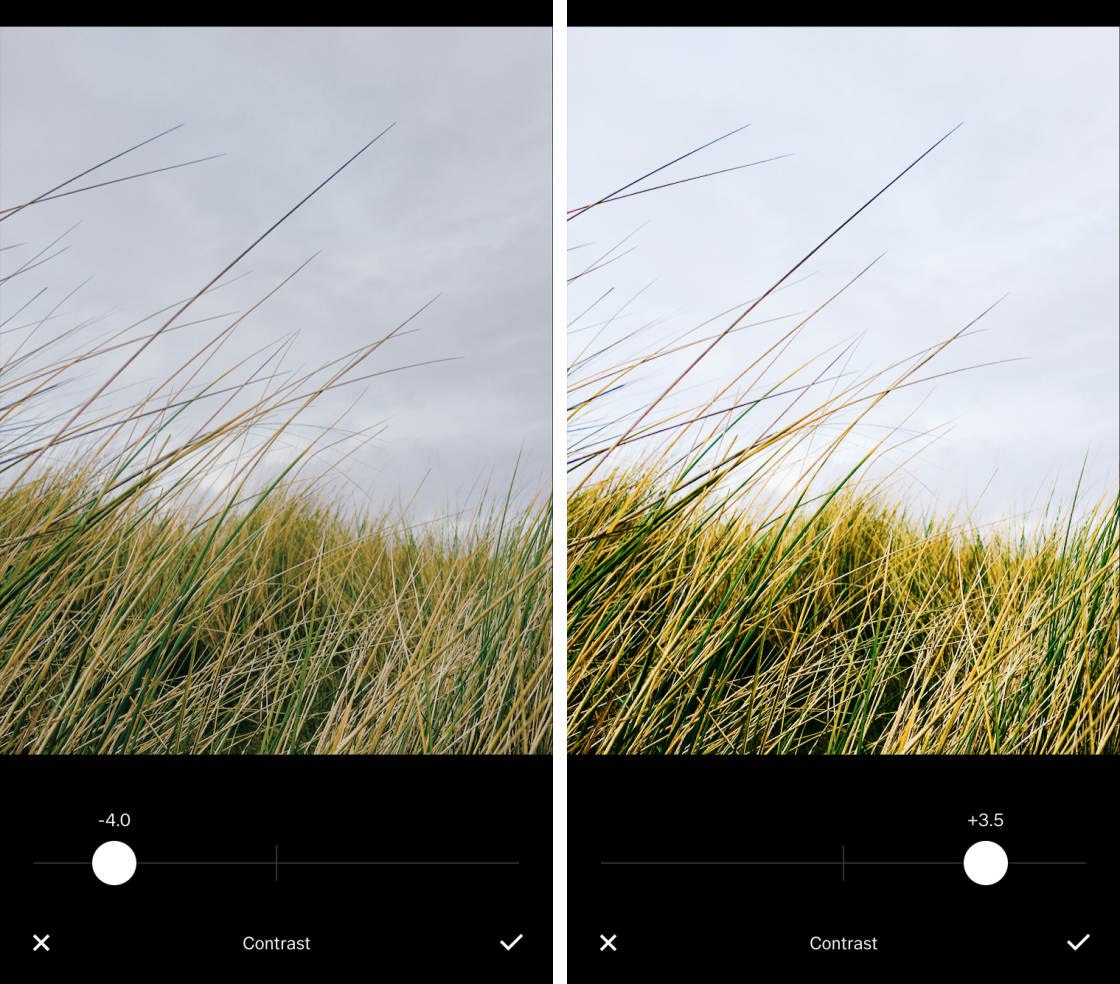
3.2 Contrast
The Contrast tool adjusts the amount of contrast between the bright and dark areas.
Increasing contrast makes the dark areas darker and the bright areas brighter. This creates a bold, dramatic image. Reducing contrast creates a softer image with less difference between dark and light.
3.3 Adjust (Crop, Rotate, Straighten & Skew)
The Adjust tool contains four image adjustment options: Crop, Rotate, Straighten and Skew.
To crop away the edges of your photo, ensure the Crop + Straighten option is selected. Then drag the corner handles to a new position. You can crop to a specific aspect ratio by tapping one of the options at the bottom of the screen, e.g. 1:1 (square), 4:5, 16:9, etc.
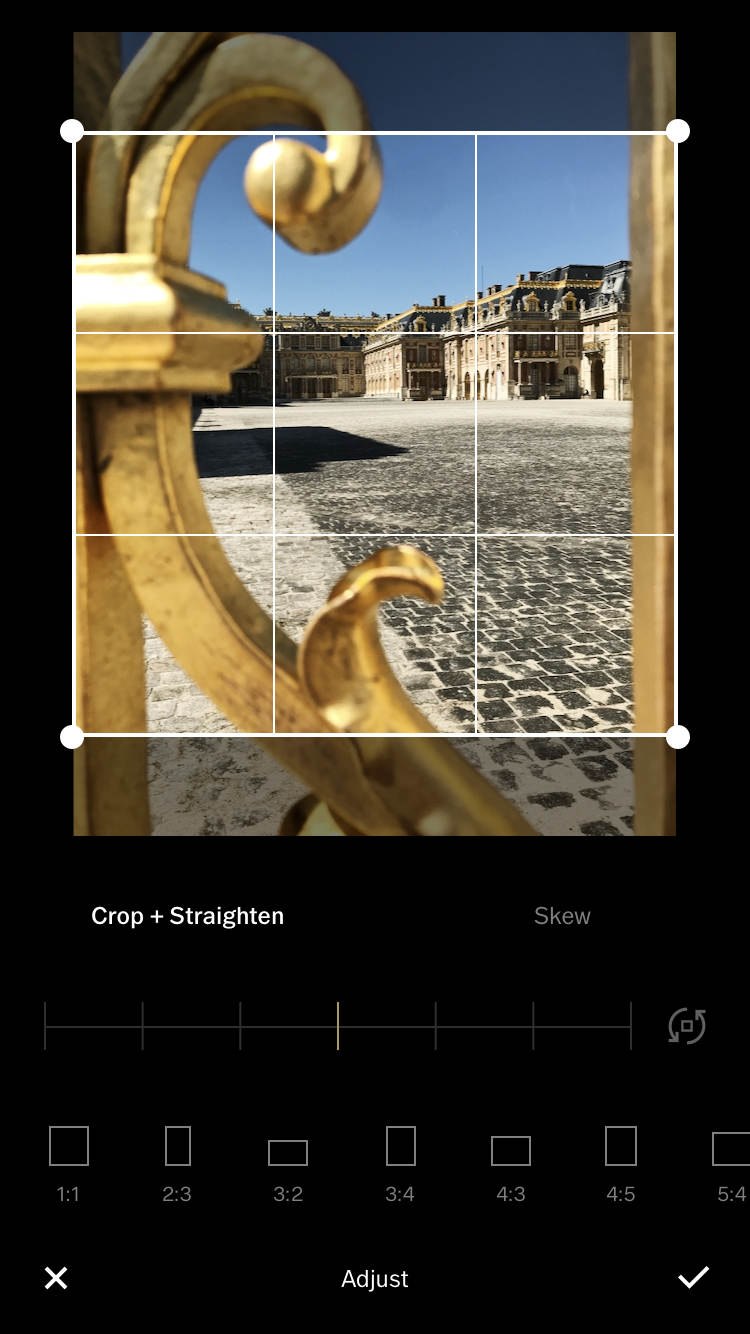
To straighten your photo, drag the slider left or right. This is perfect for leveling up slanted horizons in your landscape photos.
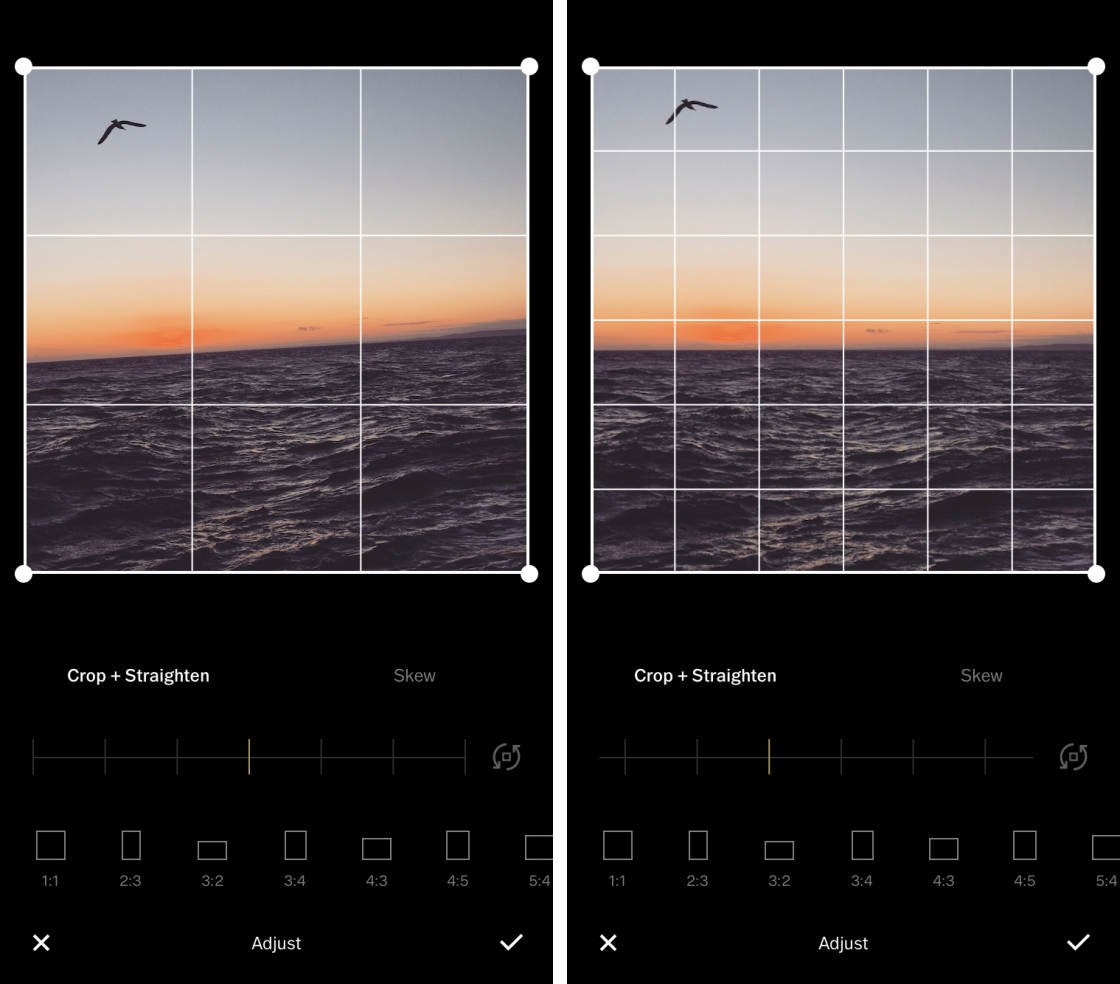
To rotate your image 90 degrees at a time, tap the Rotate icon (curved arrows) to the right of the slider.
The Skew option lets you correct problems with horizontal and vertical perspective.
If you’ve taken a photo looking up at a building, the top of the building will appear narrower than the bottom. Adjusting the vertical perspective can fix this problem, making the building appear straighter.
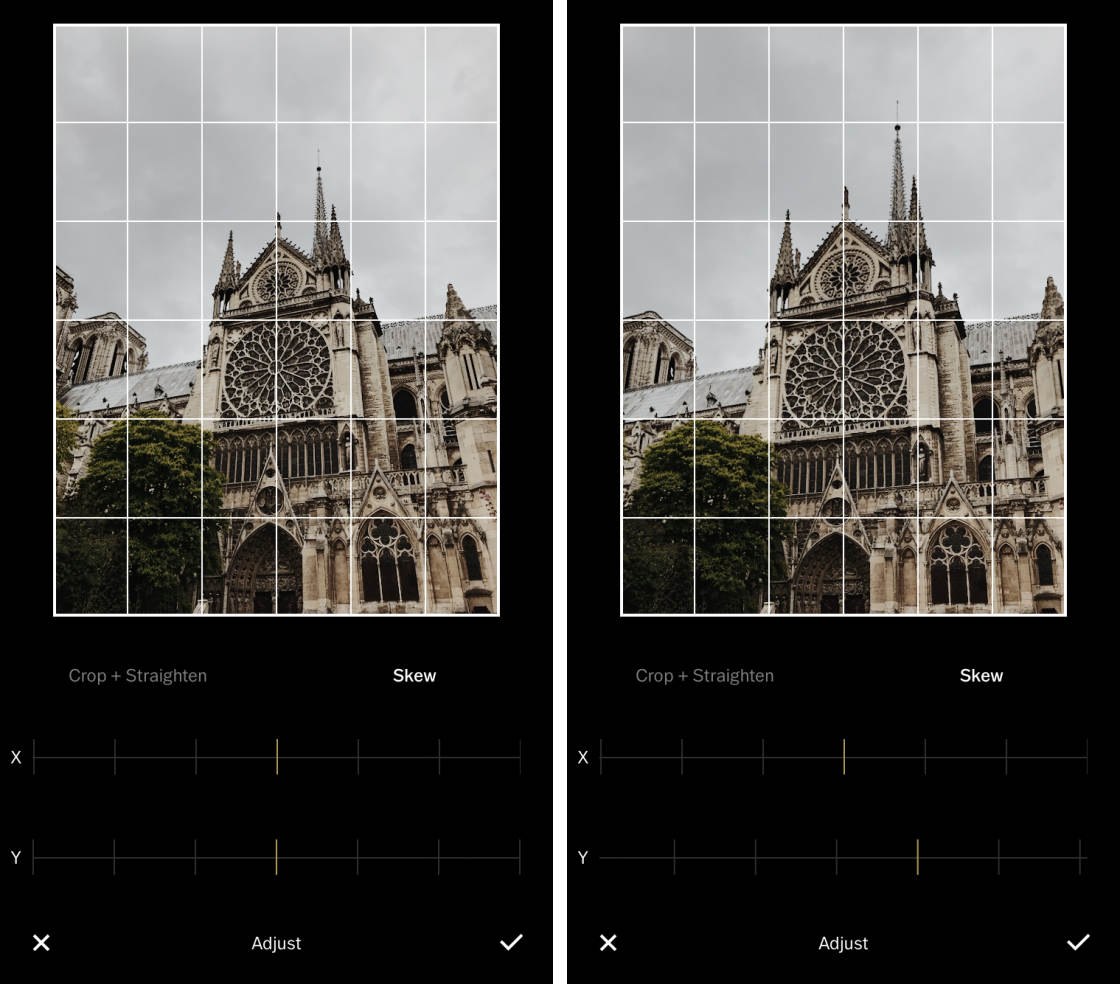
Tap Skew, then use the Y slider to adjust vertical perspective. Use the X slider to control horizontal perspective.
To return to the Crop, Straighten and Rotate tools, tap Crop + Straighten.
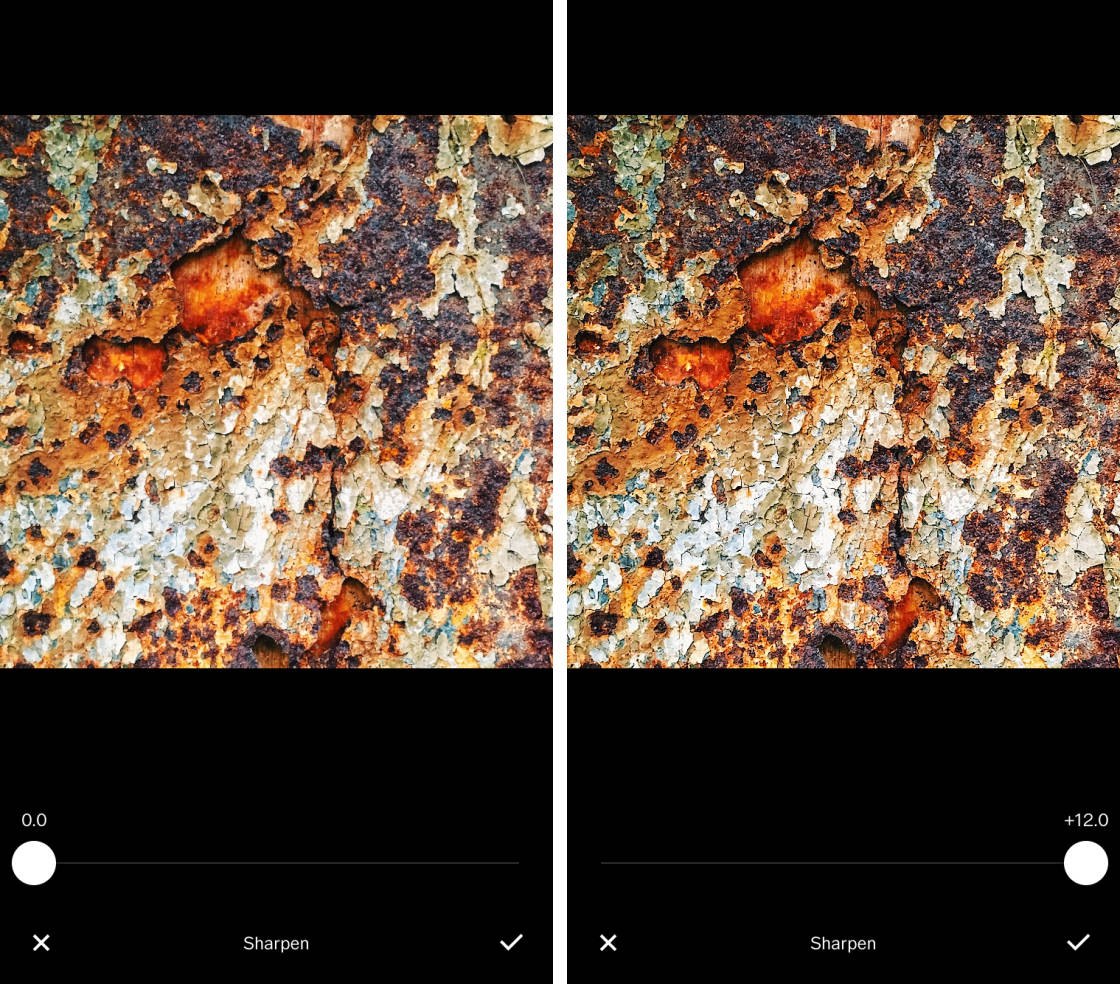
3.4 Sharpen
Use the Sharpen tool to makes the detail in your photo appear sharper and more defined.
Be careful not to over-sharpen though. Too much sharpness can degrade the quality of your photo, making it appear slightly grainy.
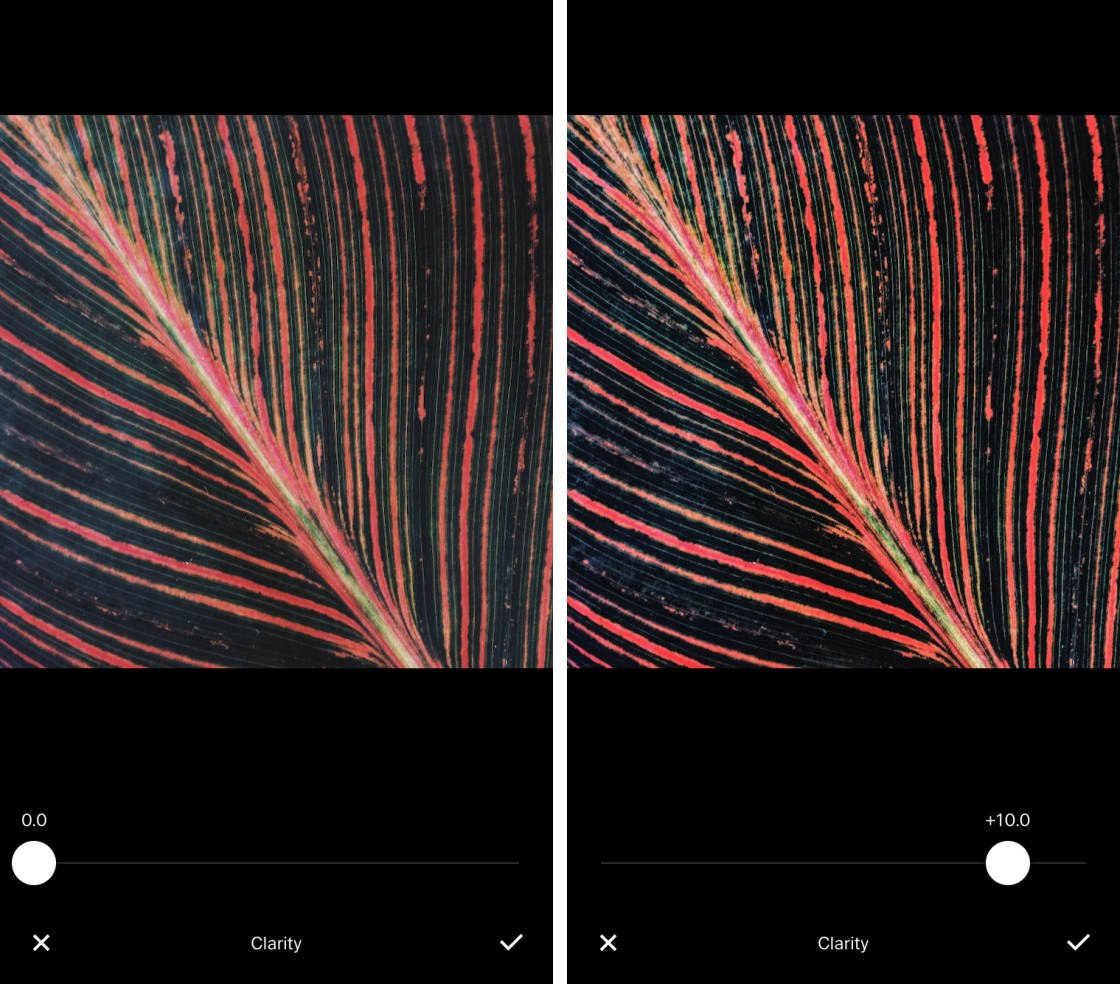
3.5 Clarity
The Clarity tool enhances detail in your photo and makes your image “pop.”
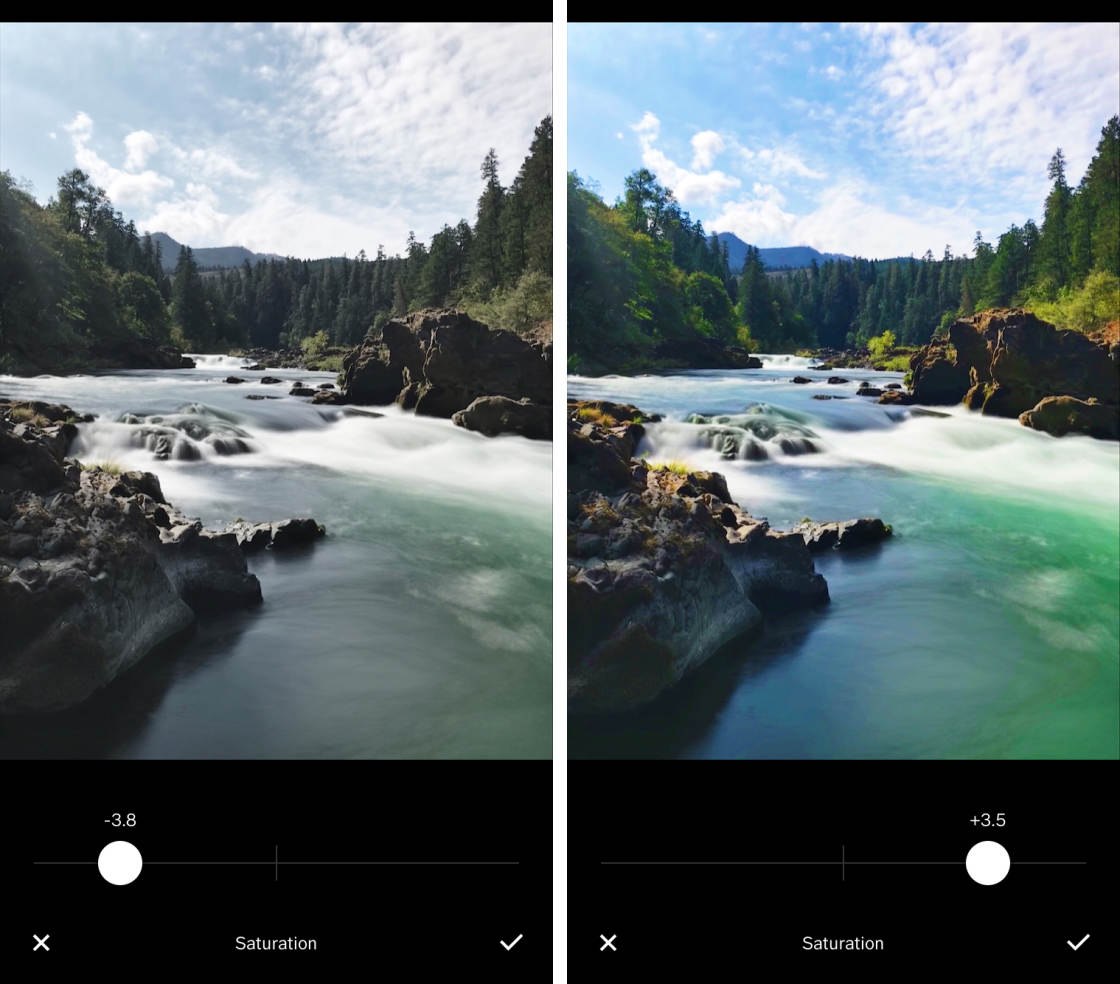
3.6 Saturation
The Saturation tool controls the vibrancy of colors in your photo. Increase saturation to make the colors more vibrant. Or decrease it to make colors more muted.
3.7 Tone
The Tone tool lets you control the brightness of highlights and shadows separately. Highlights are the bright tones in your image. Shadows are the dark tones.
Use the Highlights slider to darken areas of your image that are too bright. And use the Shadows slider to brighten areas that are too dark.
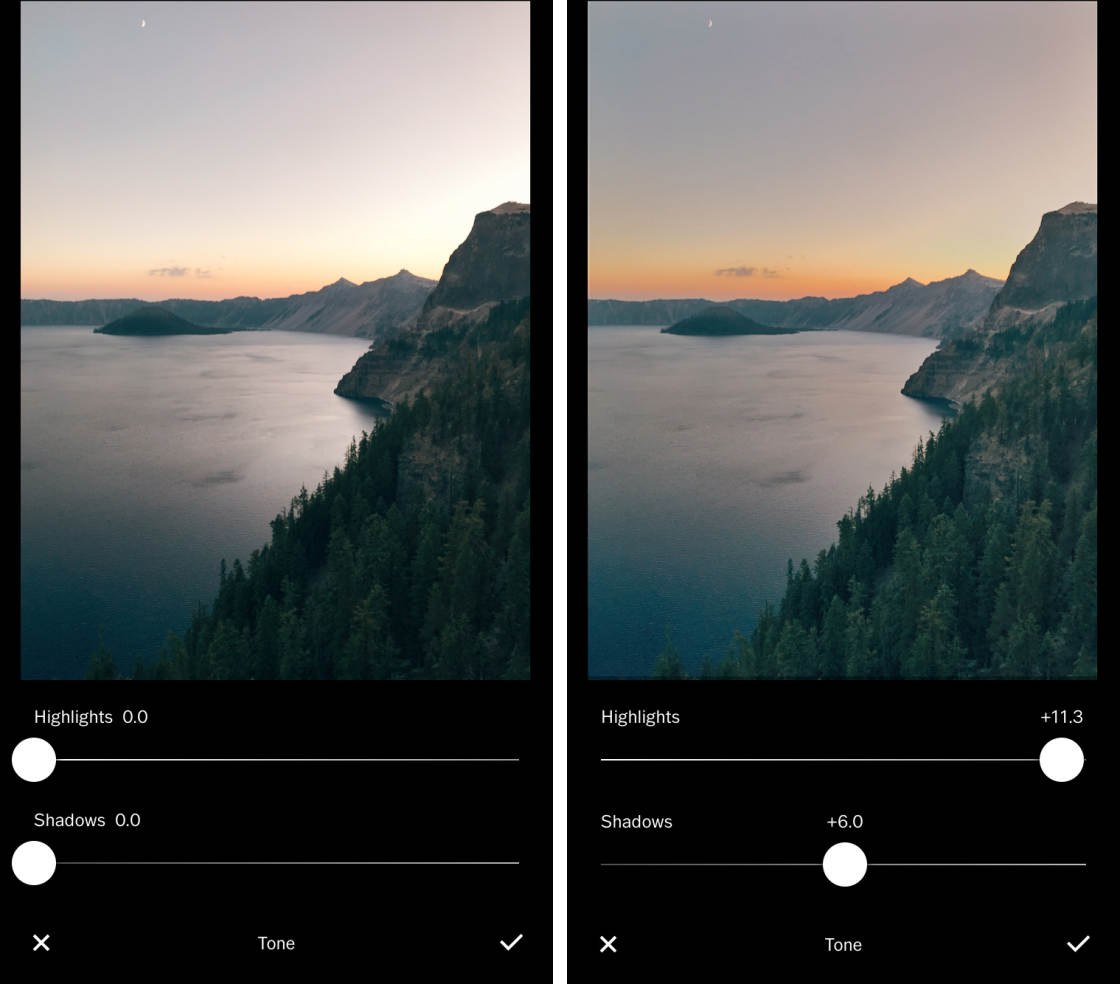
These tools bring out color and detail in the bright and dark parts of your photo. But if an area is so over-exposed that it appears pure white, you probably won’t be able to retrieve any detail.
Also, be careful not to over-apply these settings. Darkening highlights and brightening shadows can result in an image with not enough contrast.
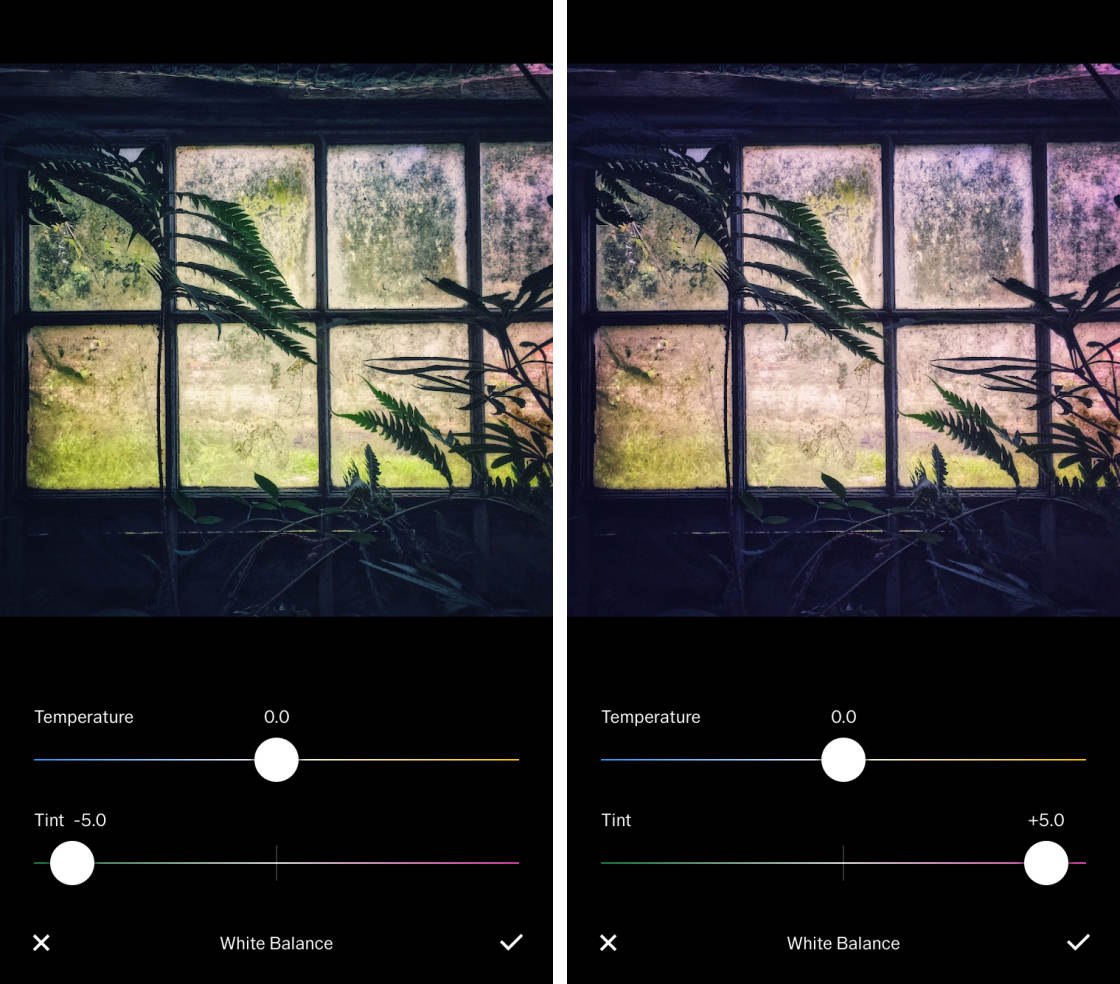
3.8 White Balance
The White Balance tool lets you adjust the color tone of your photo with two sliders. You can use this tool to change the mood of your photo. It’s also useful for correcting color casts caused by different types of light.
The Temperature slider makes the colors cooler (more blue) or warmer (more orange).
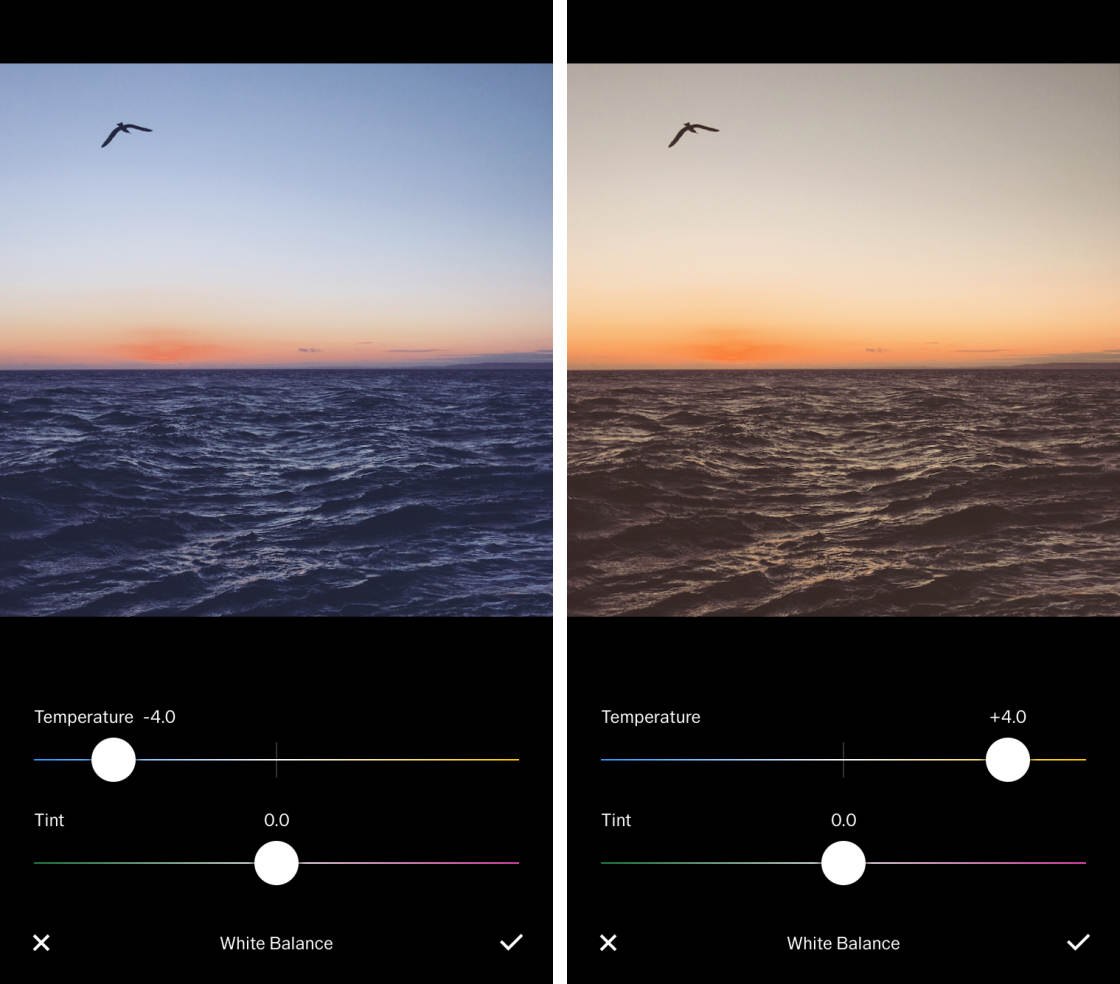
Making the colors cooler can create a cold, lonely or melancholy mood. A warmer orange tone creates a happier, vibrant mood. Warming up the color temperature is perfect for enhancing your sunset photos.
The Tint slider adds a green or purple color tint to your image. Dragging the slider to the green end of the scale is great for boosting the green tones in your photos.
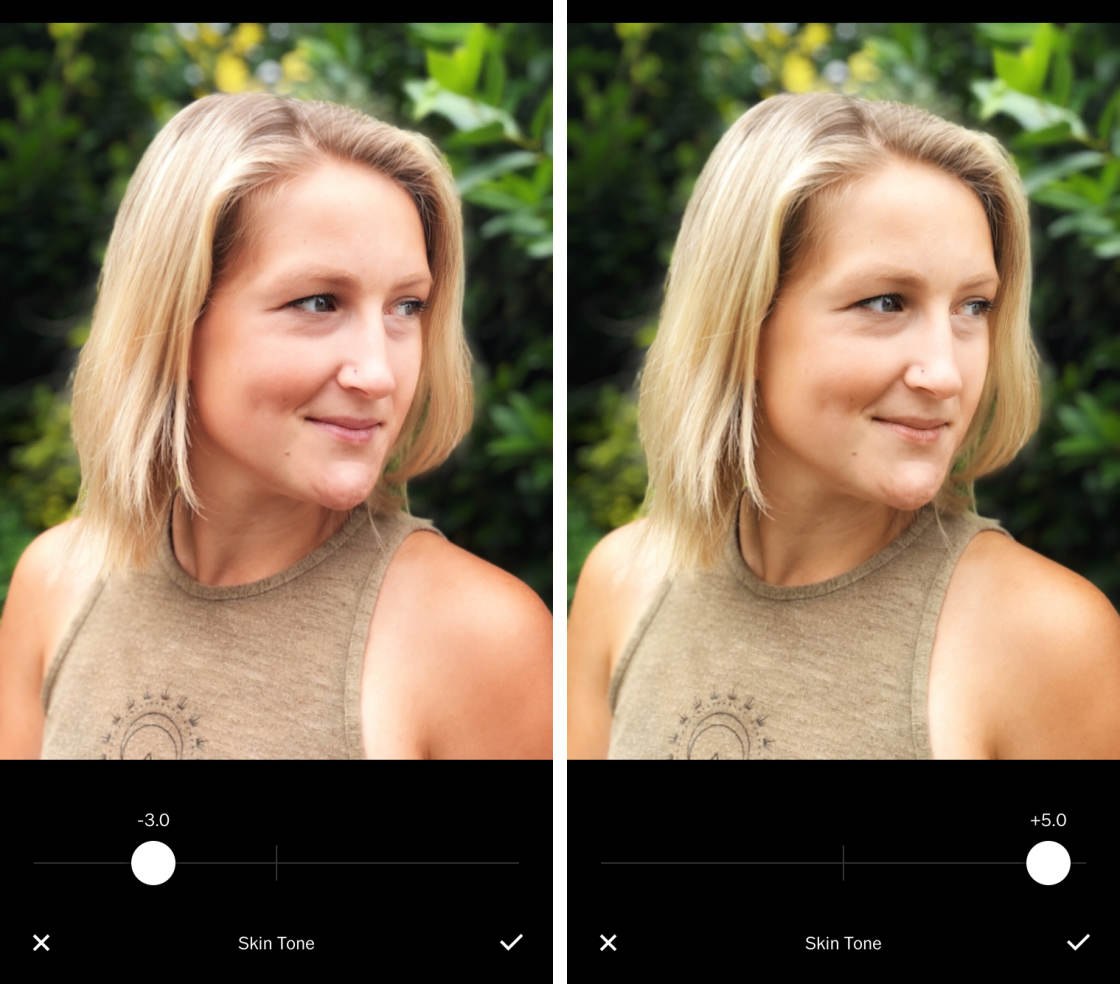
3.9 Skin Tone
The Skin Tone tool is great for enhancing the skin color in your portrait photos. Drag the slider left to add more pink tones. Or drag it right to make the skin tone appear yellower or more tanned.
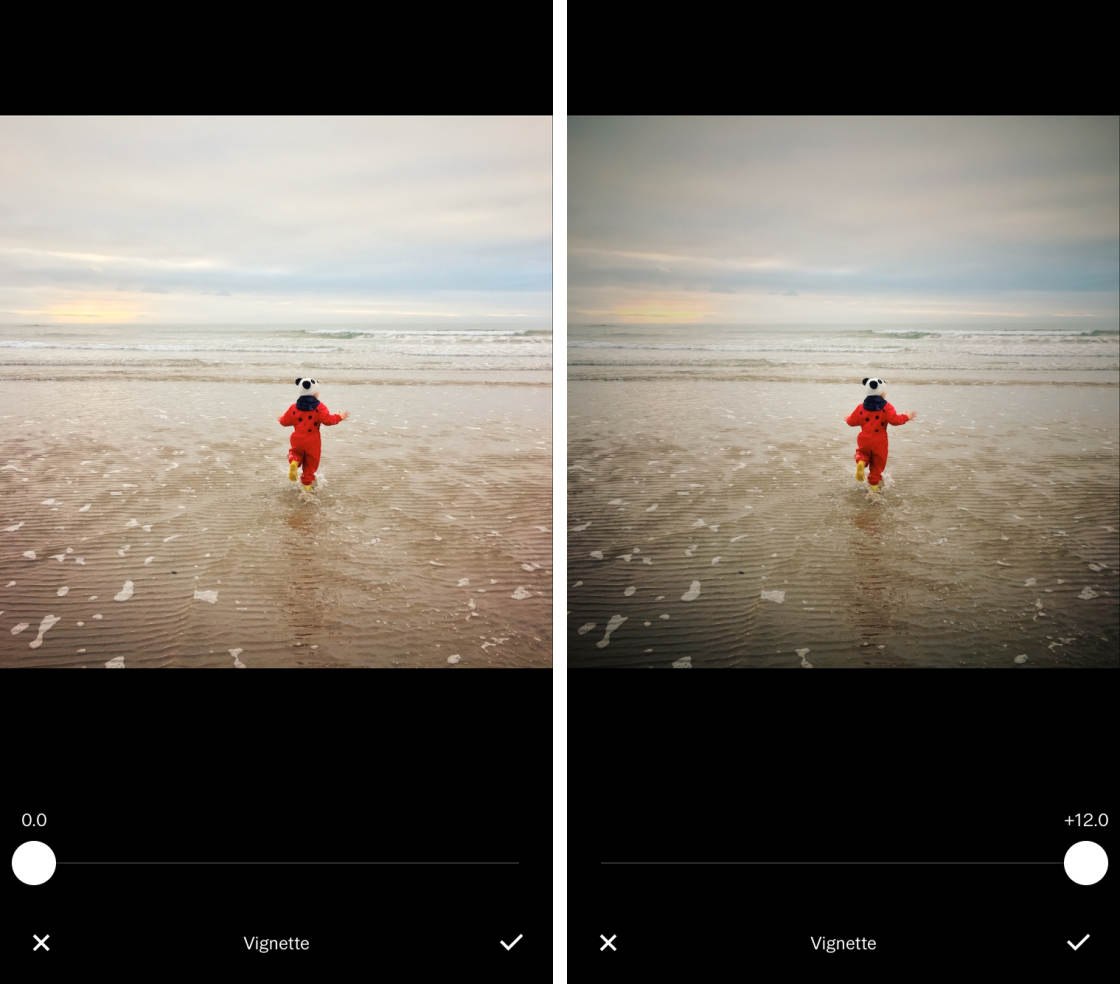
3.10 Vignette
The Vignette tool subtly darkens the edges of your image. Vignettes can add drama to your photos. And you can use them to draw the viewer’s attention to the center of the scene.
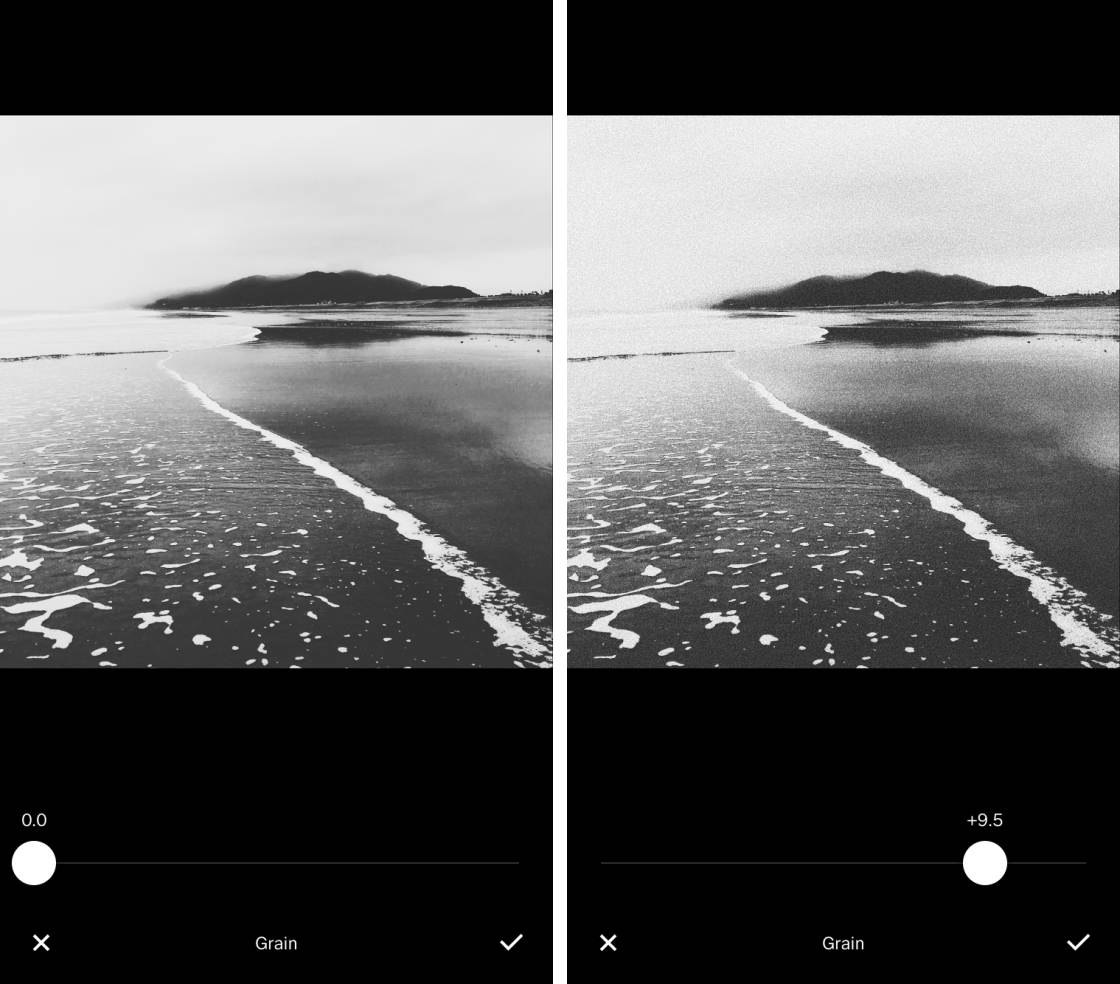
3.11 Grain
Use the Grain tool to create the look of film grain in your photo. Grain isn’t usually a desirable feature in a photo, but in certain situations it can work.
Grain can add a gritty, vintage look to your images, especially when used with a black and white filter.
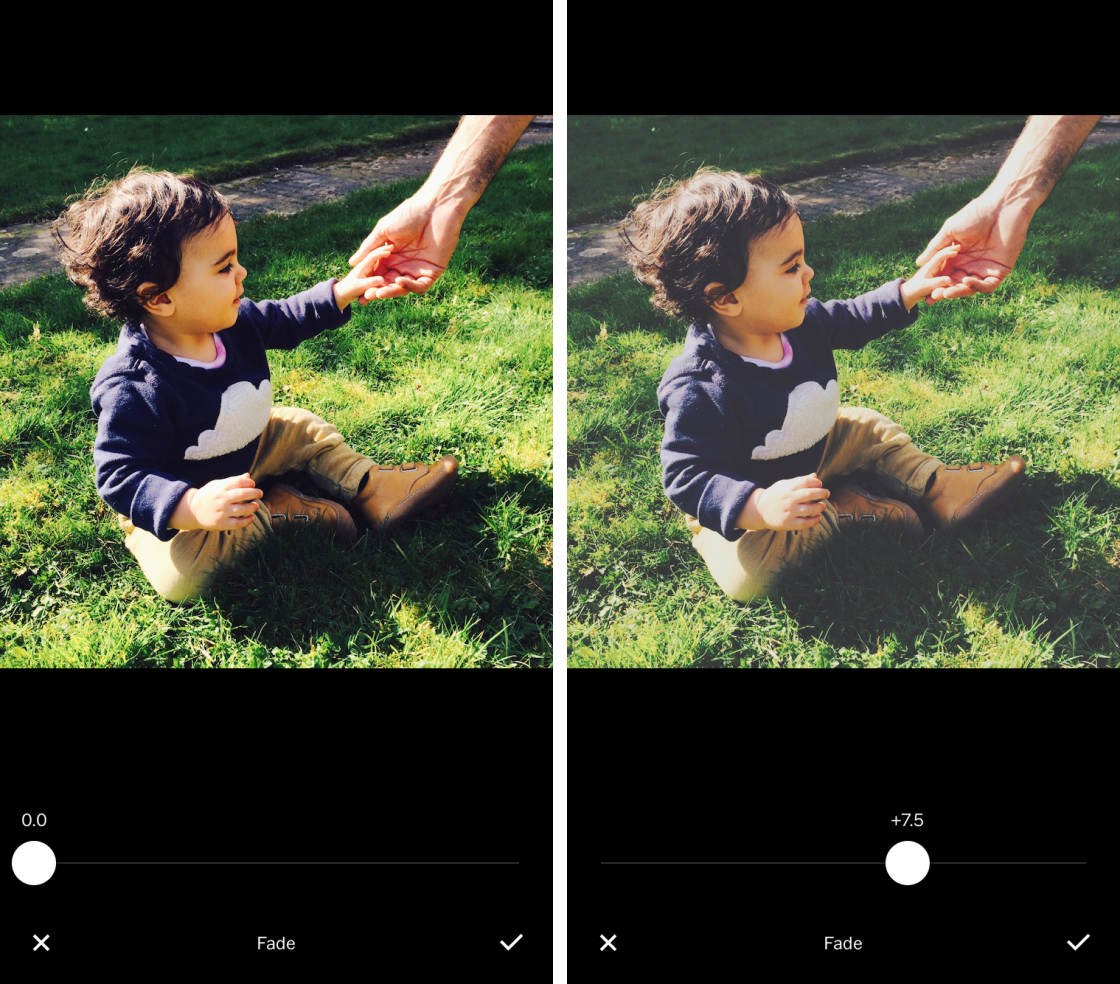
3.12 Fade
The Fade tool washes out the colors in your photo to create a faded, vintage look.
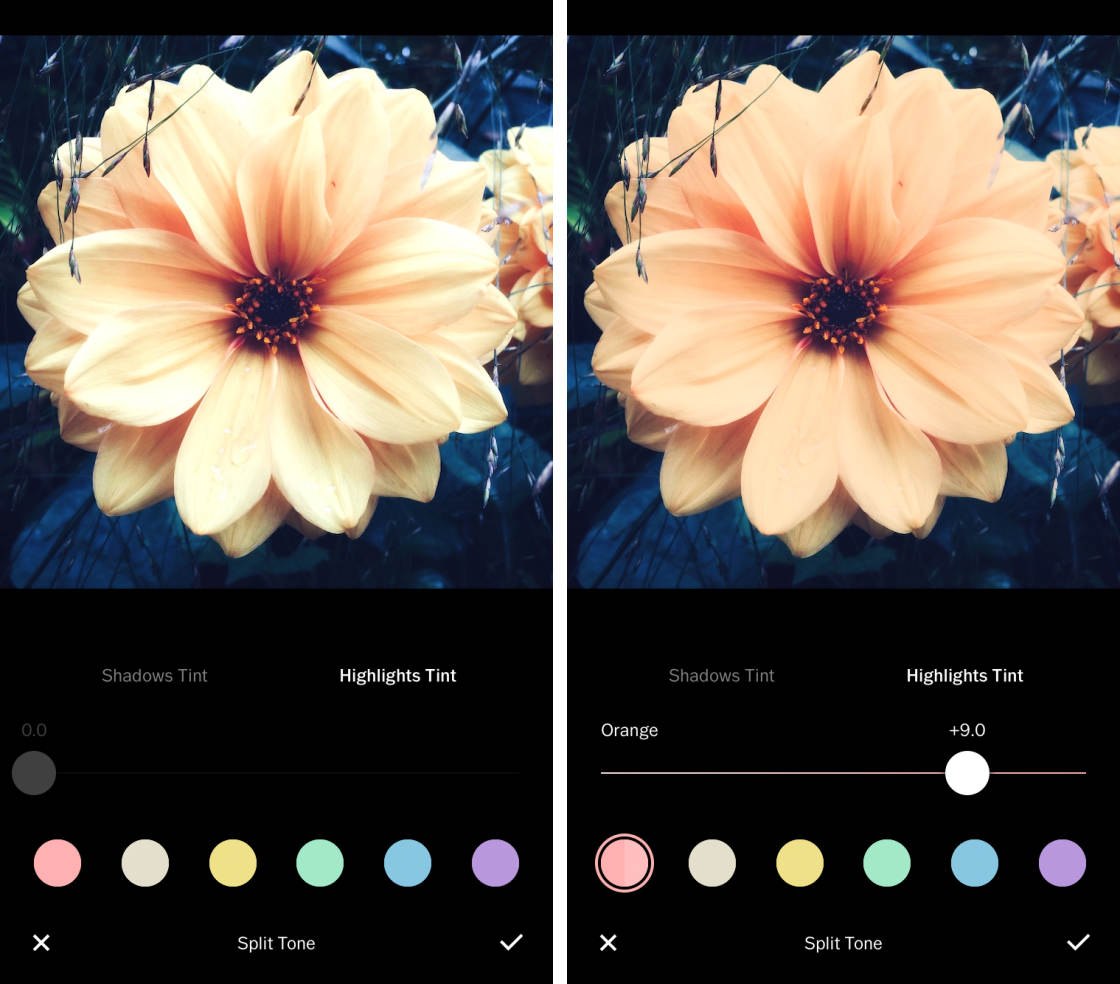
3.13 Split Tone
The Split Tone tool lets you add different colored tints to either the shadows or highlights.
To tint the dark areas of your photo, select Shadows Tint. Next, select a color at the bottom of the screen. Then use the slider to adjust the strength of the tint.
The example on the right has a blue tint applied to the dark areas of the image.
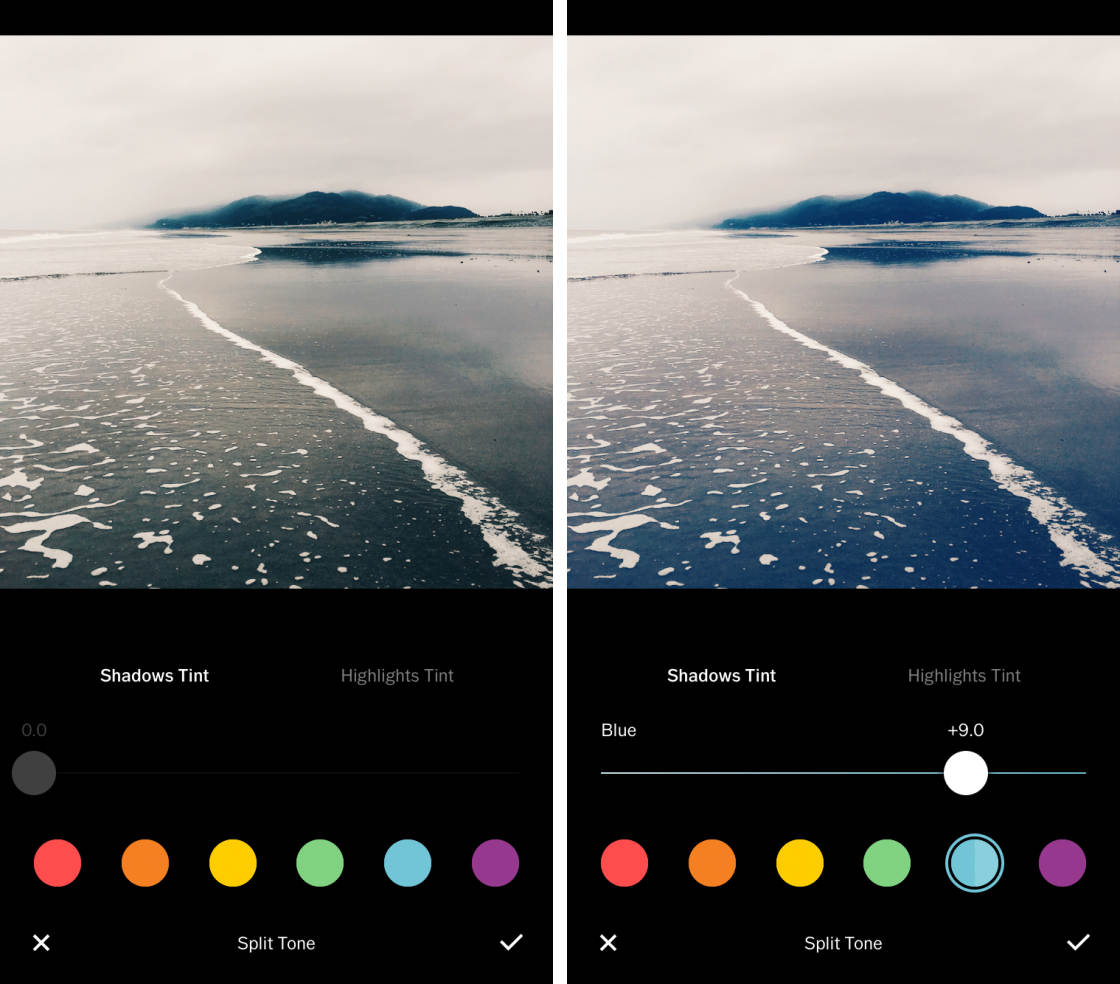
To tint the bright areas, select Highlights Tint. The example of the right below has an orange tint applied to the bright areas of the photo.
3.14 Borders
You can add a border around your image using the Borders tool. A border can add a finishing touch to your edited photos.
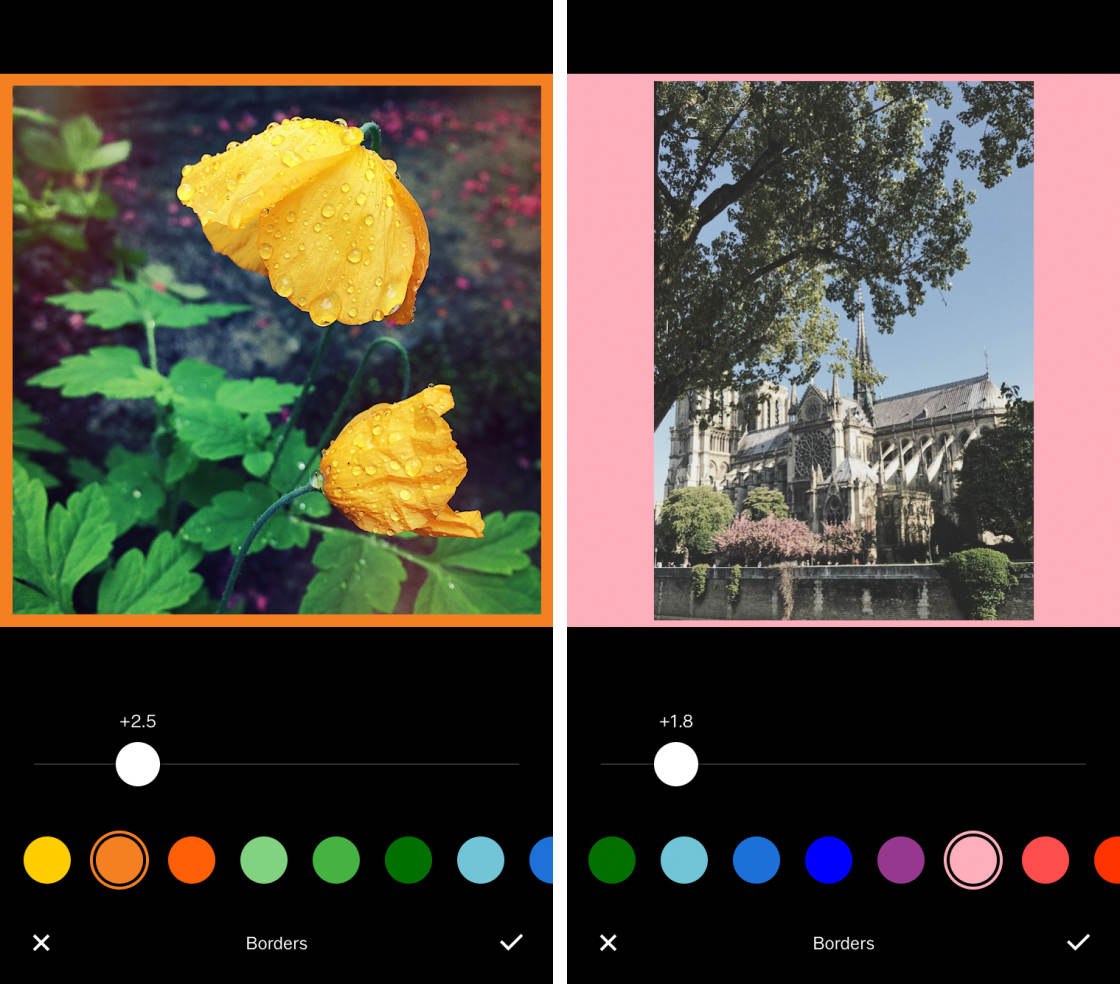
Drag the slider right to increase the width of the border. Then choose a border color from the circles beneath the slider.
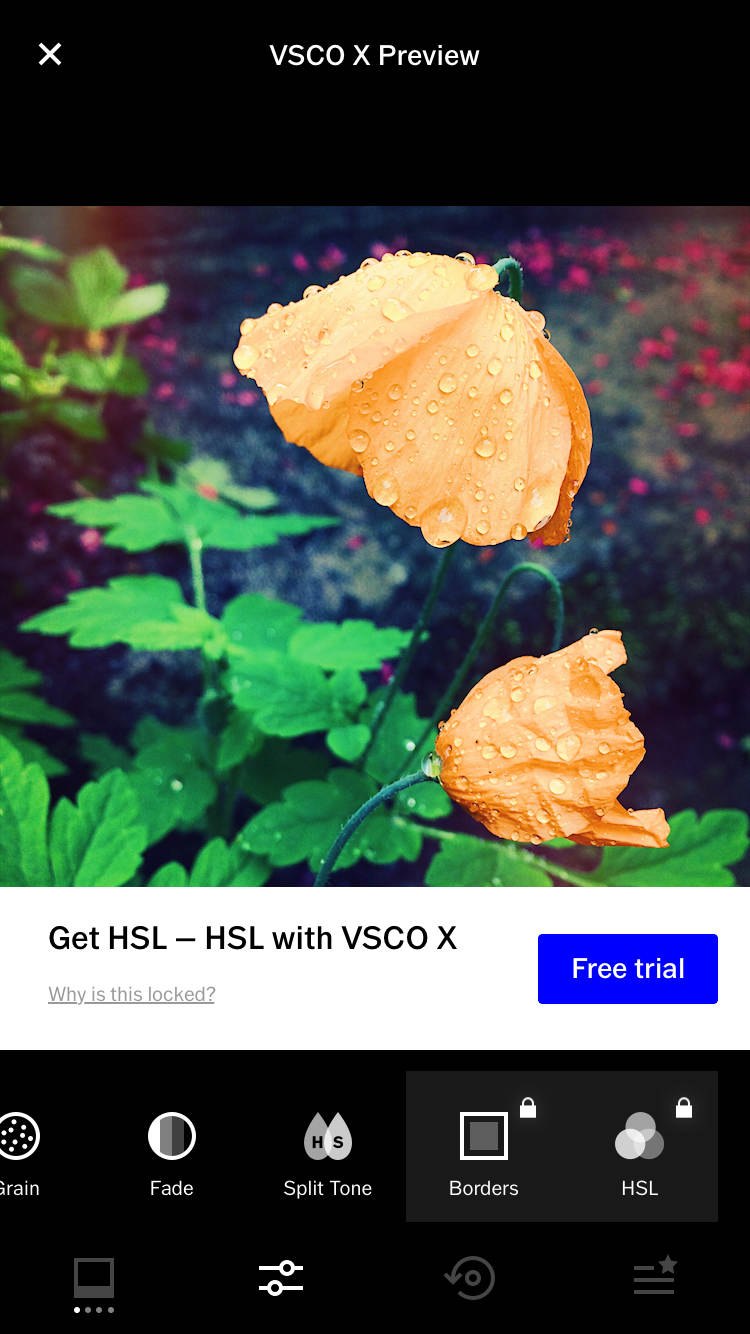
Note that the Borders tool is locked with the free version of the app. You can use the tool, but you can’t save your border unless you subscribe to VSCO X.

With VSCO X, you pay $19.99 a year to get access to every VSCO photo editing tool and filter.
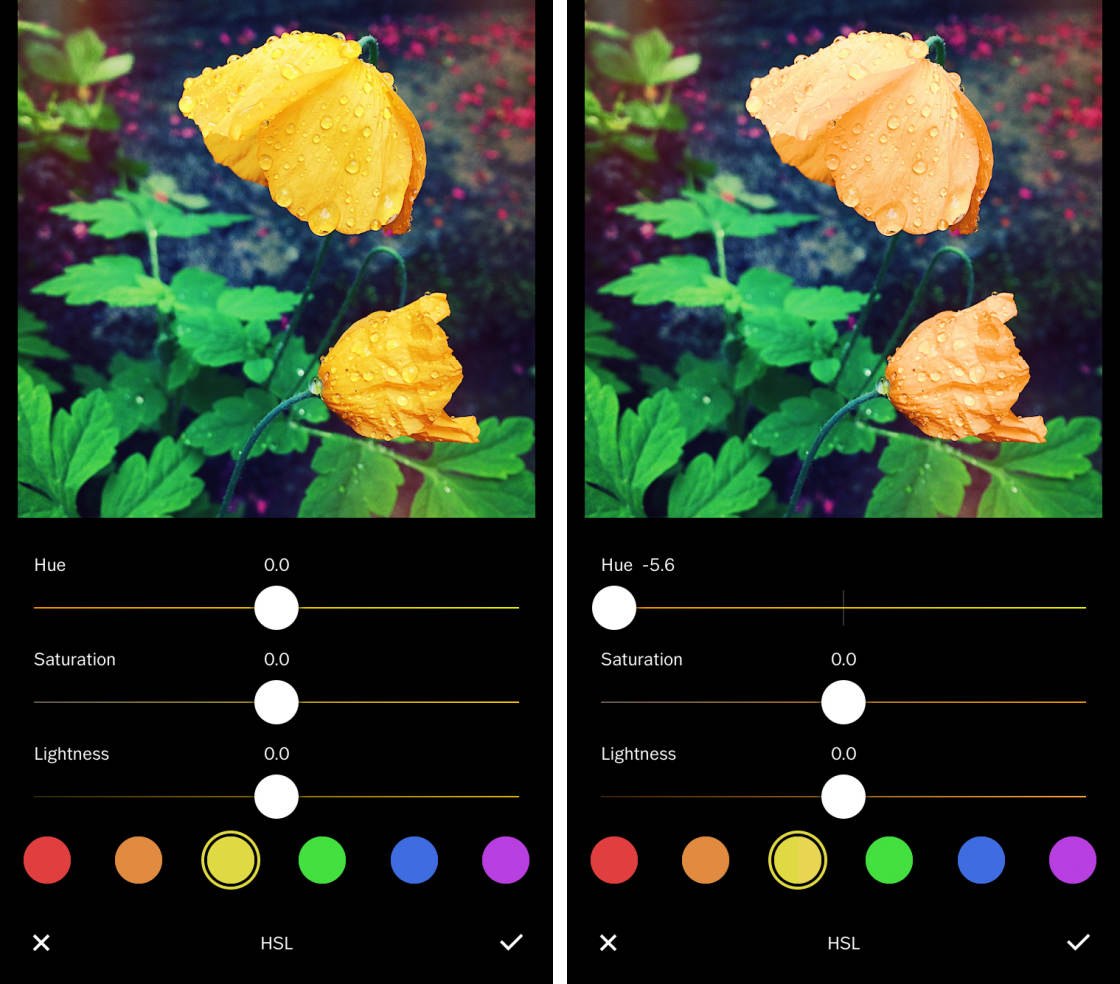
3.15 HSL (Hue, Saturation & Lightness)
HSL stands for Hue, Saturation, and Lightness. These tools let you control the hue, saturation, and lightness for each color in your image.
Start by selecting the color you want to change using the colored circles at the bottom of the screen. Then drag one of the sliders to adjust only that color in your photo.
Hue refers to the particular shade of a color. In the example below, only the yellow hues in the photo have been changed using the Hue slider.
Saturation describes a color’s intensity. In the examples below, the Saturation slider was used to adjust the vibrancy of only the blue colors.
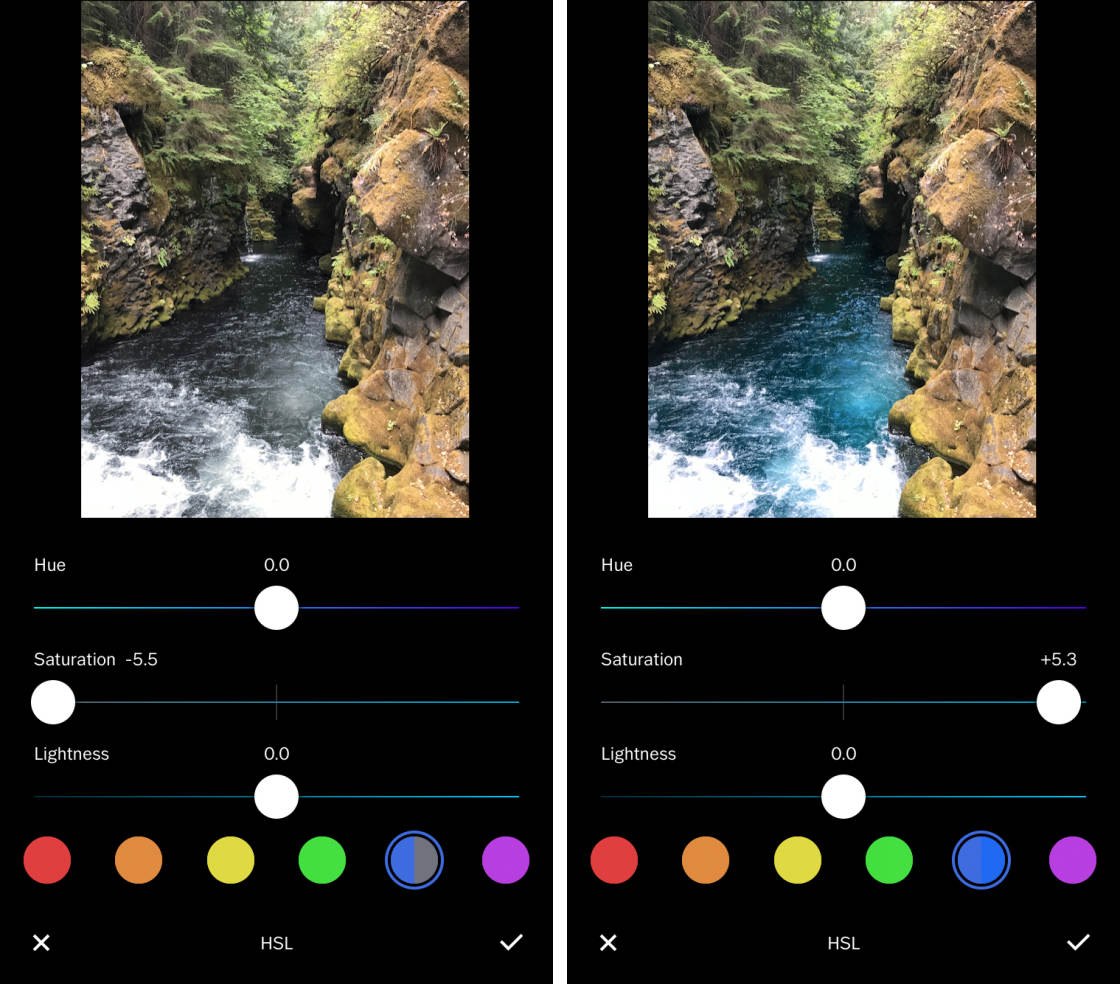
In the left photo, saturation was reduced, making the blues appear more muted. In the right photo, saturation was increased, making the blues appear more vibrant.
The Lightness slider lets you change how dark or light a particular color is. In the examples below, the lightness of only the blues was adjusted.
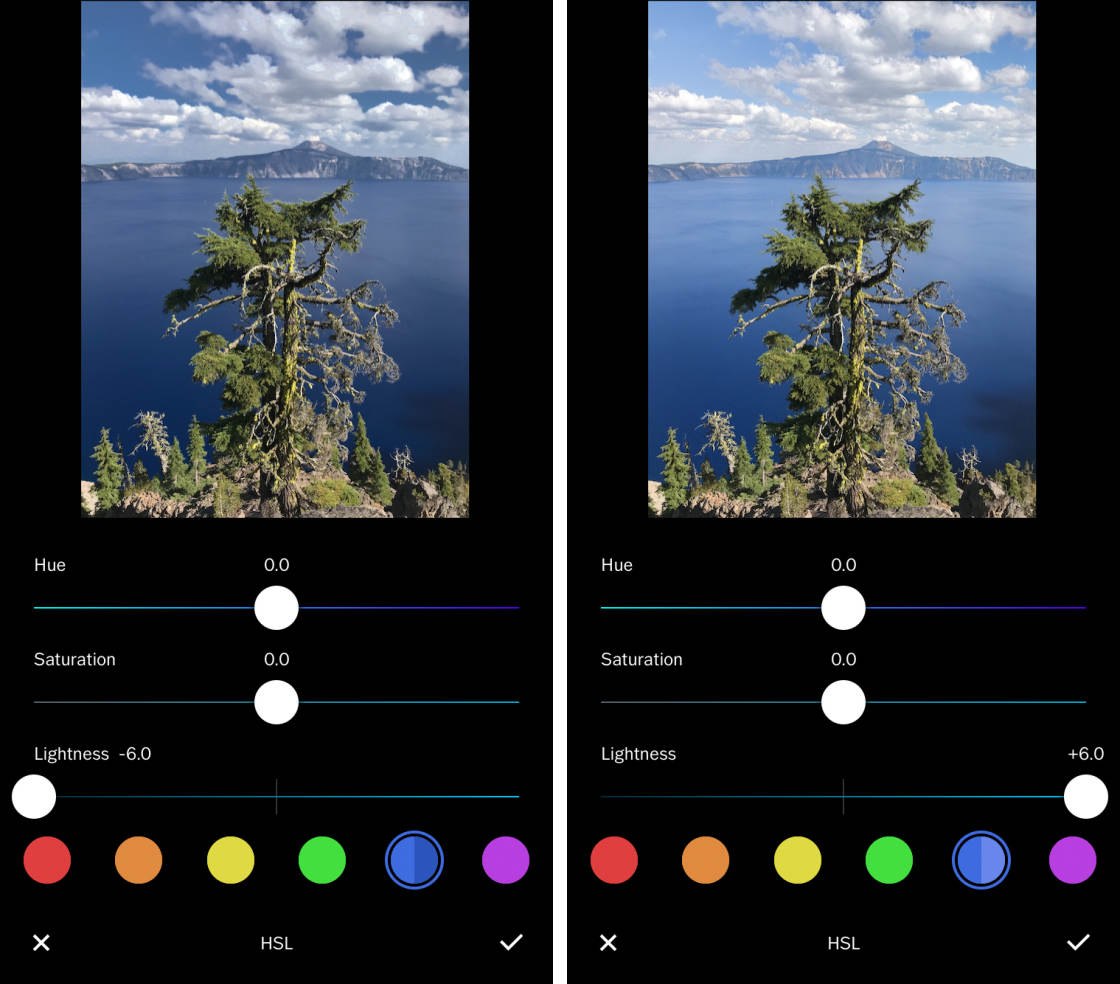
In the left photo, the lightness of the blues was reduced. This makes the blue sky and water appear darker. In the right photo, the lightness of the blues was increased. The sky and water appear lighter, while the rest of the colors in the photo are unaffected.
As you can see from these examples, the HSL tool gives you ultimate control over every color in your photo.
It’s a powerful photo editing tool, but it’s locked in the free version of the app. You can use the tool, but you can’t save your edits unless you subscribe to VSCO X.
3.16 Change Or Delete Individual Edits
VSCO allows you to view, change or delete individual edits that you made to an image. This is a useful tool for seeing what edits you’ve made and tweaking them further. It’s also helpful if you want to delete an edit that you no longer want.
At the bottom of the VSCO editor screen, tap the circular arrow icon. A list of your VSCO edits appears beneath the image. Scroll down to see more edits.

When you tap an item in the list, two icons appear. Tap the trash icon to delete that edit from your image. Or tap the slider icon to open the adjustment slider for that particular edit.
To delete all edits that you made to the image, scroll to the bottom of the list and tap Clear All.
4. Save Your Edited Photo
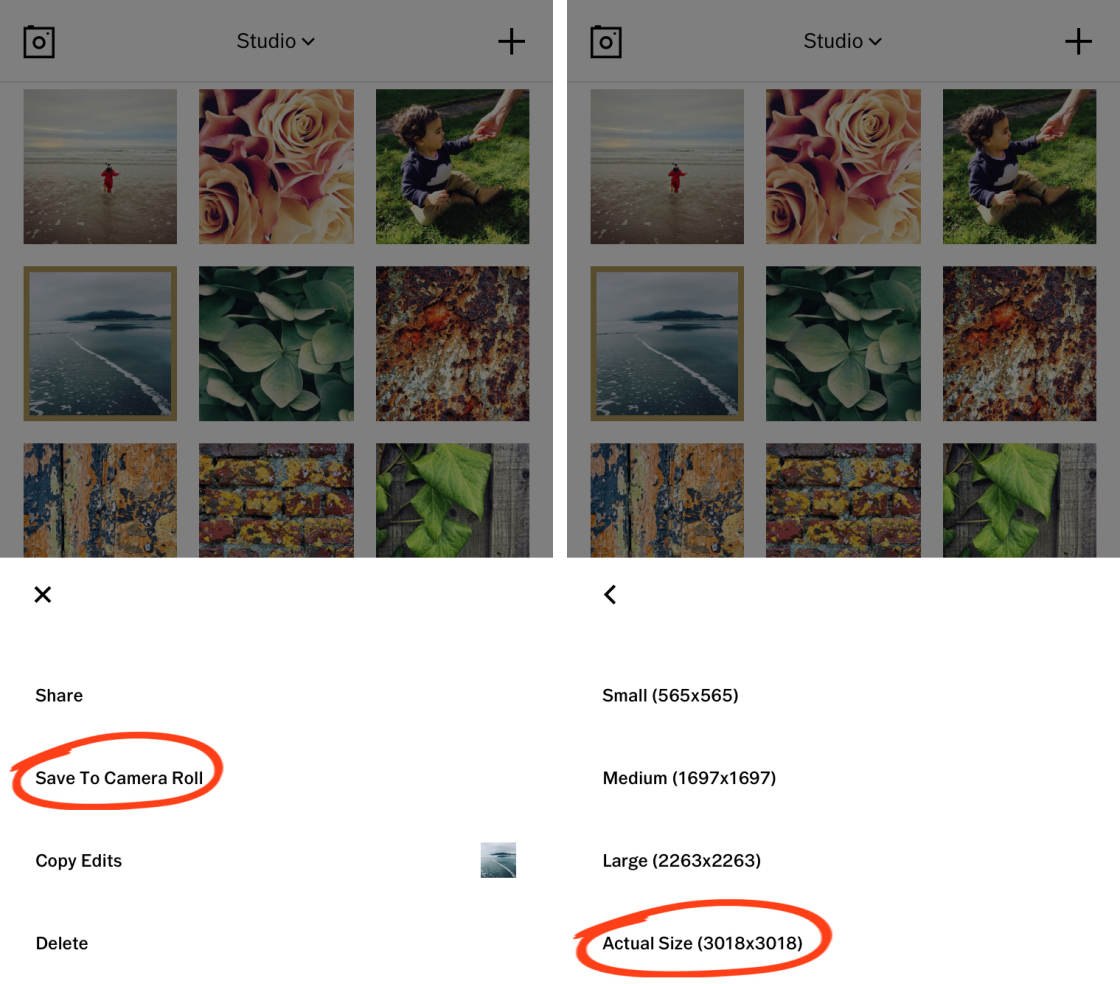
When you’ve finished editing your photo, tap Save at the top of the screen. This saves your edited photo into your VSCO studio.
You now need to save the image to the Photos app on your iPhone. Select the image in your VSCO studio. Or select several images to save them all to your Photos app in one go. Then tap the Options icon (three dots) at the bottom of the screen.
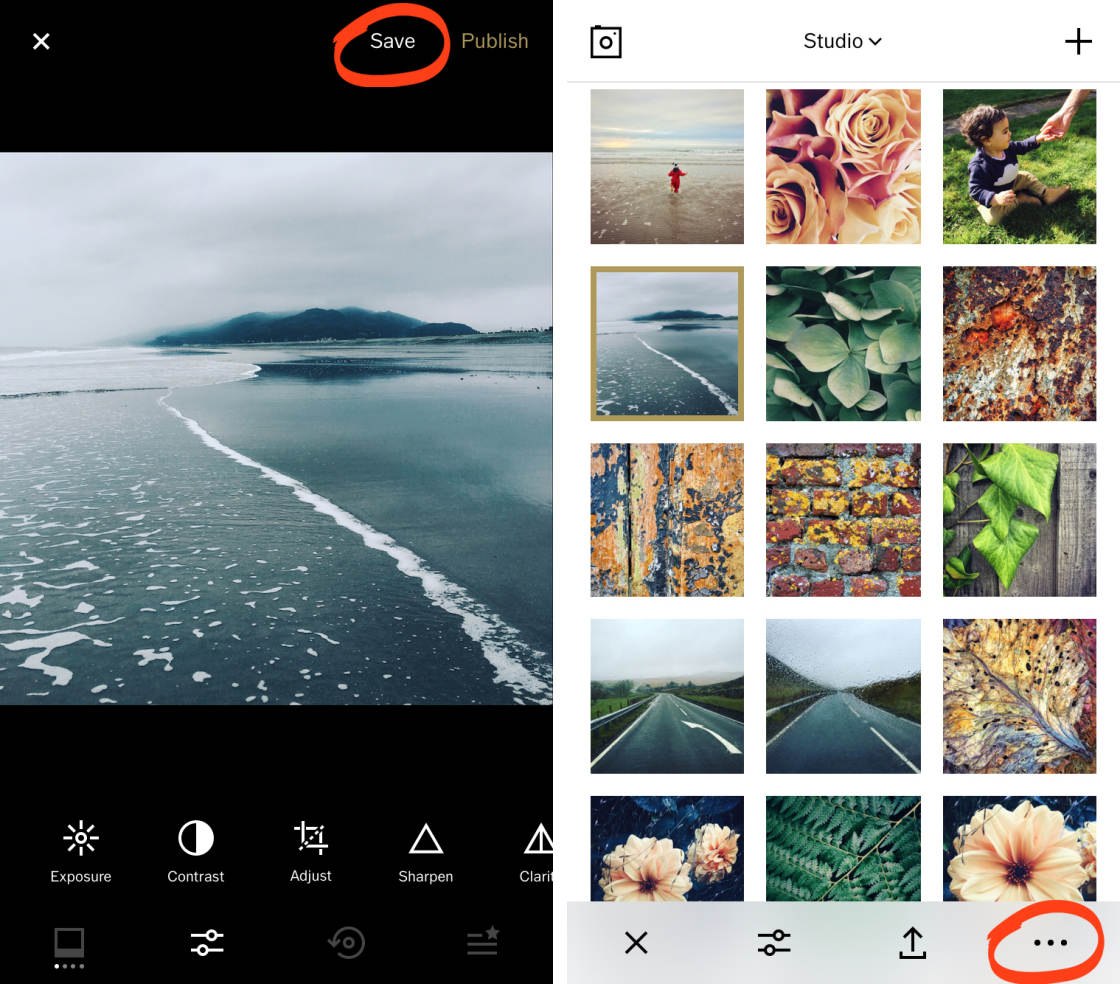
In the pop-up menu, tap Save To Camera Roll. Then select Actual Size to save the image at the largest size and highest quality.
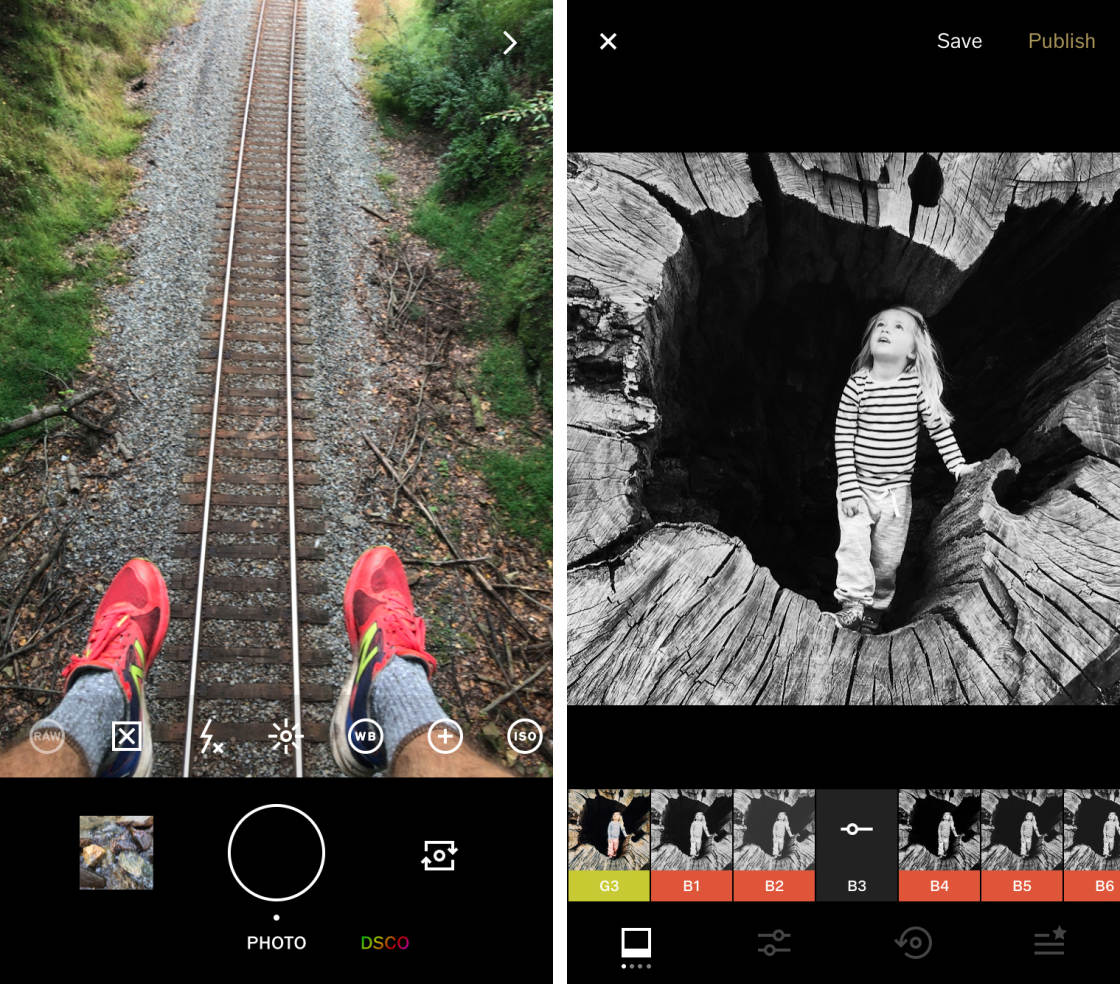
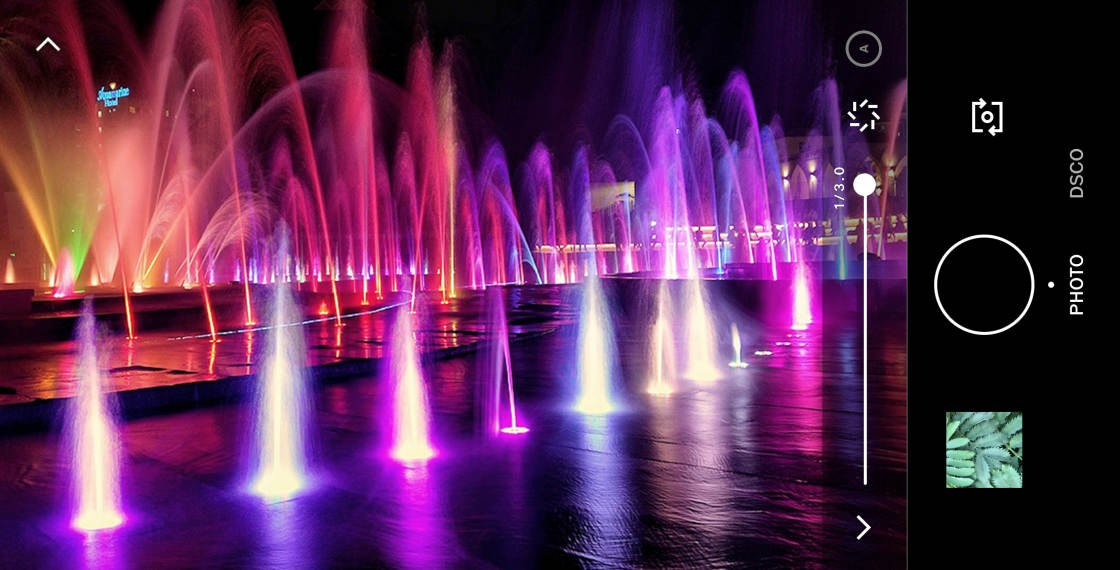
5. How To Use VSCO Camera
You can use the VSCO camera to take photos, instead of using the iPhone’s built-in Camera app. Tap the Camera icon at the top of the VSCO studio screen.
You can use the camera’s auto settings. Or take control with DSLR-like advanced manual camera controls.
These include exposure compensation, shutter speed, ISO, white balance and manual focus.
Below you’ll learn how to use the VSCO camera controls. But first, ensure the camera is set to Photo mode.
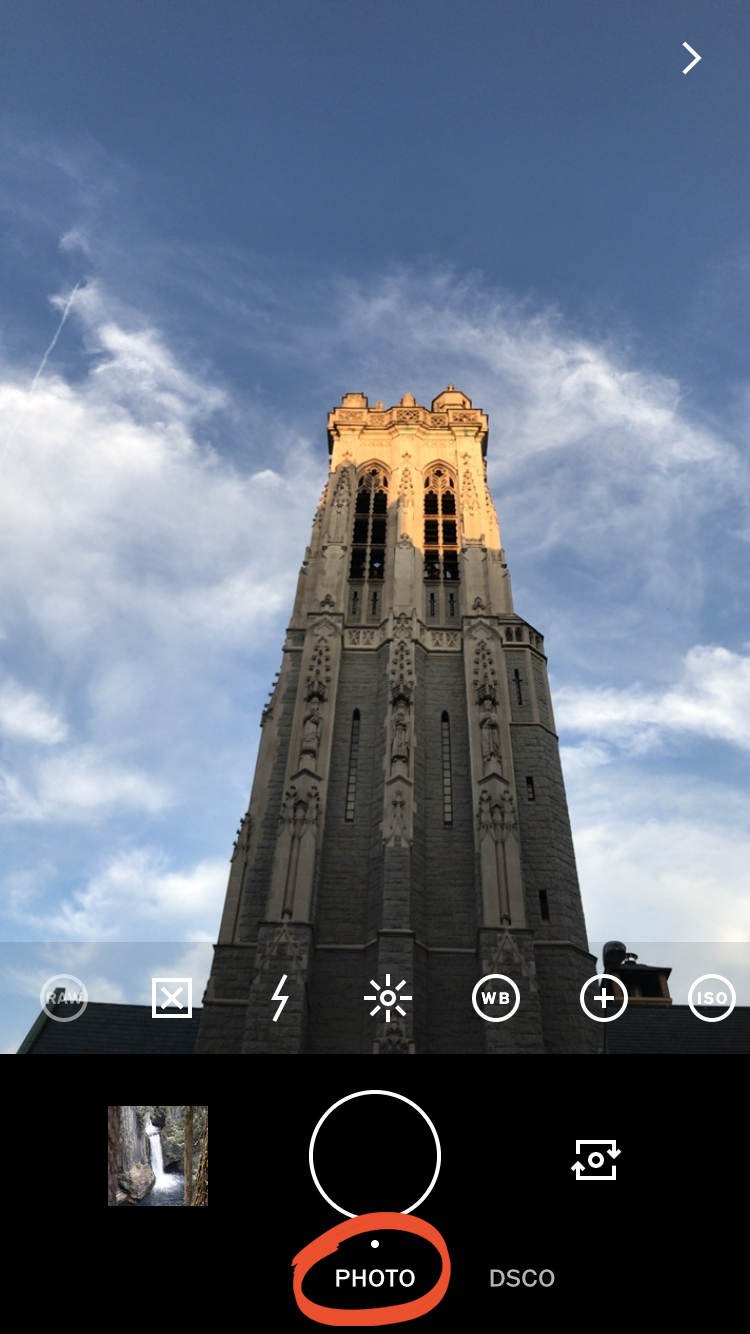
DSCO mode is for creating animated GIF videos. You don’t want to use this mode for shooting photos.
5.1 Focus & Exposure
It’s essential to set focus and exposure before taking a photo. Setting focus ensures the most important part of the scene appears crisp and sharp.
Exposure controls the brightness of the image. Setting exposure ensures the image doesn’t appear under-exposed (too dark) or over-exposed (too bright).
Tap the screen to set focus and exposure at a single point (indicated by two red circles).
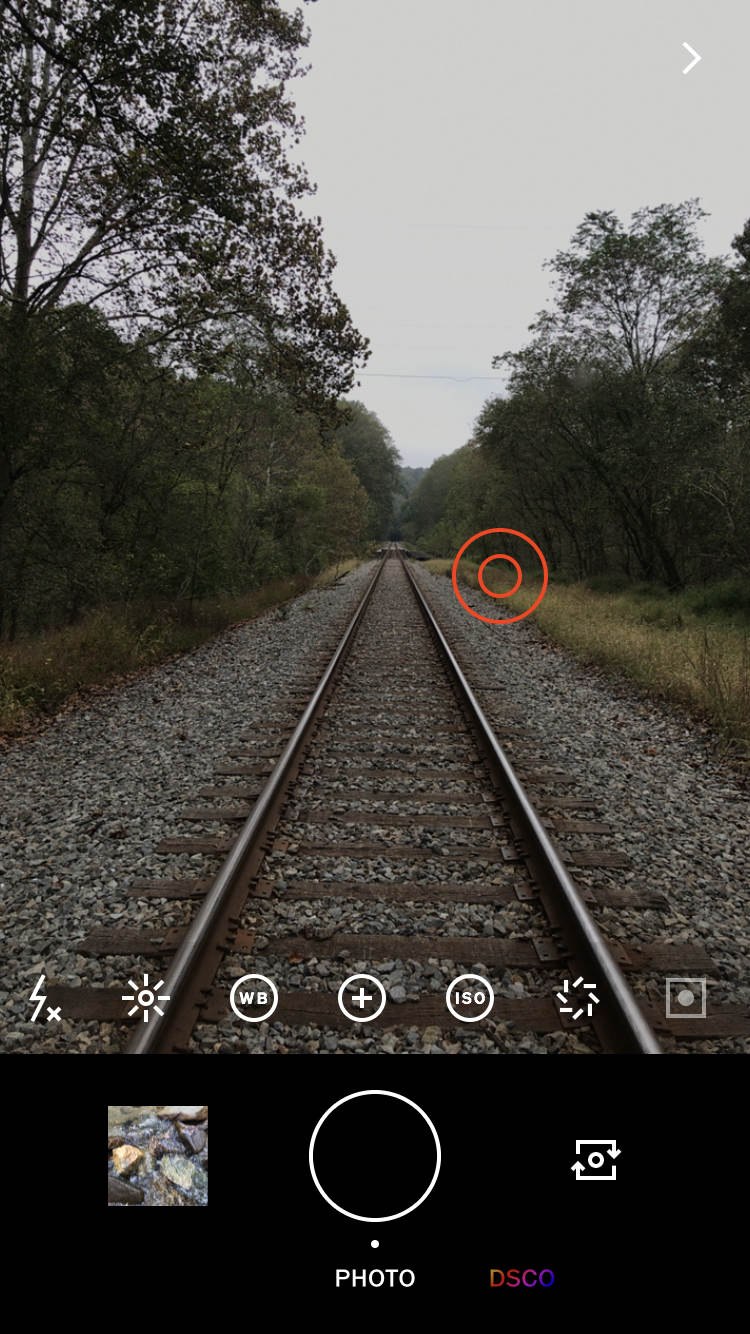
To separate the focus and exposure points, tap the screen with two fingers. The focus and exposure points will appear as two separate circles.

You can drag these focus and exposure points to any position. Drag the focus point to the part of the scene you want in sharp focus. And drag the exposure point to the area you want correctly exposed.
Double-tapping the focus or exposure point will lock the current setting. Lock focus and exposure whenever you want to take several photos of the same scene. This will save you having to set focus and exposure for each new shot.
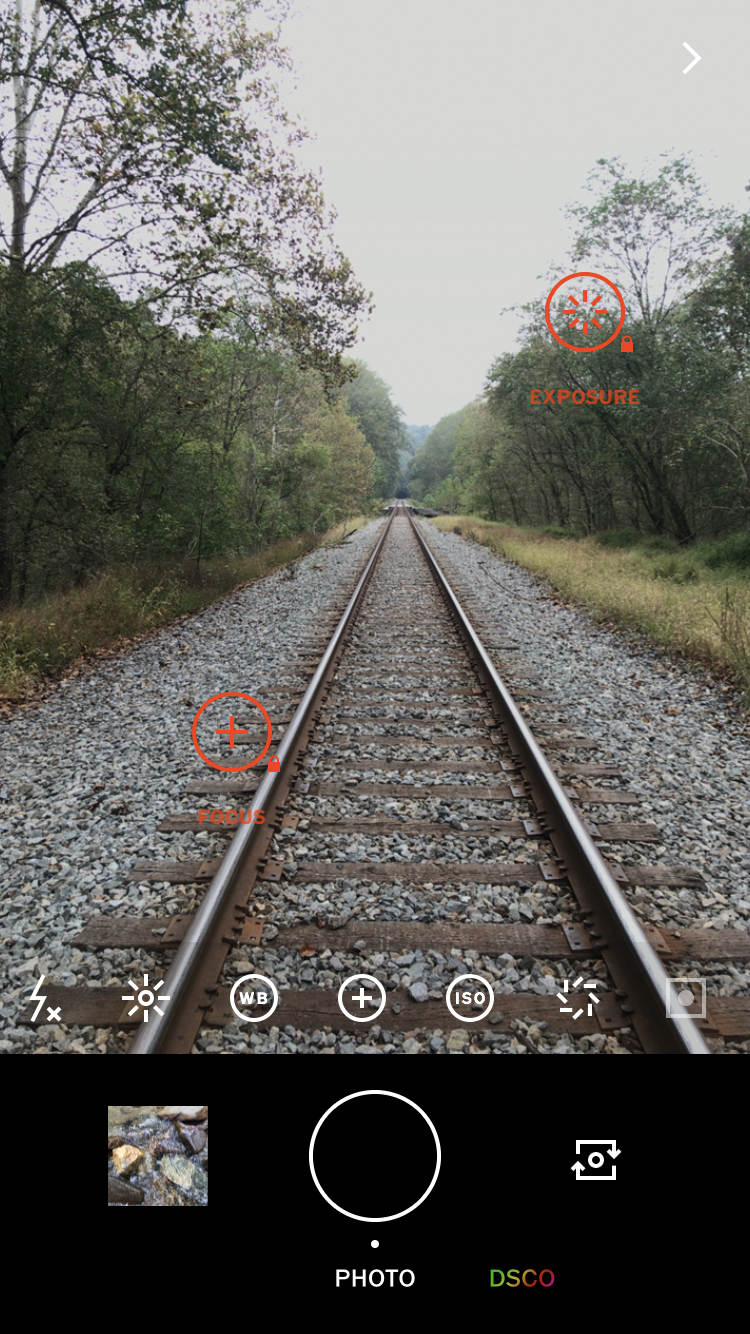
To unlock focus and exposure, drag the red circles to a different part of the screen. To exit the separate focus and exposure mode, double-tap the screen or drag one red circle onto the other.
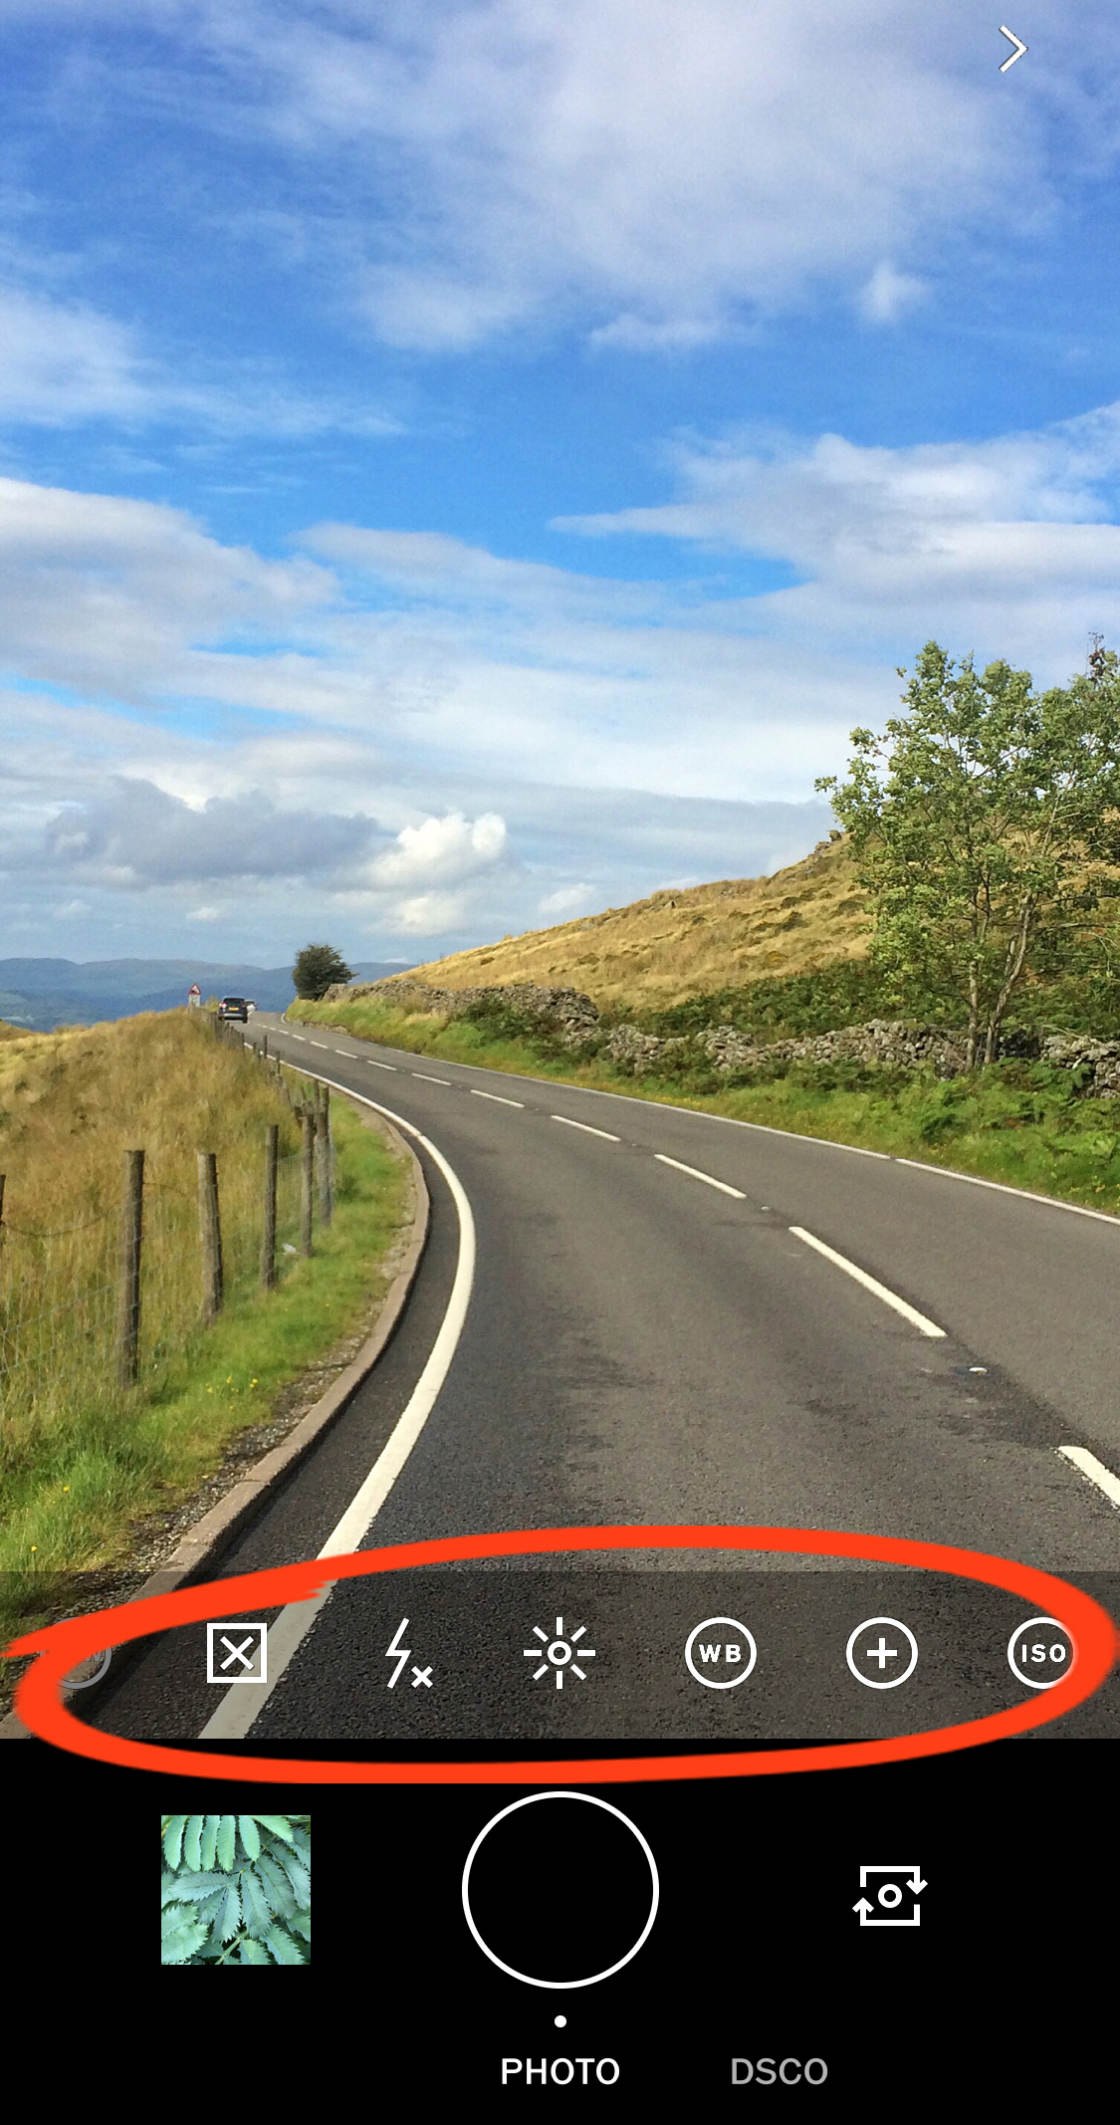
5.2 Manual Camera Controls
The manual camera controls are at the bottom of the viewfinder. Below you’ll discover how to use the VSCO camera settings.
5.3 RAW Format
The RAW icon lets you shoot in RAW file format. RAW images aren’t compressed like a standard JPEG photo, so they’re much higher quality.
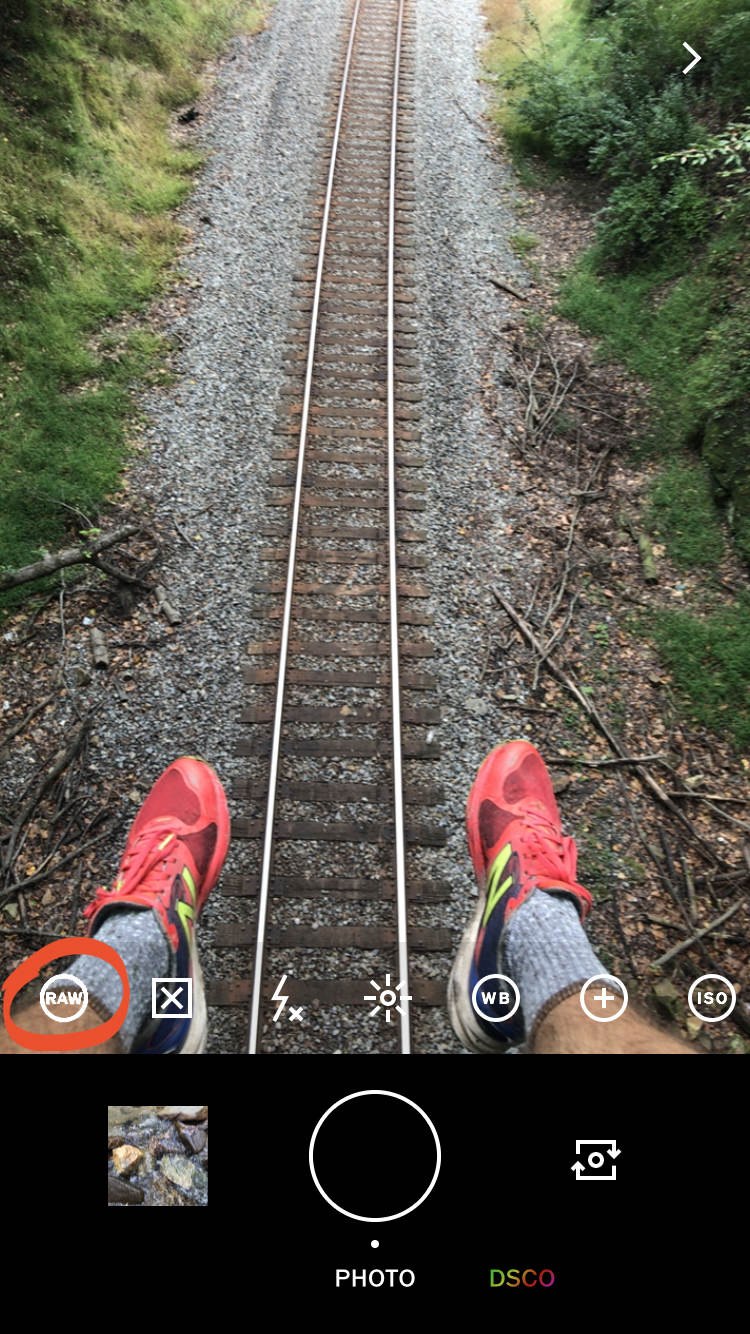
Shooting in RAW offers greater control when editing. For example, it allows you to bring out more detail in over-exposed and under-exposed areas.
Normally, if an image contains over-exposed areas that are pure white, you can’t bring back any detail. But if you shoot in RAW, there’s a better chance that you’ll be able to recover this lost detail.
If you want to create the highest quality edits in VSCO, switch on RAW when shooting. But be aware that RAW images have much larger file sizes than JPEGs. So you may run out of storage space on your iPhone if you shoot a lot of photos in RAW.
5.4 Grid & Tiltmeter
The Grid icon lets you switch on the gridlines or tiltmeter.
Use the gridlines to help you line up the elements in your shot. Or switch on the tiltmeter to ensure your iPhone is level. This is useful for making sure the horizon is straight in your landscape photos.
Keep tapping the Grid icon to toggle through the different grid display options. When the icon appears as a grid, you’ll see the gridlines in the viewfinder.
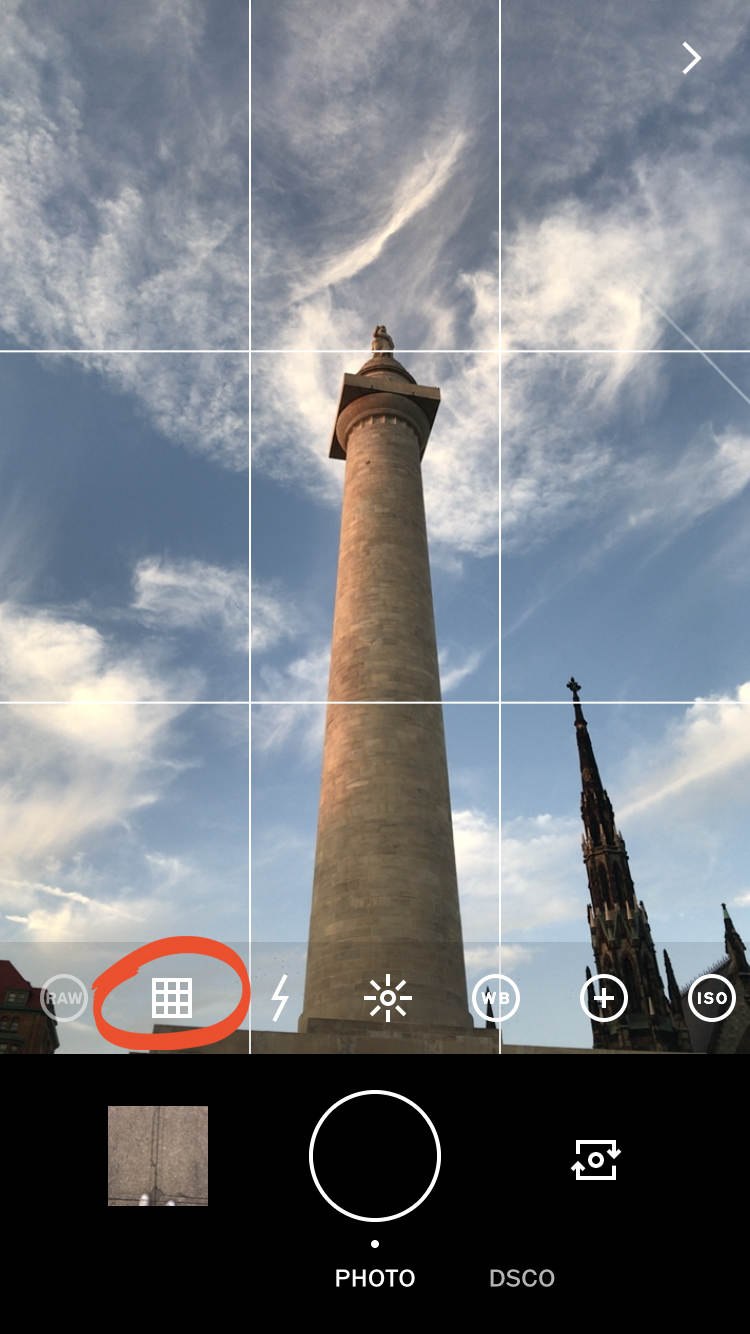
When the Grid icon appears with a single horizontal line, you’ll see the tiltmeter on your screen. This is an amazing tool for ensuring your camera is level before taking your shot.
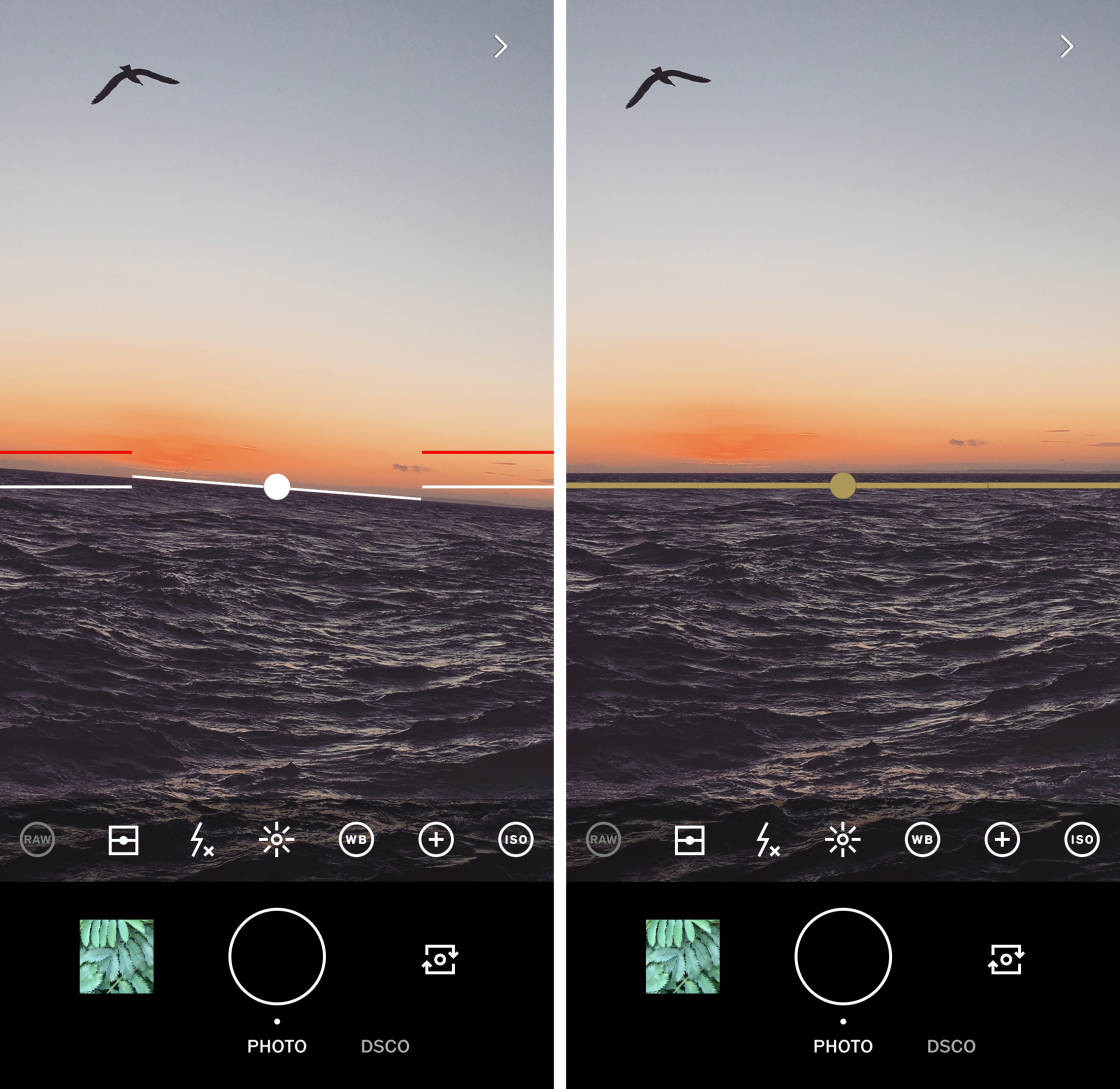
As you rotate your iPhone left or right, watch the leveling line rotate at the center of the screen. When the central line turns green, your phone is level.
The two red lines tell you whether your phone is tilted forwards or backward. To ensure your phone isn’t tilted, line up the red lines with the two white lines on either side of the screen. They’ll turn green when your phone is perfectly straight.
5.5 Flash
The lighting bolt icon offers four different flash options. You can use the flash to light up a dark scene. But use it with caution as the bright light can create glare and harsh shadows.
Keep tapping the Flash icon to toggle through the different settings. When the Flash icon appears with an “X” next to it, the flash is off. The letter “A” means Auto Flash. If there isn’t enough light, the flash will automatically fire.
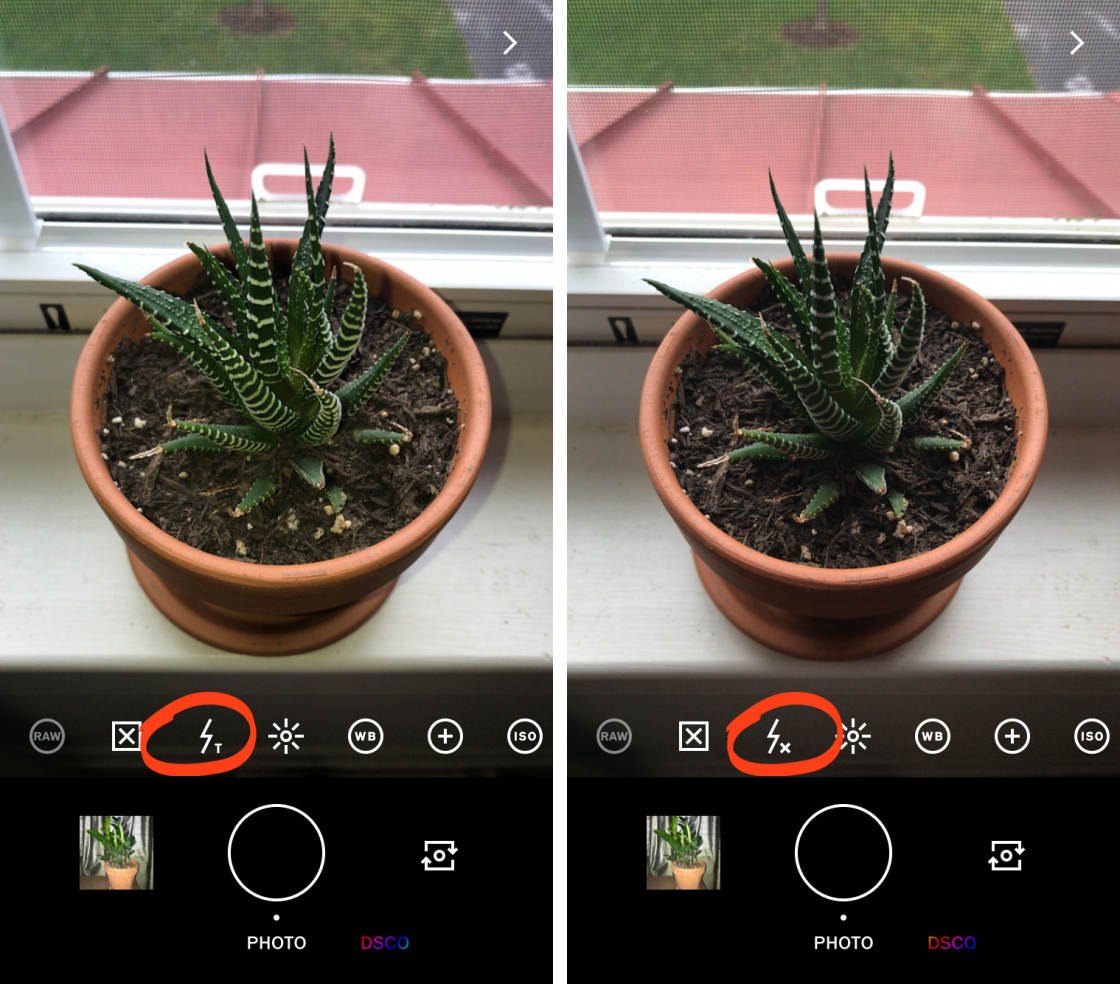
The lightning bolt icon without a letter next to it means the flash is On. The flash will fire every time you take a photo.
The letter “T” means Torch mode, which provides a continuous beam of light. This is useful in very dark scenes to illuminate the subject even before you press the shutter.
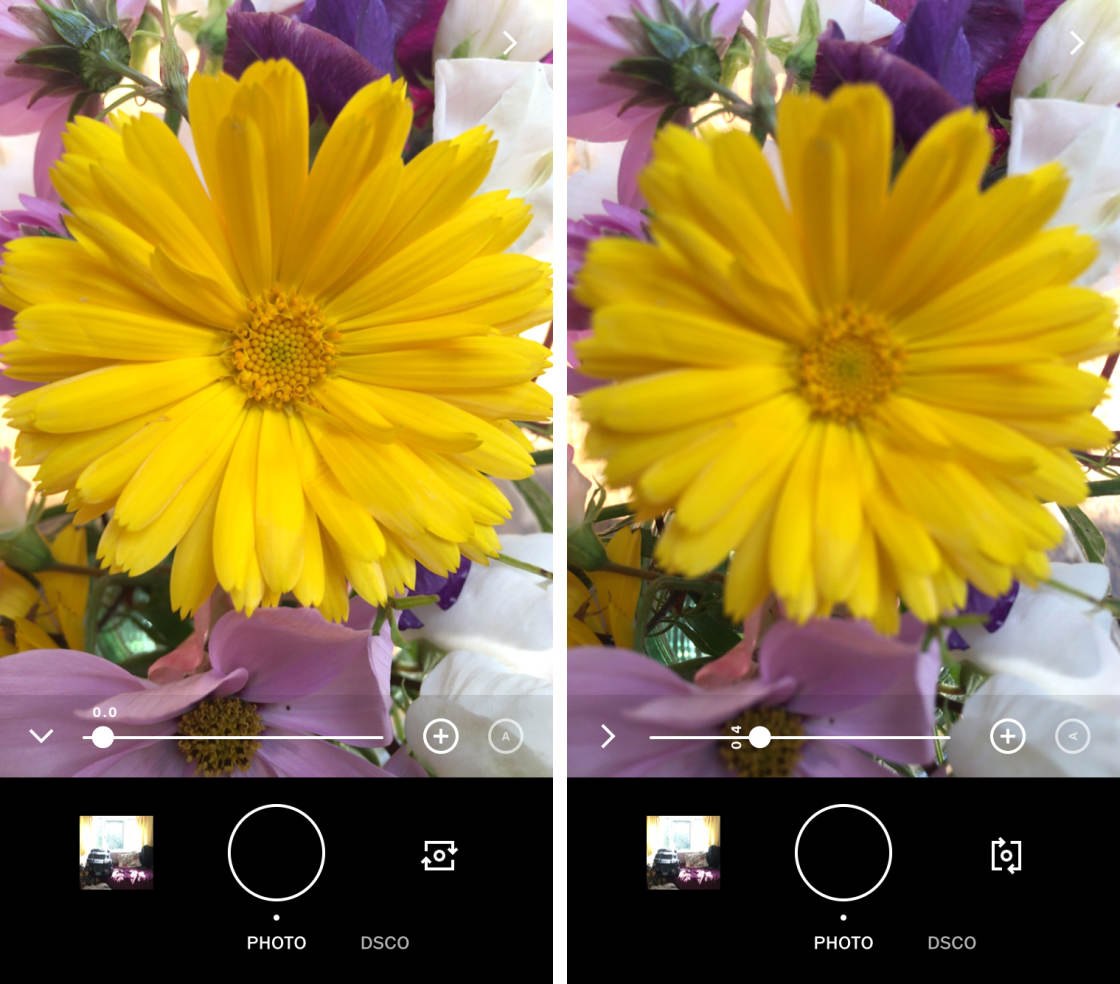
5.6 Exposure Compensation
Exposure Compensation lets you control the brightness of your image. Tap the Exposure Compensation icon (sun) at the bottom of the screen. Then drag the slider to adjust brightness.
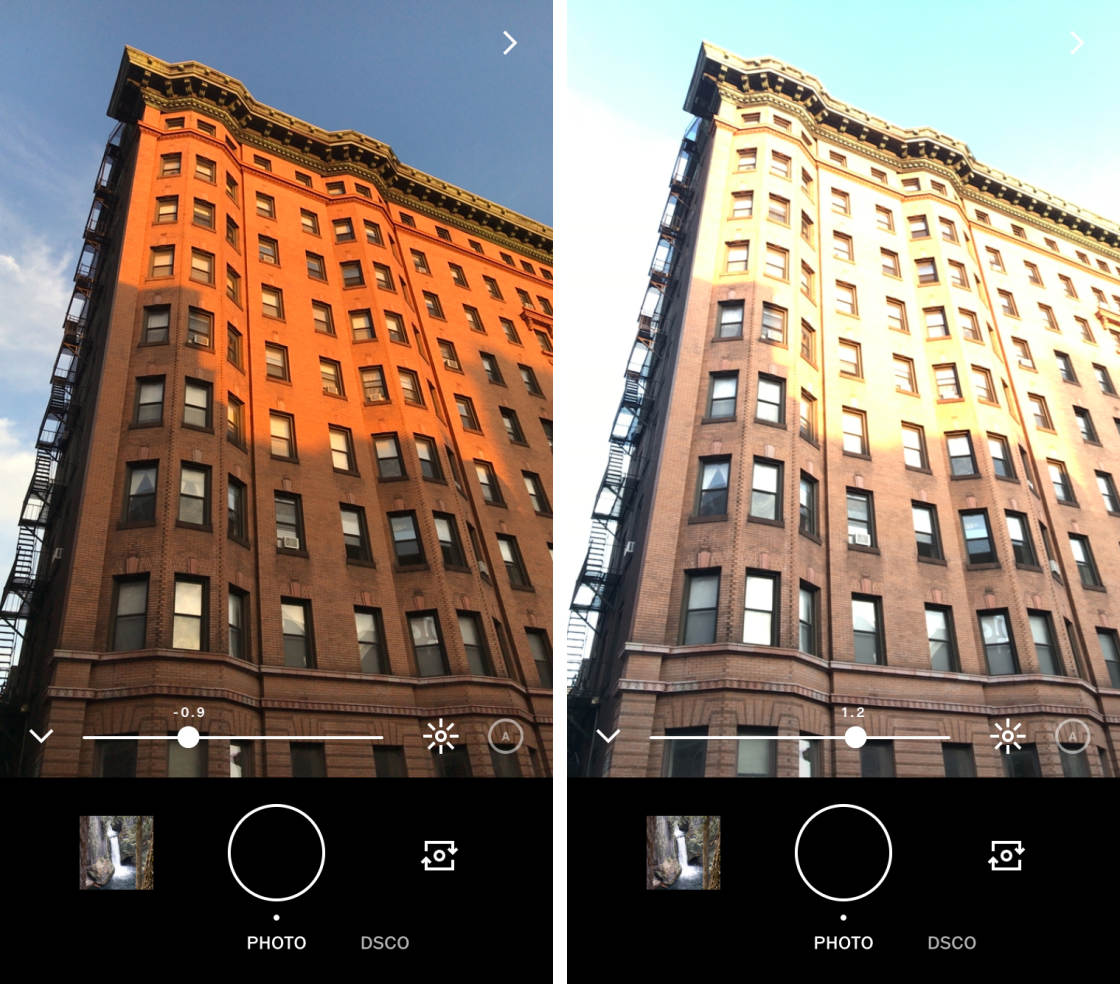
Tap “A” to the right of the slider if you want to revert to Auto Exposure. Tap the arrow to the left of the slider to exit Exposure Compensation.
5.7 White Balance
White Balance allows you to make the colors in your photo cooler (more blue) or warmer (more orange). Tap the WB icon, then drag the slider to adjust the color.
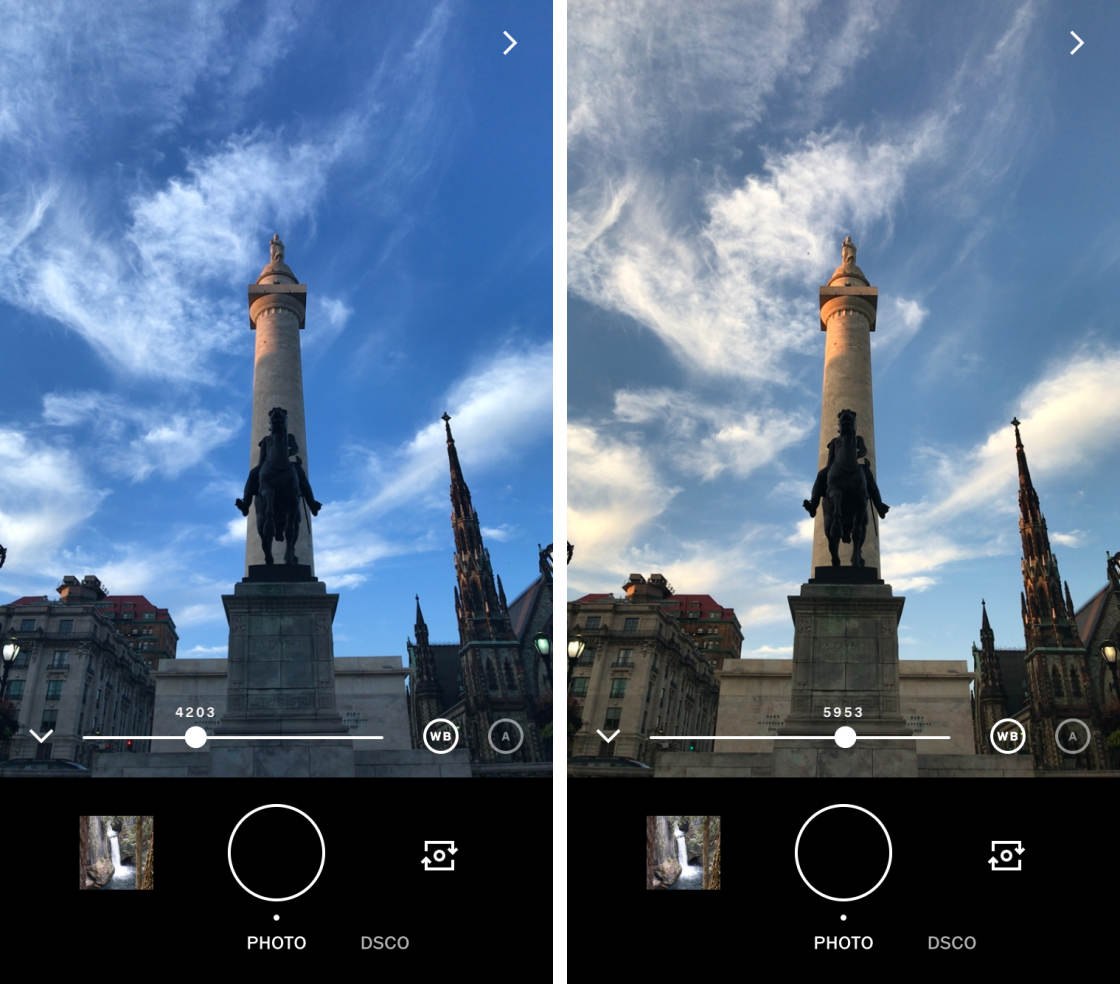
Tap “A” to the right of the slider to return to Auto White Balance. Tap the arrow to the left of the slider to exit the White Balance setting.
5.8 Manual Focus
Manual Focus lets you control focus using a slider, rather than tapping on the screen. This is great for close-up photography when you want to ensure focus is set on the exact spot you want.
Tap the Manual Focus icon (+ symbol), then drag the slider left or right to adjust focus. Tap “A” to revert to Auto Focus. Tap the arrow to exit Manual Focus.
5.9 Shutter Speed
The Shutter Speed icon (circle made up of small lines) lets you adjust the camera’s shutter speed. Shutter speed refers to the amount of time the shutter is open when you take a photo.
Drag the slider left to make the shutter speed faster. Or drag it right for a slower shutter speed.
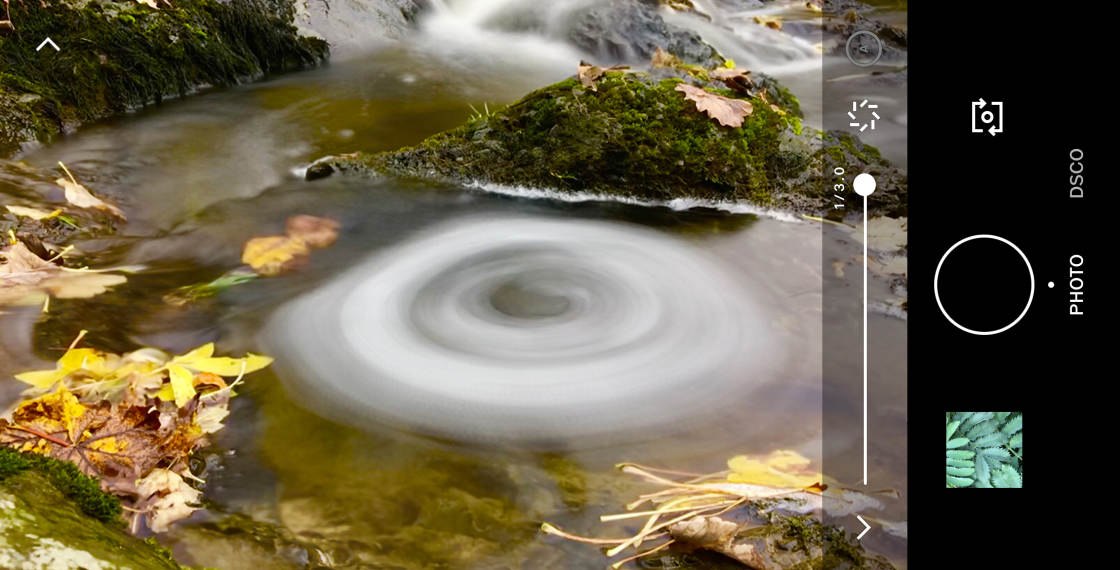
A slow shutter speed lets you create stunning long exposure photos. Any movement in the scene, such as flowing water or moving vehicles, will appear as motion blur.
By contrast, a fast shutter speed freezes movement. Use a fast shutter speed to capture sharp photos of moving subjects or to avoid camera shake in low light.
5.10 ISO
The ISO setting controls the camera’s sensitivity to light. Increasing the ISO makes the camera more sensitive to light. This means you can shoot with faster shutter speeds in low light, helping you avoid camera shake.
Tap the ISO icon, then drag the slider left or right. Drag left to make the camera less sensitive to light. Drag right to make the camera more sensitive to light.
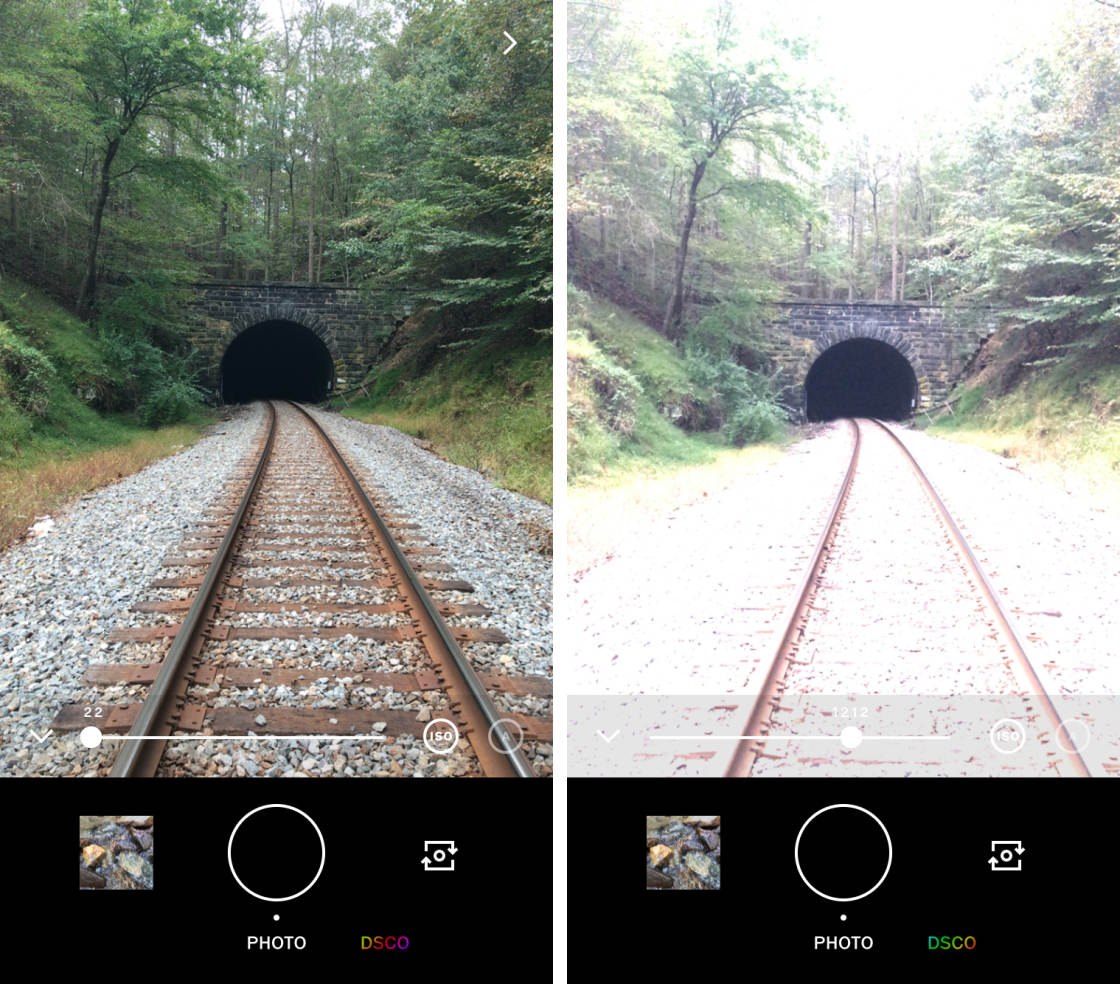
Use a low ISO setting in bright conditions. If you use a high ISO in bright light, your photo may appear over-exposed as shown in the right-hand image above.
Use high ISO settings in low light, so that you can use a faster shutter speed. But keep in mind that high ISO settings can introduce noise (grain) into your photo.
5.11 Preview Your Photos
When you take a photo, you can view it by tapping the image thumbnail at the bottom left of the screen. Scroll through your recent photos by swiping across the screen.
When viewing a photo, you have several options. To edit the image, tap the Edit icon (two sliders) at the bottom of the screen. Tap the Options icon (three dots) to save, delete or share the photo.
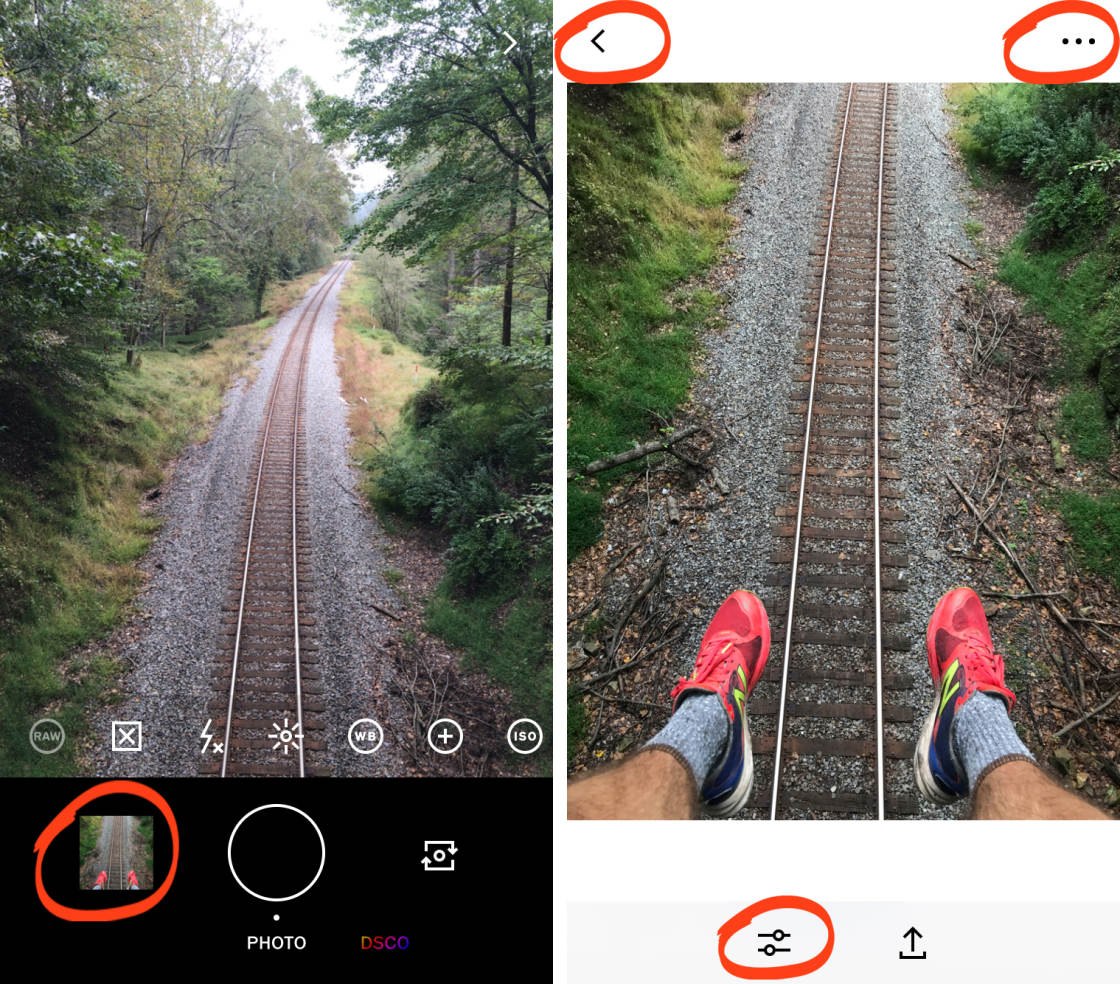
To exit the image preview, tap the arrow at the top left. This takes you to your VSCO studio where all of your images are stored.
If you want to take more photos, tap the Camera icon at the top of the screen. To exit the camera and return to your VSCO studio, tap the arrow at the top right of the camera screen.
5.12 VSCO Camera Vs. iPhone Camera App
The VSCO camera has more manual controls than the iPhone’s built-in Camera app. If you want to control white balance, shutter speed, ISO and manual focus, VSCO is a great choice.
But the VSCO camera does lack certain features that you’ll find in the iPhone Camera app. VSCO doesn’t have burst mode, self-timer, HDR, Portrait Mode or Live Photos.
You can’t shoot wide panoramic photos with VSCO. And you can’t shoot video, time-lapse or slow-motion footage.
The post VSCO App Tutorial: How To Shoot & Edit Beautiful iPhone Photos appeared first on iPhone Photography School.